DIY Easy Chicken Crochet Dish Scrubbie
Meet the cluckiest addition to your sink-side collection: my Crochet Dish Scrubbie pattern that’s chicken-shaped and perfect for your kitchen cleaning needs!
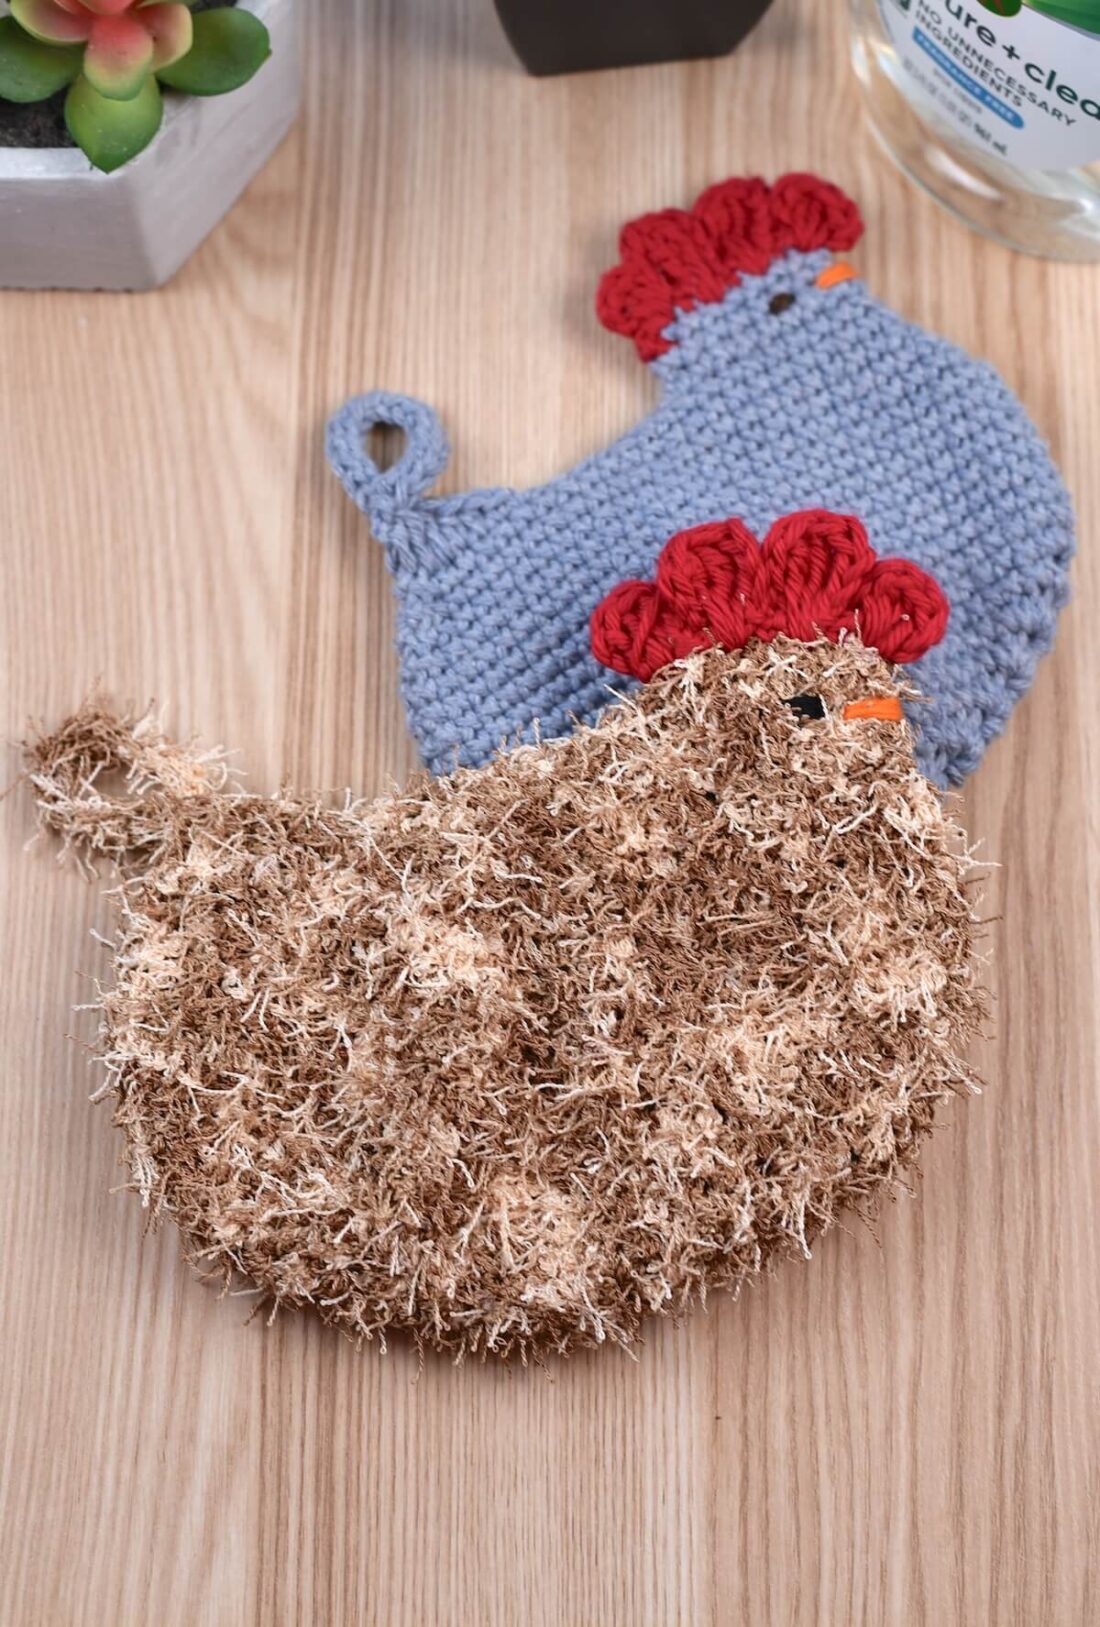
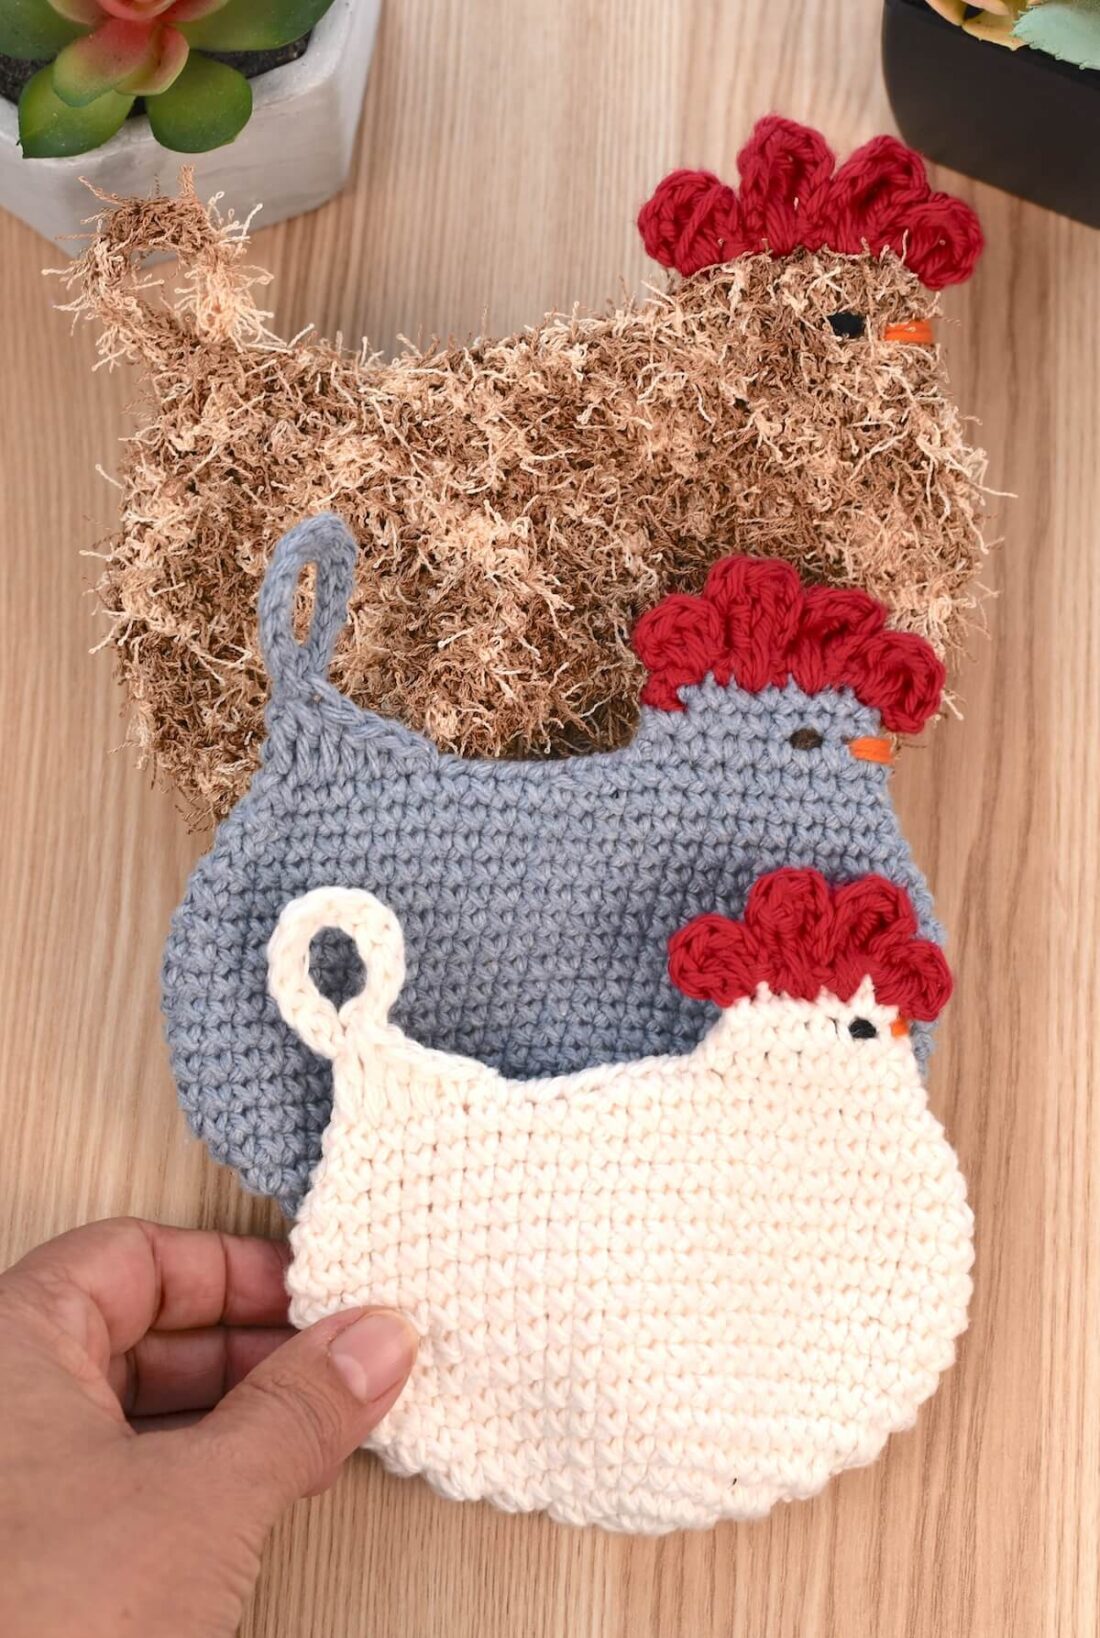
Some of my readers emailed me to request a scrubbie version of my Crochet Chicken Potholder. So, I created a smaller version of this quick, farmhouse-style crochet kitchen scrub pad pattern in two sizes — a smaller one for glasses and mugs, and a larger one for pots, pans, and countertops.
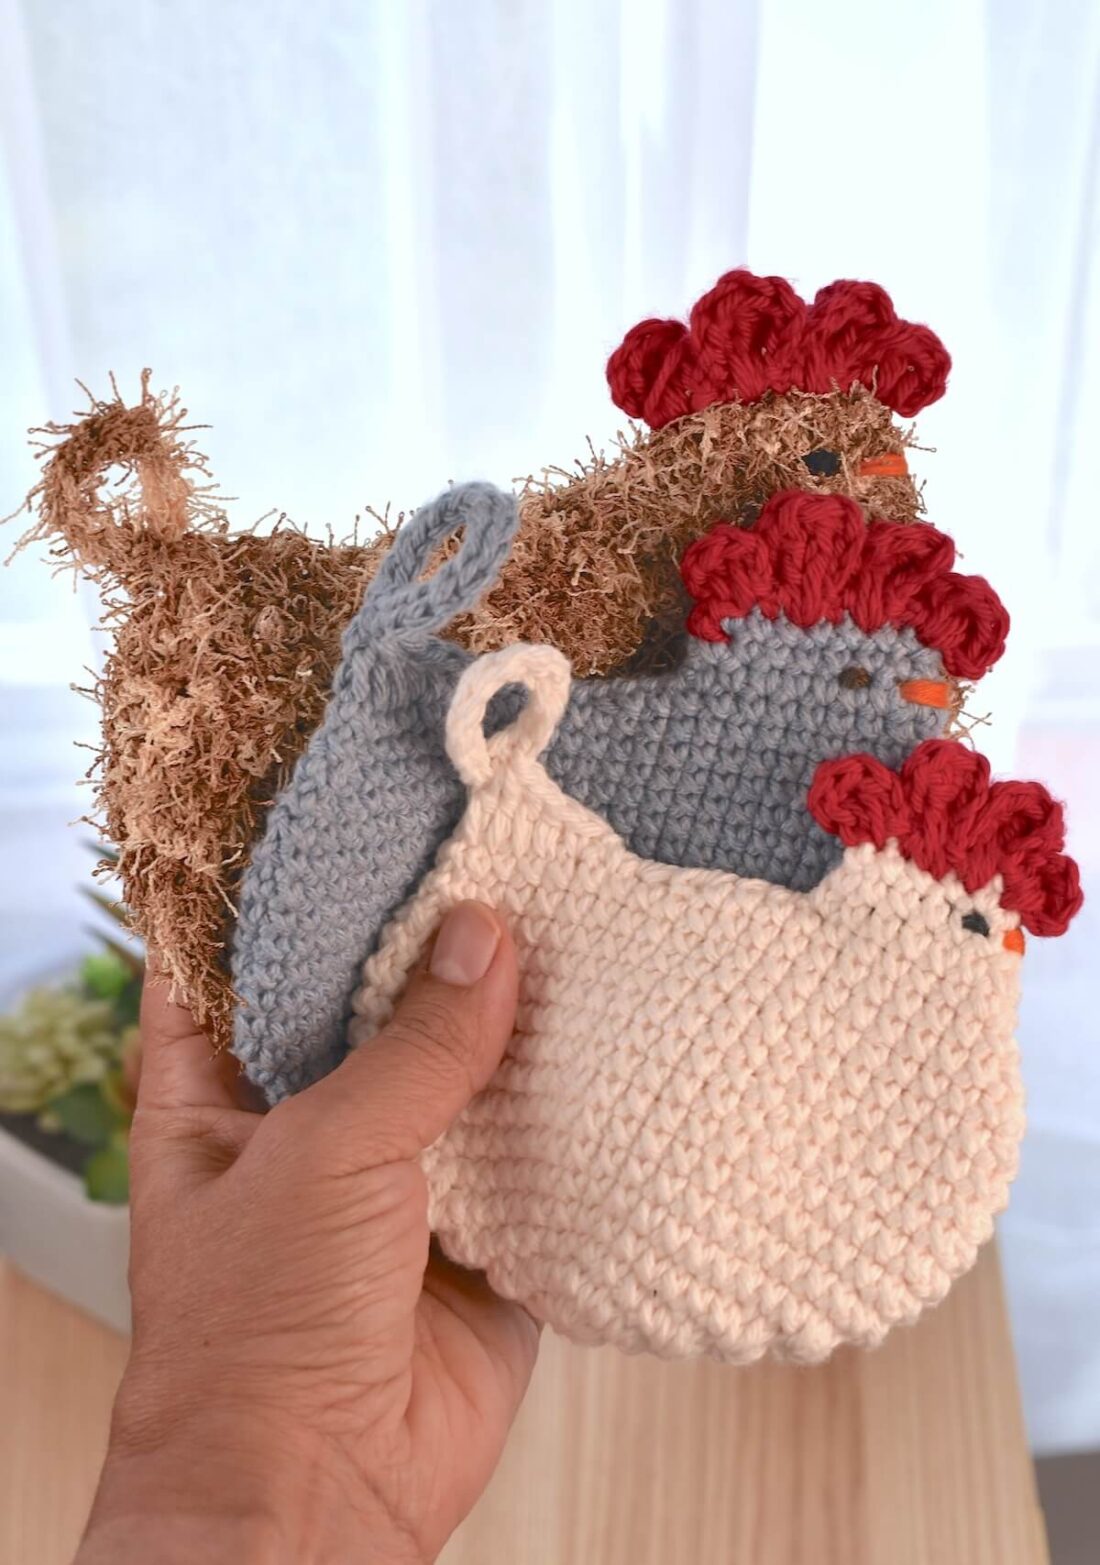
Here is a close-up photo of my hand holding my chicken scrubbies that I’ve been using for my kitchen cleaning routine. The pictured pads were made with 100% cotton and scrubby yarns.
This website is reader-supported and contains affiliate links. As an Amazon Associate, I earn from qualifying purchases. Find my affiliate disclosure here.
I’ve included simple, step-by-step instructions in US terms with easy shaping and an optional hanging loop so your little hen can dry between uses. Make it in classic cotton for gentle scrubbing or pair cotton with scrubby yarn for extra texture — either way, it’s a fun, easy project you’ll want to hatch by the dozen.
Purchase a PDF Download
- Inexpensive
- Ad-free
- Formated and Print-friendly
More Crochet Patterns for the Home
- Mason Jar Cozy
- Crochet Washcloth Pattern
- Heart-Shaped Crochet Coaster
- Crochet Daisy Flower Garland
- Crochet Snowflake Doily
- Crochet Coaster Set with Holder
- Crochet Doily with Hearts
My experience with crochet dish scrubbies
I love creating crochet patterns that are both practical and fun for all my readers to enjoy, and these little scrubbies tick all the boxes. Here are the reasons why I use them every day:
- My go-to for all sorts of kitchen jobs: I use them on countertops, my sink, and even to wipe down the stovetop. They’re the perfect size to fit in my hand comfortably, and because the pattern includes two sizes, you can make them to suit your needs (see the photo above of me holding them).
- Reusable & eco-friendly: I prefer these to disposable sponges because I can use and wash them again and again.
- Naturally textured: The textured stitches give me the perfect amount of scrubbing power without scratching my cookware. Plus, because they’re made with sturdy, cotton and scrubby yarn, they dry quickly and last far longer than disposable sponges (always test on delicate surfaces!).
- Easy care: I toss them in the washing machine (or dishwasher) and lay flat or tumble low to dry.
- Giftable: Cute, practical, and quick to crochet, making them perfect for last-minute housewarming gifts. I’ve made a set for my mother-in-law, and she absolutely loved them.

Ready to brighten your kitchen and market table? Grab some cotton (or scrubby) yarn, pick your favorite chicken colors, and let’s crochet a flock! But before you scroll down…
… You might also like these other designs for your kitchen: Kitchen Towel Pattern Set (3 sizes), Thick Crochet Trivet with Basket, and this Kitchen Crochet Patterns Roundup.
What You’ll Need:
- Approximately 48 to 65 yards of medium-weight (4) yarn – Red Heart Scrubby and Peaches n’ Cream on the pictured samples.
- Red yarn leftovers for the comb – less than 3 yards
- Thread for embroidering the eyes and beak
- 4mm (G-6) crochet hook
- A small amount of polyester fiber (optional)
- Stitch markers, tapestry needle, and scissors
Chicken Crochet Dish Scrubbie Pattern
Finished Project Size:
The small chicken crochet dish scrubbie measures approximately 5×5 inches (12.5 x 12.5 cm), and the large one is only about 1 to 2 inches (2.5 to 5 cm) bigger.
Abbreviations (US Terms):
Get a FREE Abbreviations & Terms Guide (PDF download).
- ch(s): chain(s)
- dc: double crochet
- dc3tog: three double crochet stitches together
- dec: single crochet decreases or two single crochet stitches together
- hdc: half double crochet
- inc: increase or two single crochet stitches in the same stitch
- mc: magic circle
- rep: repeat
- Rnd: Round
- sc: single crochet
- st(s): stitch(es)
- [ ]: stitch count in a round
Stitch Tension (gauge):
The first seven rounds of my chicken scrub pad’s body measured approximately 4 7/8 inches (11 cm) across at its widest point.
Pattern Notes:
- This crochet dish scrubbie pattern uses US Crochet Terms.
- Level of difficulty: Advanced beginner.
- This dish scrubbie is crocheted bottom up in continuous rounds (no joining), using “yarn under” single crochet stitches.
- The increasing technique used in this pattern allows the scrubby to lie flat.
- The head pattern has its own round count.
About Exclusive Content: When you create a Grow.me account, you can bookmark your favorite content in one place. With one FREE account, you can have not only mine, but many other creators’ content saved in one place.
When you come to my blog and see the button “Unlock Exclusive Content”, go ahead and create an account or simply click the login button and sign in with an existing Grow account. It’s a secure, free feature, and you can unsubscribe at any time. Everything you bookmark with the “heart” on a page that uses Grow.me will show up under “Grow Bookmarks” in your account.
Disclosure: Please note that Grow.me is a third-party app for Exclusive Content, and I have no control over their user policies. Neither will I be able to assist with account creation and/or password resetting. For information on how to troubleshoot login and password resetting, go to “Resources” on the Grow.me website’s top menu.
Crochet Dish Scrubbie Instructions
You may find these resources helpful before you begin: how to create a magic circle, how to do an invisible finish in crochet, and how to create a slip knot.
Step 1: Body
Pro Tip: When using scrubby yarn, it can be hard to see the stitches. Use stitch markers to assist with stitch and row placement.
Small Crochet Dish Scrubby
Round #1: 8 sc in a magic circle
Round #2: inc 8 times [16]
Round #3: (5 sc in the next st, sc in each of the next 7 sts) 2 times. [24]
Round #4: sc in each of the next 2 sts, 5 sc in the next st, sc in each of the next 11 sts, 5 sc in the next st, sc in each of the next 9 sts. [32]
Round #5: sc in each of the next 4 sts, 5 sc in the next st, sc in each of the next 15 sts, 5 sc in the next st, sc in each of the next 11 sts. [40]
Round #6: sc in each of the next 6 sts, 3 sc in the next st, sc in each of the next 19 sts, 3 sc in the next st, sc in each of the next 13 sts. [44]
Round #7: sc in each of the next 7 sts, 2 sc in the next st, sc in each of the next 21 sts, 2 sc in the next st, sc in each of the next 14 sts. [46]
Round #8-12: sc around. [46]
Round #13: sc in each of the next 9 sts, dec, sc in each of the next 21 sts, dec, sc in each of the next 12 sts. [44]
Round #14: sc in each of the next 8 sts, dec, sc in each of the next 20 sts, dec, sc in each of the next 12 sts. [42]
Round #15: sc in each of the next 8 sts, dec, sc in each of the next 19 sts, dec, sc in each of the next 11 sts. [40]
Round #16: sc in each of the next 8 sts, dec, sc in each of the next 18 sts, dec, sc in each of the next 10 sts. [38]
Skip ahead to the “tail and hanging loop” and “head” instructions.

Large Scrubby
Round #1-5: Follow the instructions for the small crochet dish scrubbie above.
Round #6: sc in each of the next 6 sts, 5 sc in the next st, sc in each of the next 19 sts, 5 sc in the next st, sc in each of the next 13 sts. [48]
Round #7: sc in each of the next 8 sts, 3 sc in the next st, sc in each of the next 23 sts, 3 sc in the next st, sc in each of the next 15 sts. [52]
Round #8: sc in each of next 10 sts, 3 sc in next st, sc in each of next 25 sts, 3 sc in next st, sc in each of next 15 sts. [56]
Round #9: sc in each of the next 12 sts, 2 sc in the next st, sc in each of the next 27 sts, 2 sc in the next st, sc in each of the next 17 sts. [58]
Round #10-17: sc around. [58]
Round #18: sc in each of the next 13 sts, dec, sc in each of the next 27 sts, dec, sc in each of the next 14 sts. [56]
Round #19: sc in each of the next 13 sts, dec, sc in each of the next 26 sts, dec, sc in each of the next 13 sts. [54]
Round #20: sc in each of the next 12 sts, dec, sc in each of the next 25 sts, dec, sc in each of the next 13 sts. [52]
Round #21: sc in each of the next 12 sts, dec, sc in each of the next 24 sts, dec, sc in each of the next 12 sts. [50]
Round #22: sc in each of the next 11 sts, dec, sc in each of the next 23 sts, dec, sc in each of the next 12 sts. [48]
Round #23: sc in each of the next 11 sts, dec (place a st marker in this dec), sc in each of the next 22 sts, dec (place a st marker in this dec), sc in each of the next 11 sts. Cut the yarn. FO. [46]

Step 2: Tail and Hanging Loop
- Squeeze the top opening with one stitch marker (stitch markers placed in round 21) at each end.
- Then, pick either of the two ends to make the tail and attach the main color yarn, 6 (7) stitches away from the stitch marker. Ensure you grab both stitch layers for this and all remaining stitches. Pull up a loop in that stitch and chain 1. Remove the stitch marker.
- Next, single crochet in the next stitch, then half double crochet in the next 1 (2) stitch, double crochet in the next stitch, and dc2tog in the next 2 stitches.
- As an option, you can chain 13 (15) to create a hanging loop, slip stitch in the back bump of each chain across, slip stitch into the top of the dc3tog with the other end to form a loop. Fasten off and cut the yarn.


Step 3: Head
These instructions are for both small and large crochet crochet dish scrubbers.
In the same way you made the tail, attach the main color yarn 7 (9) stitches away from the stitch marker at the other end. However, this time, you are not crocheting in both layers. Instead, crochet one stitch at a time, in rounds, to create a partial “cup” for the rounded head.
Start by pulling up a loop in the 7th (9th) stitch, chain 1 (does not count as a stitch).
Round #1: You can go ahead and remove the stitch marker, then sc in each of the next 14 (18) sts, do not join. [14] [18]
Round #2: sc in the first st of round #1, sc in each of the next 6 (8) sts, dec, sc in each of the next 6 (8) sts. [13] [17]
Round #3: dec, sc in each of the next 5 (6) sts, dec, sc in each of the next 5 (7) sts. [11] [15]
Fasten off and cut the yarn.

Step 4: Crochet Dish Scrubbie Facial Features
Use the embroidery thread (yarn scraps work too) to embroider the eyes and beak. Use the back opening to fasten off inside and weave in the ends.
- Embroider the eyes one row (two rows) below the top of the head and two stitches (three stitches) away from the front edge of the head.
- Then, embroider the beak in the same row as the eyes, inserting the needle from one side to the opposite side, one (two) stitch away from the front edge of the head.
- Hide the tails inside and fasten off.

Step 5: Comb
Attach the red yarn to the top round, at the front of the head, inserting the hook in both layers of stitches to close the crochet dish scrubbie’s head opening as you crochet the comb.
Small Scrubby:
- Then, (ch 2, 2 dc, ch 2 again, sl st) in the first st, * (sl st, ch 3, 3 tr, ch 3 again, sl st) in the next stitch, repeat from the asterisk one more time.
- Next, sc in the next stitch, then crochet the last comb in the last st, (sl st, ch 2, 2 dc, ch 2 again, sl st).
- Cut the yarn. FO. Use the back opening to weave in the yarn ends.
Large Scrubby:
- Then, (ch 2, 3 dc, ch 2 again, sl st) in the first st, *sc in next st, (sl st, ch 3, 4 tr, ch 3 again, sl st) in the next stitch, repeat from the asterisk one more time.
- Next, sc in the next stitch, then crochet the last comb in the last st, (sl st, ch 2, 2 dc, ch 2 again, sl st).
- Cut the yarn. FO. Use the back opening to weave in the yarn ends.

Step 6: Finishing off the scrubby
Before closing your crochet dish scrubby, you can add a small amount of polyester fiber if you like. To sew the top, thread the needle with a strand of the main color yarn and sew the remaining open stitches. Fasten off and weave in the ends.

Your chicken-shaped crochet dish scrubbie is done. I hope you had a good time making them.
Pin, Share, and Comment
- Comment on this post: I always read comments and reply to all questions posted on the blog, and I love it when you take the time to stop by and say hello.
- Have you made this? Share your project if you make this or any of my other patterns, tag me on Instagram or Facebook, or use the hashtag #zamiguzmakers. I love seeing what you make.
- Pin it now: Are you not ready to make it yet? You can use the above image to pin it to your crochet boards or follow me on Pinterest for more.
- Join The Makers community: Join my community group on Facebook and be the first to know about pattern releases and other crochet-related content.

Would you rather bookmark this blog post for later? You can create a free Grow.me account and use the “heart” on the left-hand side of your screen to save it. It’s easy to have your internet favorites in one place.