DIY Amigurumi Tumbler Easy Crochet Pattern
Are you a fan of those oversized drink quenchers everyone seems to love carrying around? Then you’re going to love this emotional support Amigurumi tumbler pattern!
This website is reader-supported and contains affiliate links. As an Amazon Associate, I earn from qualifying purchases. Find my affiliate disclosure here.
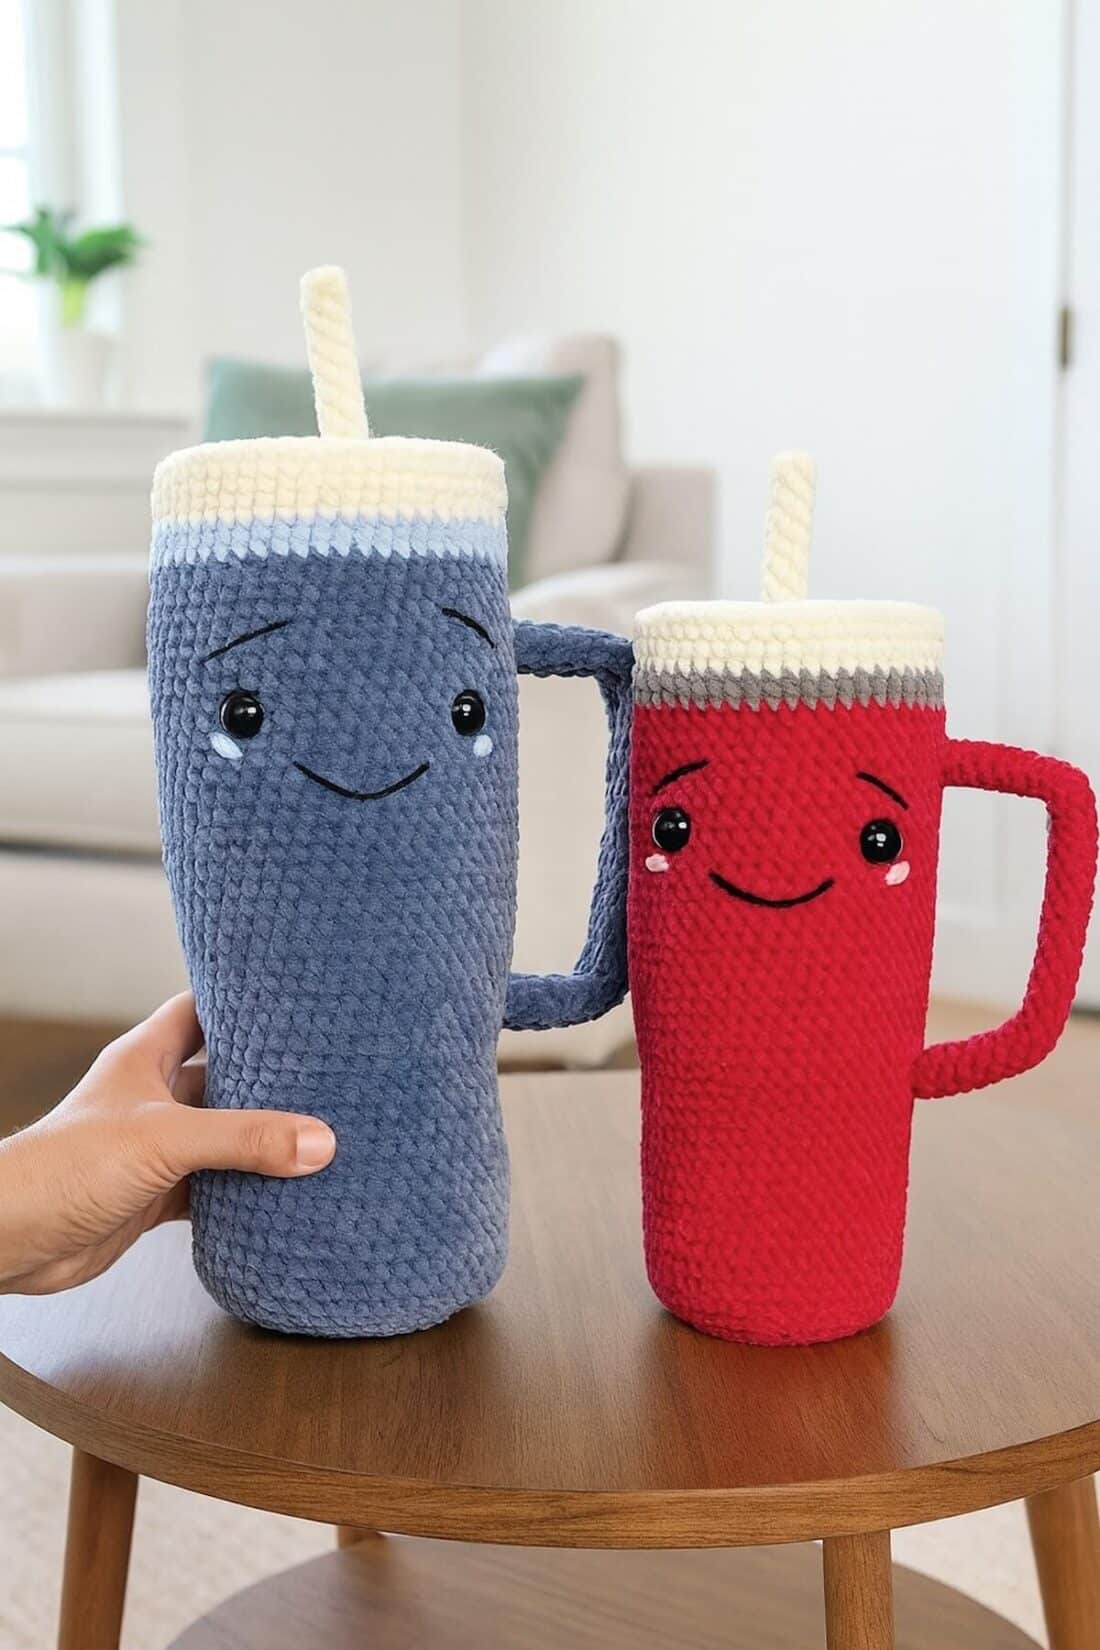
It all started during the height of the Valentine’s Day Pink Stanley quencher craze. Social media was overflowing with vibrant drinkware, and I thought—why not turn that into a cuddly crochet version? That spark of inspiration led me to create not just one, but two adorable plush tumblers: one real-size, and one extra jumbo, for those who love big, squishy projects.
I began with the handle, shaping it for a sturdy yet huggable grip. Then came the body of the cup—stitched seamlessly and stuffed as I progressed. The lid and straw lock were the final touches, crocheted and sewn on to bring the tumbler to life.
This project is as fun as it is beginner-friendly, especially if you enjoy working with bulky and super bulky chenille yarn. So, grab your yarn, your hook, and your favorite stitch marker—because we’re about to make the cutest, most huggable crochet tumbler you’ve ever seen!
But before you begin…
… you may also like to check these cute Amigurumi projects made with chenille yarn: Amigurumi Loaf Bunny, Mini Amigurumi Whale, and this Chubby Amigurumi Chicken.
More Amigurumi Patterns
- Cute Amigurumi Pig
- Crochet Pope Figure
- Adorable Amigurumi Elephant
- Amigurumi Frankenstein Doll
- No-Sew Floppy-Earred Amigurumi Bunny
- No-Sew Amigurumi Gingerbread Boy
Amigurumi Tumbler Pattern
Materials, Tools & Notions:
- Bulky (#5) or Super Bulky (#6) Chenille Yarn (more on the yarn below)
- 3.5 mm (US E) crochet hook
- Stitch markers, tapestry Needle, and scissors
- A pair of 18 mm safety eyes
- Stuffing fiber – like Poly-Fil
- Stuffing tool – I use a hemostat
- Safety eyes placement tool
- Sewing pins to pin the locker in place when sewing it
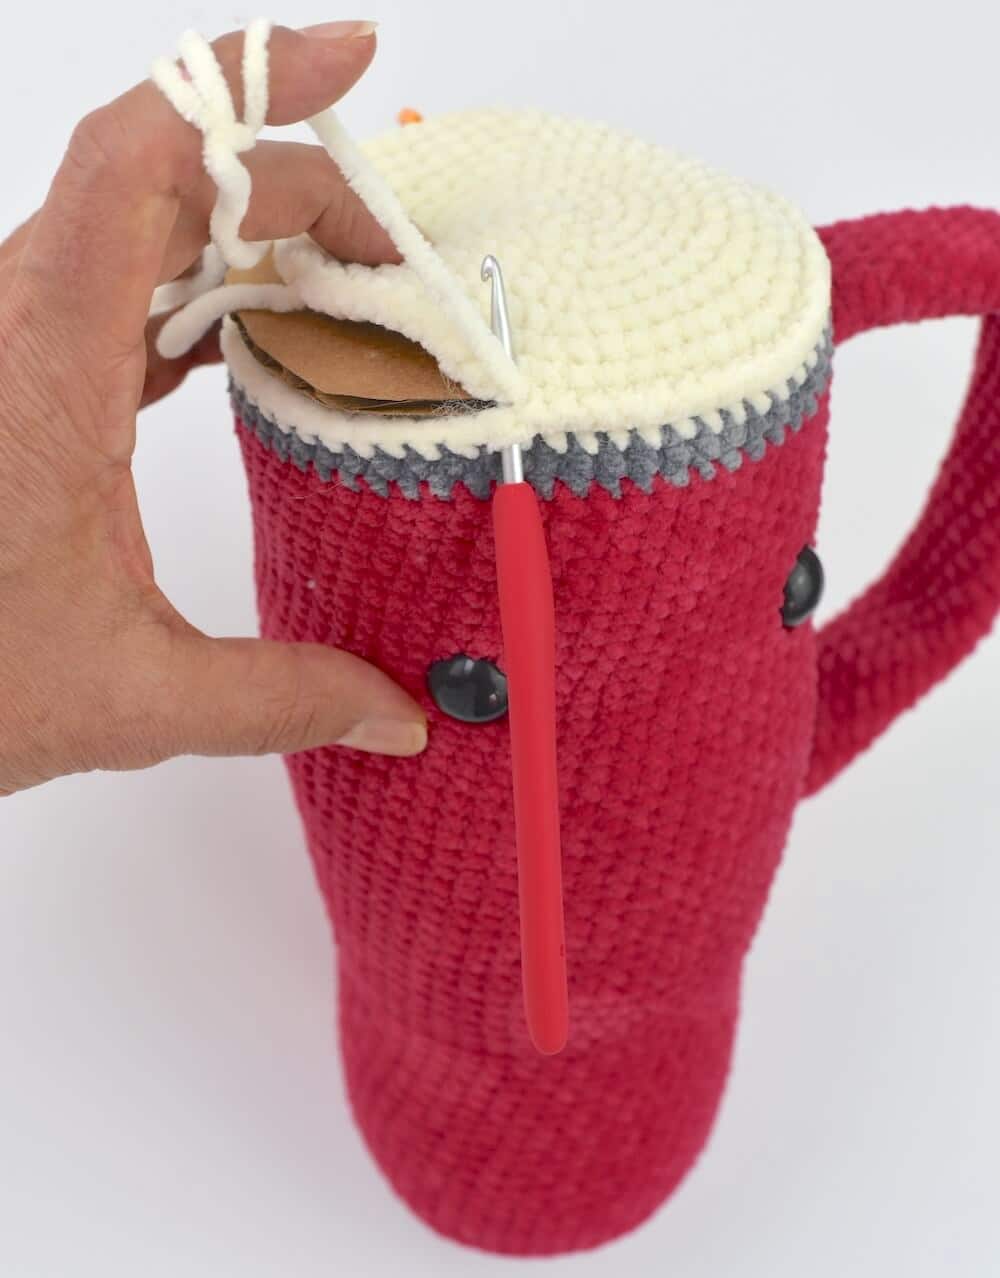
- Scraps of cardboard or EVA cut in circles to make the bottom and top flat – optional, but highly recommended
Yarn Specifics
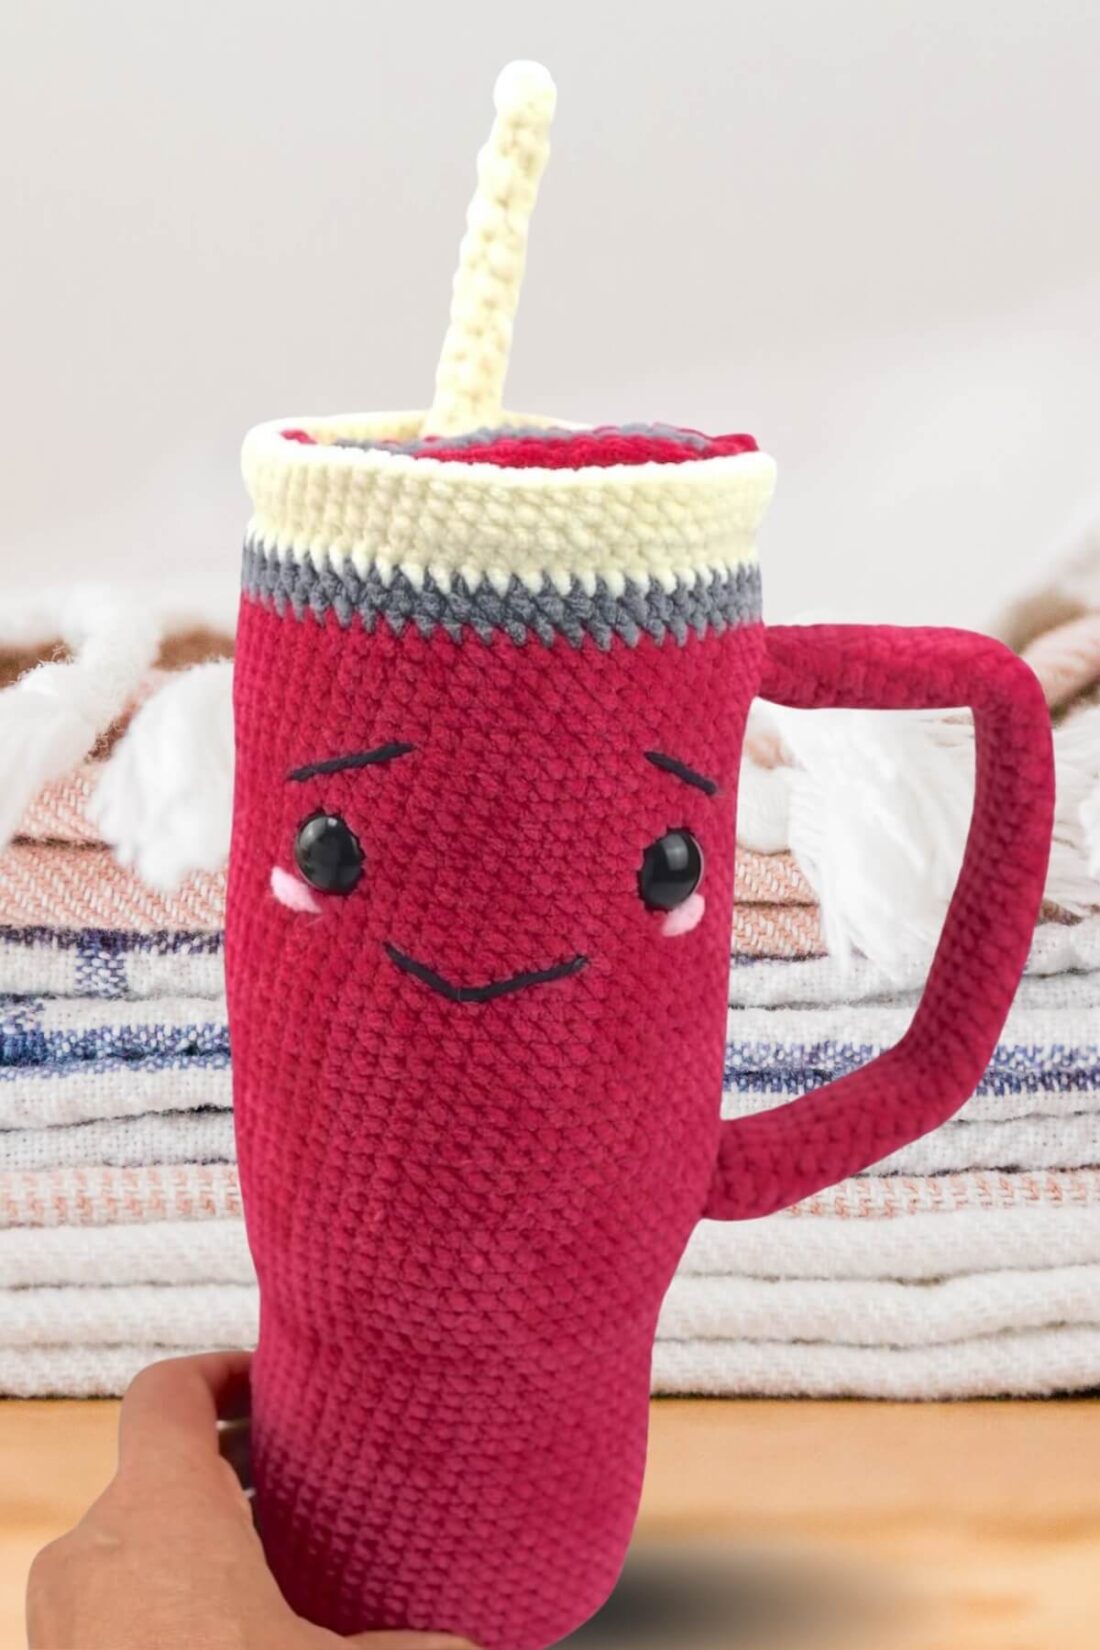
I used Chenille yarn Bulky (#5) for the pink Amigurumi tumbler and Super Bulky (#6) for the gray tumbler. However, you can use any other yarn you like.
Approximate amount of yarn:
- Primary color: Country Blue (Sweet Snuggles by Loops & Threads) or Hot Pink (Parfait by Premier Yarns): 164 yds (150 m) to 200 yds (183 m).
- Accent Color for the Stripe under the lid: Light Blue or gray (Baby Snuggle by Hobbii or Parfait by Premier Yarns): 8.5 yds (8 m) to 14 yds (13 m).
- Off white for the lid: 22 yds (20 m) to 35 yds (32 m).
Finished Project Size:
The small crochet quencher stands about 10.5 inches (26.5 cm) tall, with a top circumference of 13 ¼ inches (33.5 cm). The larger one is approximately 15 inches (38 cm) tall, with a top circumference of 18.5 inches (47 cm).
Abbreviations (US Terms):
Get a FREE Abbreviations & Terms Guide (PDF download).
- approx.: approximately
- bpsc: back post single crochet (insert the hook from back to front in the next st, then draw it to the back around the post of the next st and complete a sc as usual).
- blo: back loop only
- flo: front loop only
- ch (s): chain (s)
- inv dec: invisible decrease (two single crochet together)
- FO: fasten-off
- rem: remaining
- Rnd : Round
- sl st: slip stitch
- st(s): stitch(es)
- sk: skip
- sc: single crochet in continuous rounds
- ( ): repeat the instructions within parentheses as many times as directed
- [ ]: stitch count in a round
Stitch Tension
Gauge isn’t essential for this Amigurumi Quencher project. However, if you’d like an idea of what stitch tension looks like, my first 8 rounds of the cup’s pattern (bottom) measured about 3 inches (7.5 cm) in diameter with bulky (5) yarn and 3.75 inches (9.5 cm) with super bulky (6) yarn.
Pattern Notes
- This pattern uses standard US Crochet Terms.
- Level of difficulty: Advanced beginner to intermediate. The skills required include basic Amigurumi techniques.
- The best time to stuff this crochet tumbler plushie is just before attaching the lid.
- Shape it firmly but avoid overstuffing.

Purchase a PDF Download
- Inexpensive
- Ad-free
- Formated and Print-friendly
About Exclusive Content: When you create a Grow.me account, you can bookmark your favorite content in one place. With one FREE account, you can have not only mine, but many other creators’ content saved in one place.
When you come to my blog and see the button “Unlock Exclusive Content”, go ahead and create an account or simply click the login button and sign in with an existing Grow account. It’s a secure, free feature, and you can unsubscribe at any time. Everything you bookmark with the “heart” on a page that uses Grow.me will show up under “Grow Bookmarks” in your account.
Disclosure: Please note that Grow.me is a third-party app for Exclusive Content, and I have no control over their user policies. Neither will I be able to assist with account creation and/or password resetting. For information on how to troubleshoot login and password resetting, go to “Resources” on the Grow.me website’s top menu.
Amigurumi Tumbler Instructions
Before you begin, you may find these crochet resources helpful to make this Amigurumi Tumbler: How to Create a Magic Circle, a list of the Best Supplies and Tools to Make Amigurumi, and How to Crochet a Perfect Circle.

Step 1: Handle (pink or gray)
Ch 12 and slip st to 1st ch to form a ring.
Rnd1: sc in each ch around. [12]
Rnd2-45: sc around. [12]
The finished tube for the handle will be about 8 1/4 inches (21 cm) long and 1 1/4 inches (3 cm) wide, assuming you use the recommended material and meet the specified gauge. Also, there is no need to stuff the handle.
Tip: For a sturdier handle, try inserting a flexible piece, such as a strip of transparent EVA sheet, before attaching it to the cup. Cut it slightly narrower than the tube, then insert it before attaching.
Cut the yarn and FO. Wait until you attach the other end to fold it in two spots to shape it as a handle. Use fewer rounds if you want the handle smaller, but keep in mind the folded ends will need to be shorter. Then, set aside.

Step 2: Amigurumi Tumbler’s Bottom (pink or dark gray)
Rnd1: 6 sc in a mc
Rnd2: (inc) 6 x. [12]
Rnd3: (inc, sc) 6 x. [18]
Rnd4: (inc, sc 2) 6 x. [24]
Rnd5: (inc, sc 3) 6 x. [30]
Rnd6: (inc, sc 4) 6 x. [36]
Rnd7: (inc, sc 5) 6 x. [42]
Rnd8: (inc, sc 6) 6 x. [48]
Rnd9: bpsc around. Do not cut the yarn yet. [48]
Tip: To flatten the bottom of the tumbler, cut a round piece of sturdy cardboard or EVA sheet. Make it slightly smaller in diameter than the bottom of the cup. Then, place it inside at the bottom before stuffing it.

Step 3: Cup’s Body (pink or dark gray)
Rnd10-26: sc around. [48]
Rnd27: (inc in flo, sc in next 15 sts in flo) 3 x. [51]
Rnd28: sc around. [51]
Rnd29: (inc, sc in next 16 sts) 3 x. [54]
Rnd30: (inc, sc in next 17 sts) 3 x. [57]
Attach one end of the handle to the first 6 stitches in round 33 and the other end to round 59, making sure they are properly aligned. To start, squeeze the first end of the tube, single crochet in all 6 stitches, inserting the hook through all layers of stitches. Then, finish the round normally with single crochet stitches (repeat the process with the second end).
Rnd31-62: sc around. [57]
Cut the yarn. FO. Switch to gray or light blue yarn.
Rnd63-64: sc around. [57]
Cut the yarn, FO, and set it aside for now.
Attaching the eyes: Next, select any spot to feature as the face of your Amigurumi tumbler (I’m right-handed, so I made my tumbler face me when I hold it). Attach the safety eyes between rounds 51 and 52 (12 stitches apart), before you add stuffing fiber.


Step 4: Top Circle of the Lid (Off-white yarn)
Rnd1: 6 sc in a mc
Rnd2: (inc) 6 x. [12]
Rnd3: (inc, sc) 6 x. [18]
Rnd4: (inc, sc 2) 6 x. [24]
Rnd5: (inc, sc 3) 6 x. [30]
Rnd6: (inc, sc 4) 6 x. [36]
Rnd7: (inc, sc 5) 6 x. [42]
Rnd8: (inc, sc 6) 6 x. [48]
Rnd9: (inc, sc 7) 6 x. [54]
Rnd10: (inc, sc 17) 3 x. [57]
FO, cut the yarn and set aside.
Next, attach the off-white yarn to any stitch in round 64 (the gray yarn round on the edge of the cup) and crochet one round of sc sts. Do not cut the yarn yet.
Tip: To make the top of the Amigurumi tumbler flat, you can cut a circle out of cardboard or EVA sheet, just like you did with the bottom.

Step 5: Attaching the lid circle (off-white)
Stuff the cup before proceeding to the following steps. Then, do this:
- Place the lid circle on top of the cup with the right side out.
- Next, insert the hook in both loops of the sts in the edge of the cup and both loops of the sts in the last round of the lid, and do a sc, one at a time, until you complete round 2 with the off-white yarn.
- Lastly, crochet 3 more rounds with the same yarn. All these 5 rounds will have 57 sts each.
- Cut the yarn and FO.
Step 6: Lid lock (gray and pink)
I haven’t added a lid lock on the jumbo Amigurumi tumbler, but you can if you’d like.
Start with gray yarn. Ch 17
Rnd1: sc 3 in 2nd ch from hook, sc in top loop of the next 14 chs, sc 3 in last ch, rotate, sc in opposite loops of the same 14 chs. [34]
Switch to pink.
Rnd2: *(inc) 3 times, sc in next 14 sts, rep from the asterisk one more time. [40]
Rnd3: *(inc, sc) 3 times, sc in next 14 sts, rep from the asterisk one more time. [46]
FO and cut the yarn, leaving a long tail. Thread a tapestry needle with the tail and sew the lid lock onto the top of the lid. Sewing pins can help hold it in place while sewing.

Step 7: Straw (off-white)
Tip: Making a small tube like this can be a bit tricky, but it’s doable. If you know other ways to crochet a straw, feel free to use your own method. An iCord is also an option.
Ch 4 and slip st to 1st ch to form a ring.
Rnd1: sc in each ch around. [4]
Rnd2 to 4” (10 cm) or to the desired straw length: sc around. [4]
Cut the yarn, leaving a long tail. Thread the tapestry needle with this tail and sew the straw’s end to the top of the Amigurumi tumbler’s lid. FO. Weave in all remaining ends.

Your super Amigurumi tumbler is done. I hope you’ve had a great time making it.
Comment, Pin, and Share
- Comment on this post: I always read comments and reply to all questions posted on the blog, and I love it when you stop by to say hello.
- Share your project: if you make this or any of my other patterns, tag me on Instagram or Facebook, or use the hashtag #zamiguzmakers. I love seeing what you make.
- Pin it now: Are you not ready to make it yet? You can use the above image to Pin it to your crochet boards or follow me on Pinterest for more.
- Join The Makers community: Join my community group on Facebook and be the first to know about pattern releases and other crochet-related content.
Would you rather bookmark this blog post for later? You can create a free Grow.me account and use the “heart” on the left-hand side of your screen to save it. It’s easy to have your internet favorites in one place.


