DIY Easy Mesh Crochet Skull Cap Pattern
Grab a small amount of your favorite cotton yarn, set aside about 30 minutes, and with just a couple of basic stitches… voilà! You’ll have a gorgeous crochet skull cap that’s sure to become your go-to accessory for spring and summer.
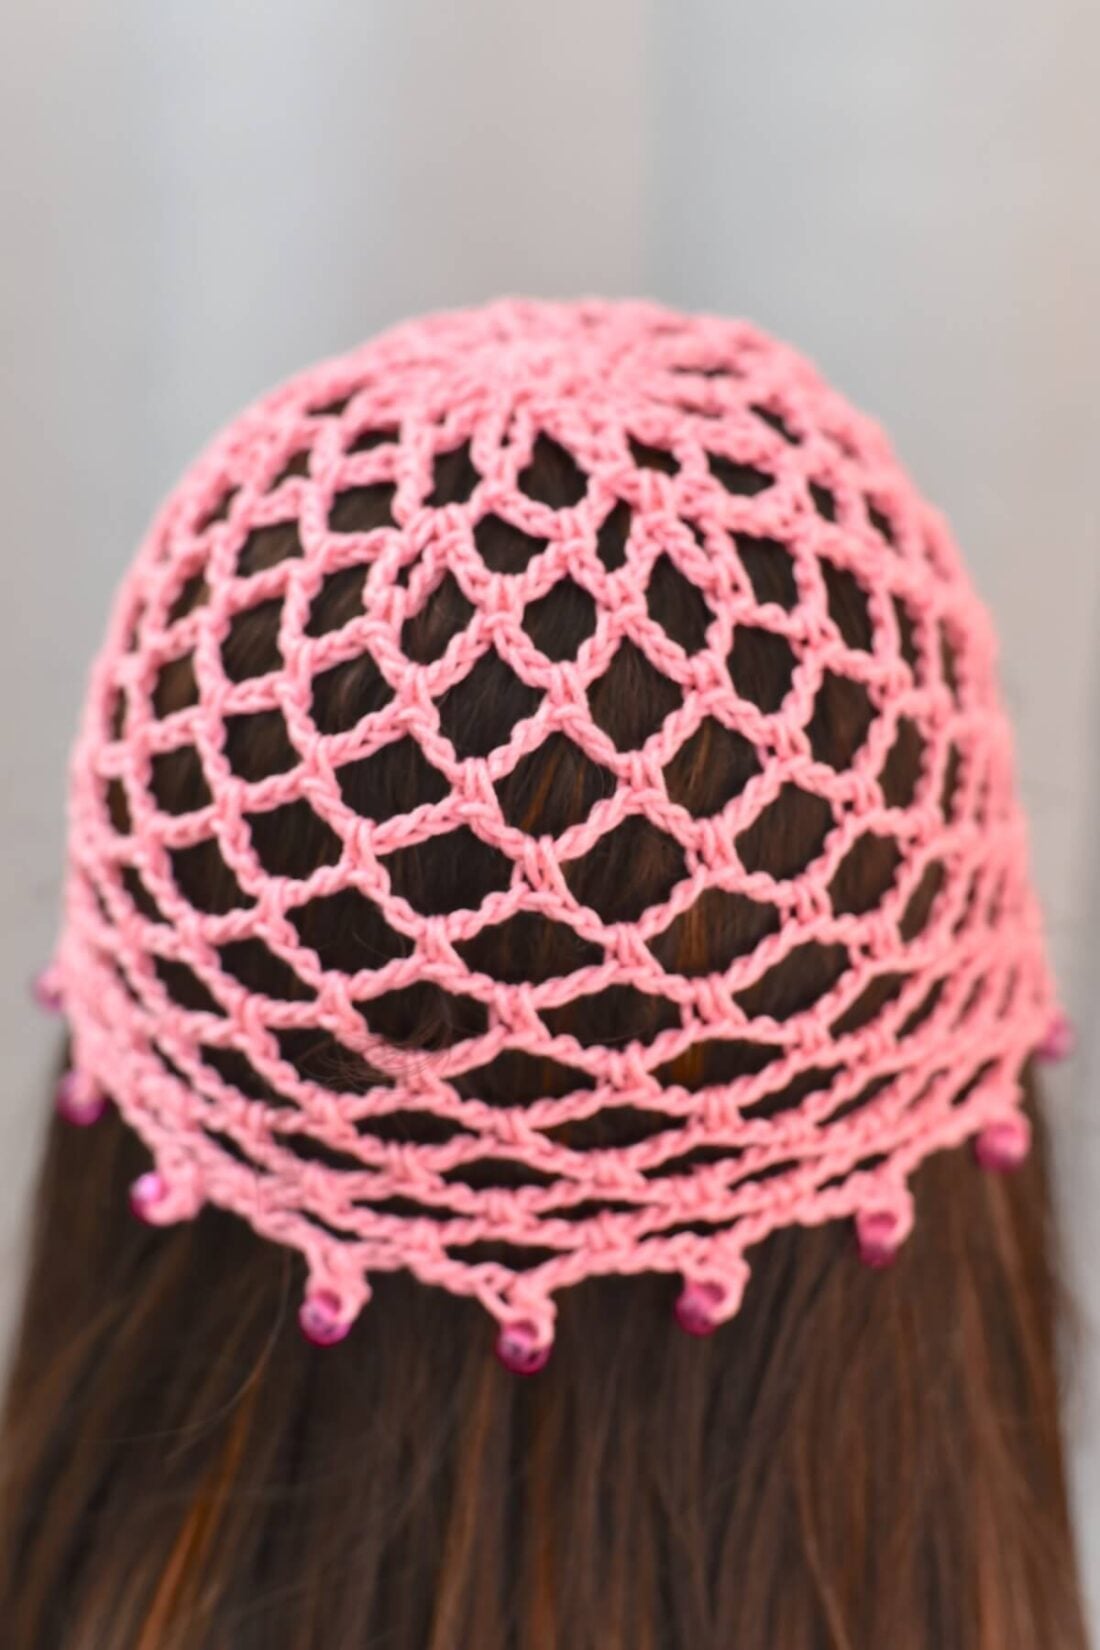
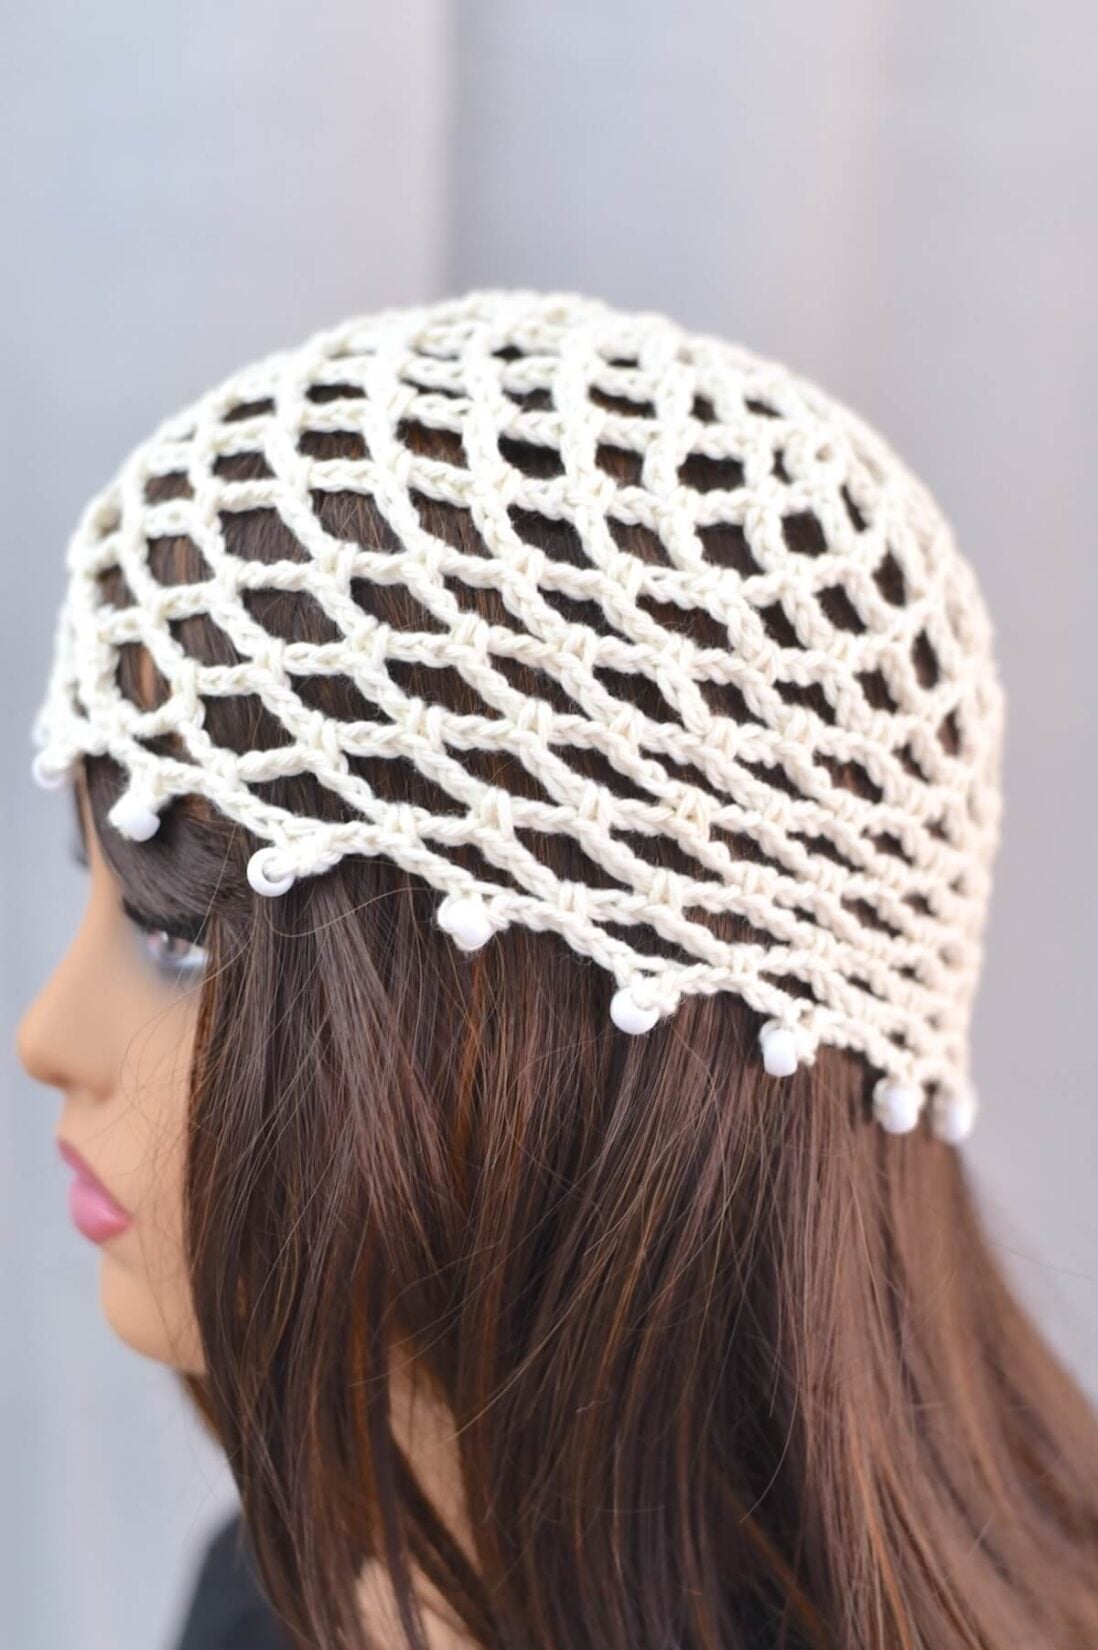
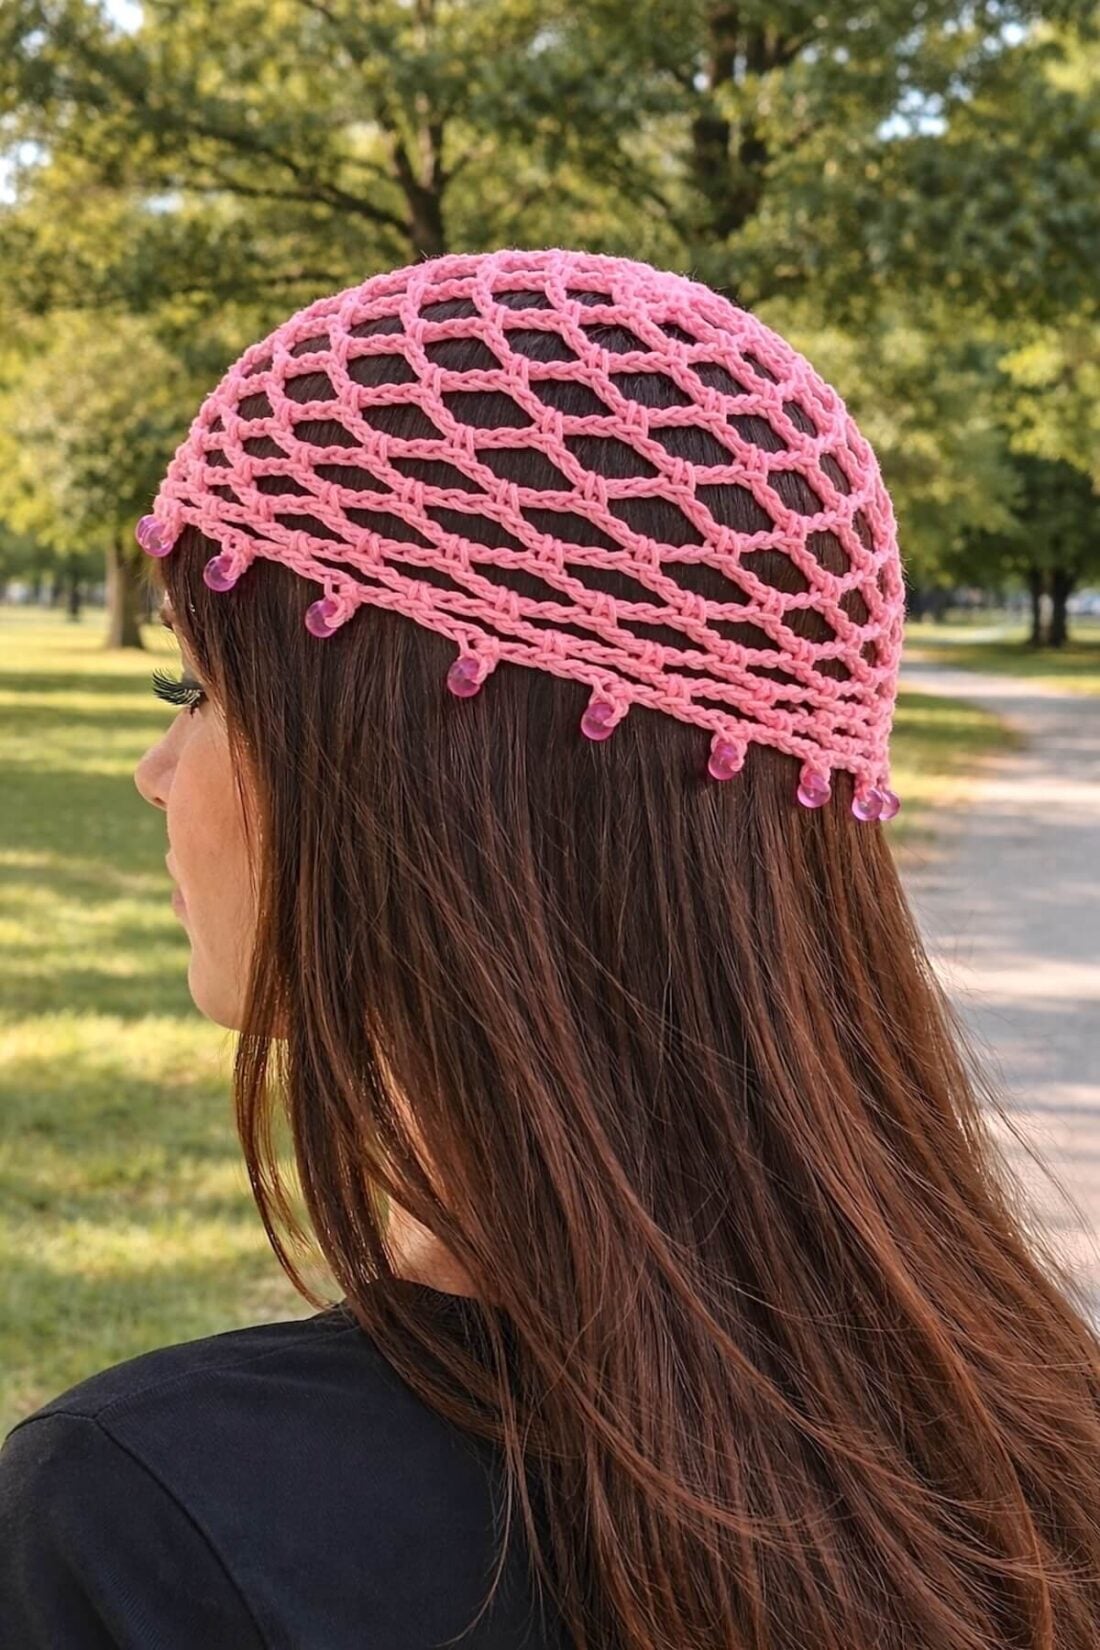
Here is a photo of my mannequin showcasing one of the crochet caps I made:

This website is reader-supported and contains affiliate links. As an Amazon Associate, I earn from qualifying purchases. Find my affiliate disclosure here.
On those breezy summer days, when I’m heading out for a casual day or for a walk on the beach, I like to wear something to keep my hair in place. And living in Maine, I like to say the weather here has all four seasons built into it, which makes it perfect for predicting exactly what to wear year-round.
I couldn’t be more excited about this airy skull cap for the upcoming warm season. Just can’t wait to wear it!
Why you’ll love this crochet skull cap
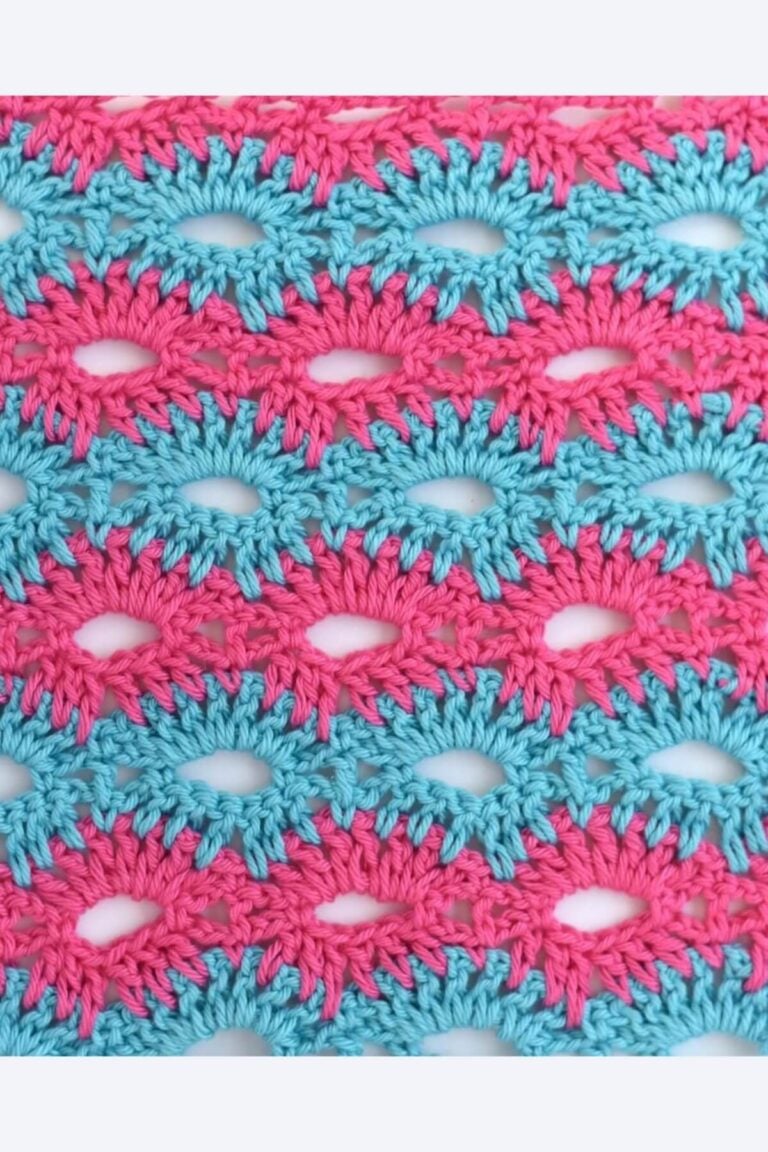
- Simple and beginner-friendly: One of my favorite things about this project is how simple it is to make. The mesh stitch uses only chains and single crochet, making it very easy to learn, even if you’re just starting.
- Light and breathable: the combination of chains and single crochet stitches creates an airy fabric that’s perfect to hold your hair up on those warm-weather days.
- Quick and yarn-efficient: It took me under 30 minutes to make one, and I used less than 65 yards of yarn, which is ideal for stash-busting small projects.
Crochet Skull Cap Pattern
Let’s start by talking about the yarn… I’m a big fan of the subtle sheen of 24/7 mercerized cotton, but the softness of Sugar n’ Cream non-mercerized cotton is just as lovely for summer wearables. Keep scrolling for more details on the yarn.
The hat is worked in the round, beginning with a magic circle. From there, you’ll crochet rounds of single crochet and chain-5 spaces to create an open, airy fabric. The result is a lightweight headpiece that’s both practical and beautiful – exactly the look and feel I had in mind for this mesh-stitch design.
Want to make it your own? Add craft beads along the edge for a cute decorative touch – they also give the cap a bit of weight to help it stay in place.
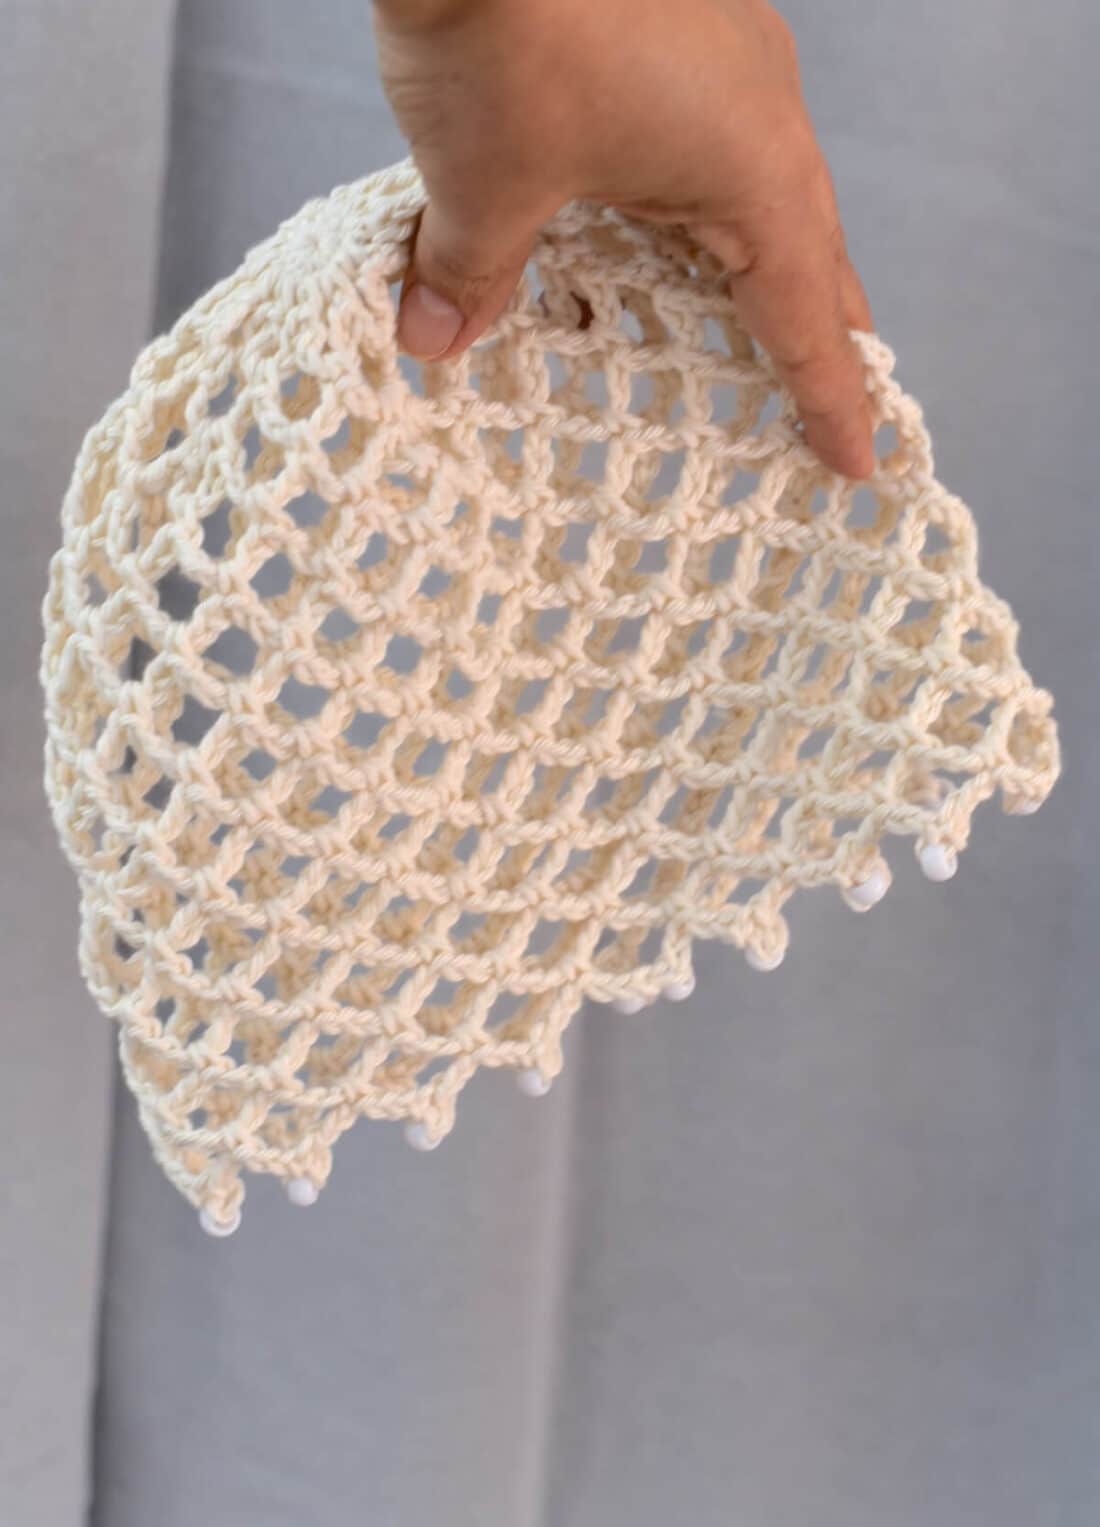
Here is a close-up photo of the edge with plastic beads I added to my hat:
Alright, enough chatting – let’s take a look at what you’ll need and jump right into the pattern!
What You’ll Need:
- Worsted Weight (4) yarn – approximately 56 yards for the smaller size and 65 yards for the larger size.
- 4.00 mm (US G) hook – or other hook size needed to meet gauge.
- A smaller hook to attach the beads, as small as it can fit through the bead hole to pull the yarn through.
- Plastic or stone beads: 8-10 mm beads with 5 mm holes – 18 for the Small Adult/Teen size or 19 for the Large Adult size.
- Scissors, a stitch marker, and a tapestry needle to weave in the ends.
Yarn Specifics:
I prefer cotton, but feel free to use any fiber content you like. However, I recommend avoiding any yarn with stretch. Here are my recommendations:
- MainStays cotton yarn by Walmart
- Sugar n’ Cream yarn by the Lily Brand
- 24/7 Worsted-Weight Yarn – Mercerized cotton by Lion Brand
Pattern Abbreviations and Terms:
Do you like free PDFs? You can get a Free Guide to Abbreviations & Terms (PDF download right here on the blog.
- ch(s): chain(s)
- FO: Fasten off
- mc: magic circle
- rep: repeat
- sc: single crochet
- sl st: slip stitch
- sp: space
- st(s): stitch(es)
- ( ): Repeat instructions within parentheses as many times as directed.
Project Size:
The pattern for the crochet skull cap in this blog post is for two sizes: the smaller one fits heads with a circumference of 19-21 inches/48-53 cm, and the larger one fits heads with a circumference of 22-23 inches/56-58 cm.
If your head size falls in the middle, I strongly suggest opting for the larger size. This is because the hat will fit better when it’s slightly larger than your head.
Stitch Tension:
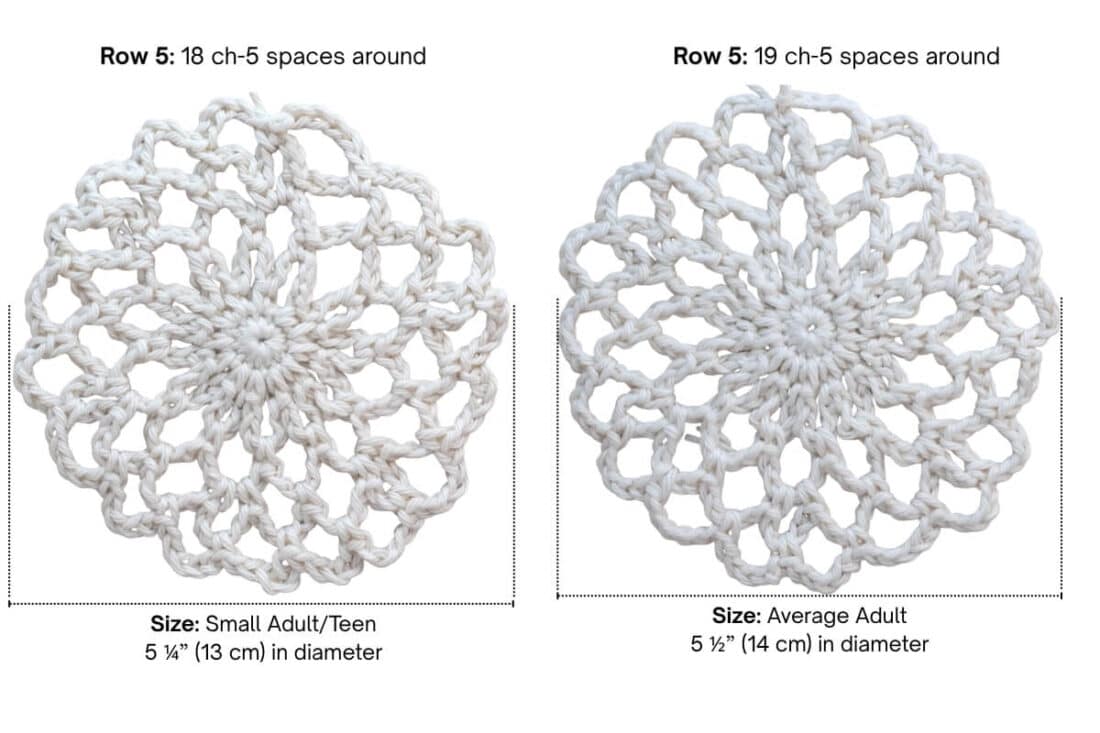
Gauge is crucial for this crochet skull cap project, so make sure your first 5 rows of the pattern match the size specified below for the right fit.
- Small Adult/Teen cap: the circle with the first five rows measures approximately 5 ¼ inches (13 cm) in diameter.
- Large Adult cap: the circle with the first five rows measures approximately 5 ½ inches (14 cm) in diameter.
Pattern Notes:
- This crochet skull cap pattern uses US crochet terminology.
- Skill Level: Easy.
- The sizes in the pattern are written in this order: Small Adult/Teen (Average Adult). For example, “(sc, ch 6) x12 (x13)” means x12 is for the Small Adult/Teen size, and x13 is for the Average Adult size.
Purchase a PDF Download
- Inexpensive
- Ad-free
- Formatted and Print-friendly
About Exclusive Content: When you create a Grow.me account, you can bookmark your favorite content in one place. With one free account, you can save not only mine, but also the content of many other creators, allin one place.
When you visit my blog and see the “Unlock Exclusive Content” button, please create an account or click the login button and sign in with an existing Grow account. It’s a secure, free feature, and you can unsubscribe at any time. Everything you bookmark with the “heart” ona page that uses Grow.me will show up under “Grow Bookmarks” in your account.
Disclosure: Please note that Grow.me is a third-party app for Exclusive Content, and I have no control over their user policies. Neither will I be able to assist with account creation and/or password resetting. For information on how to troubleshoot login and password resetting, go to “Resources” on the Grow.me website’s top menu.
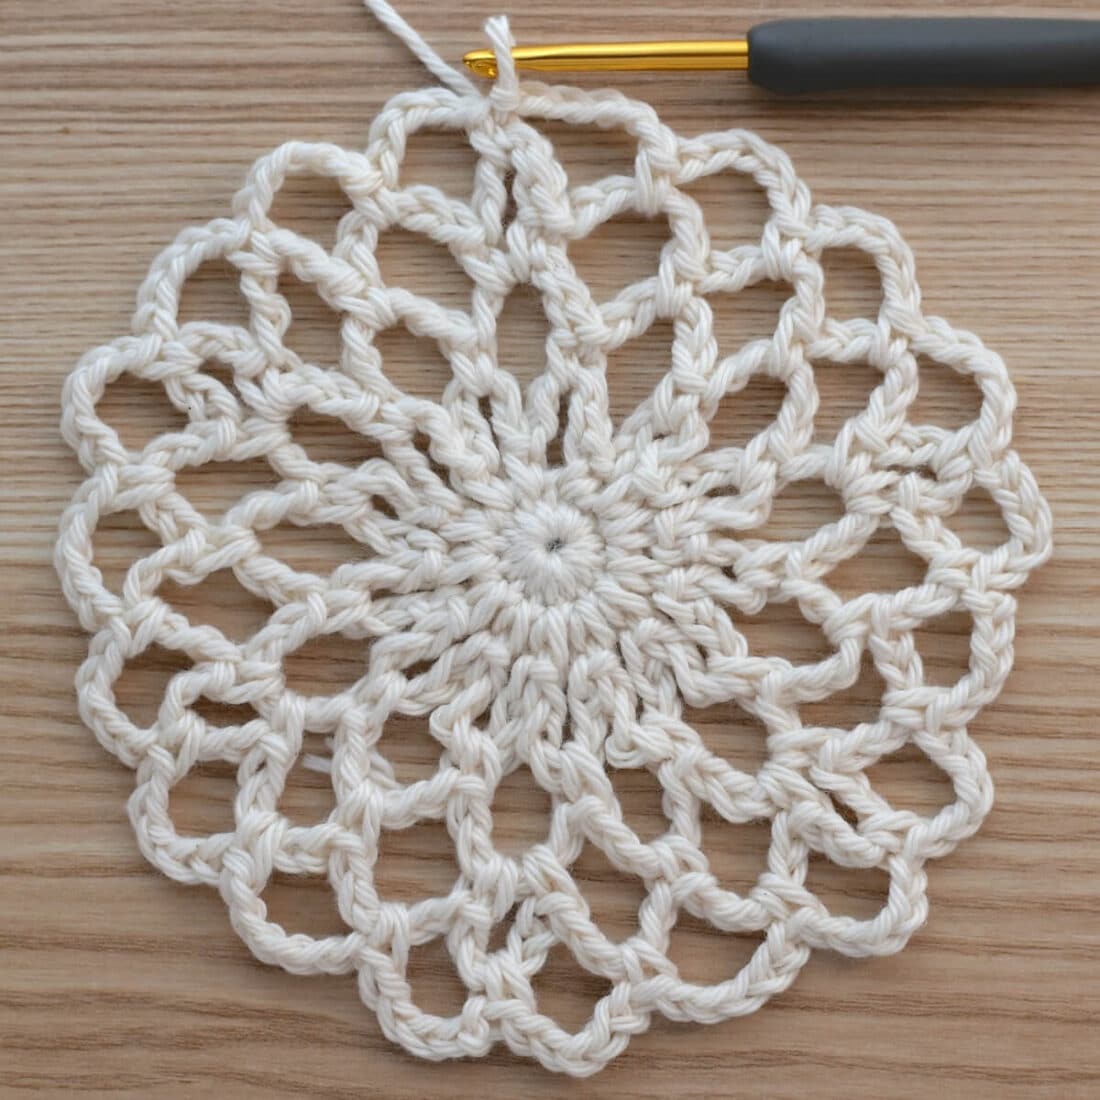
Crochet Skull Cap Instructions
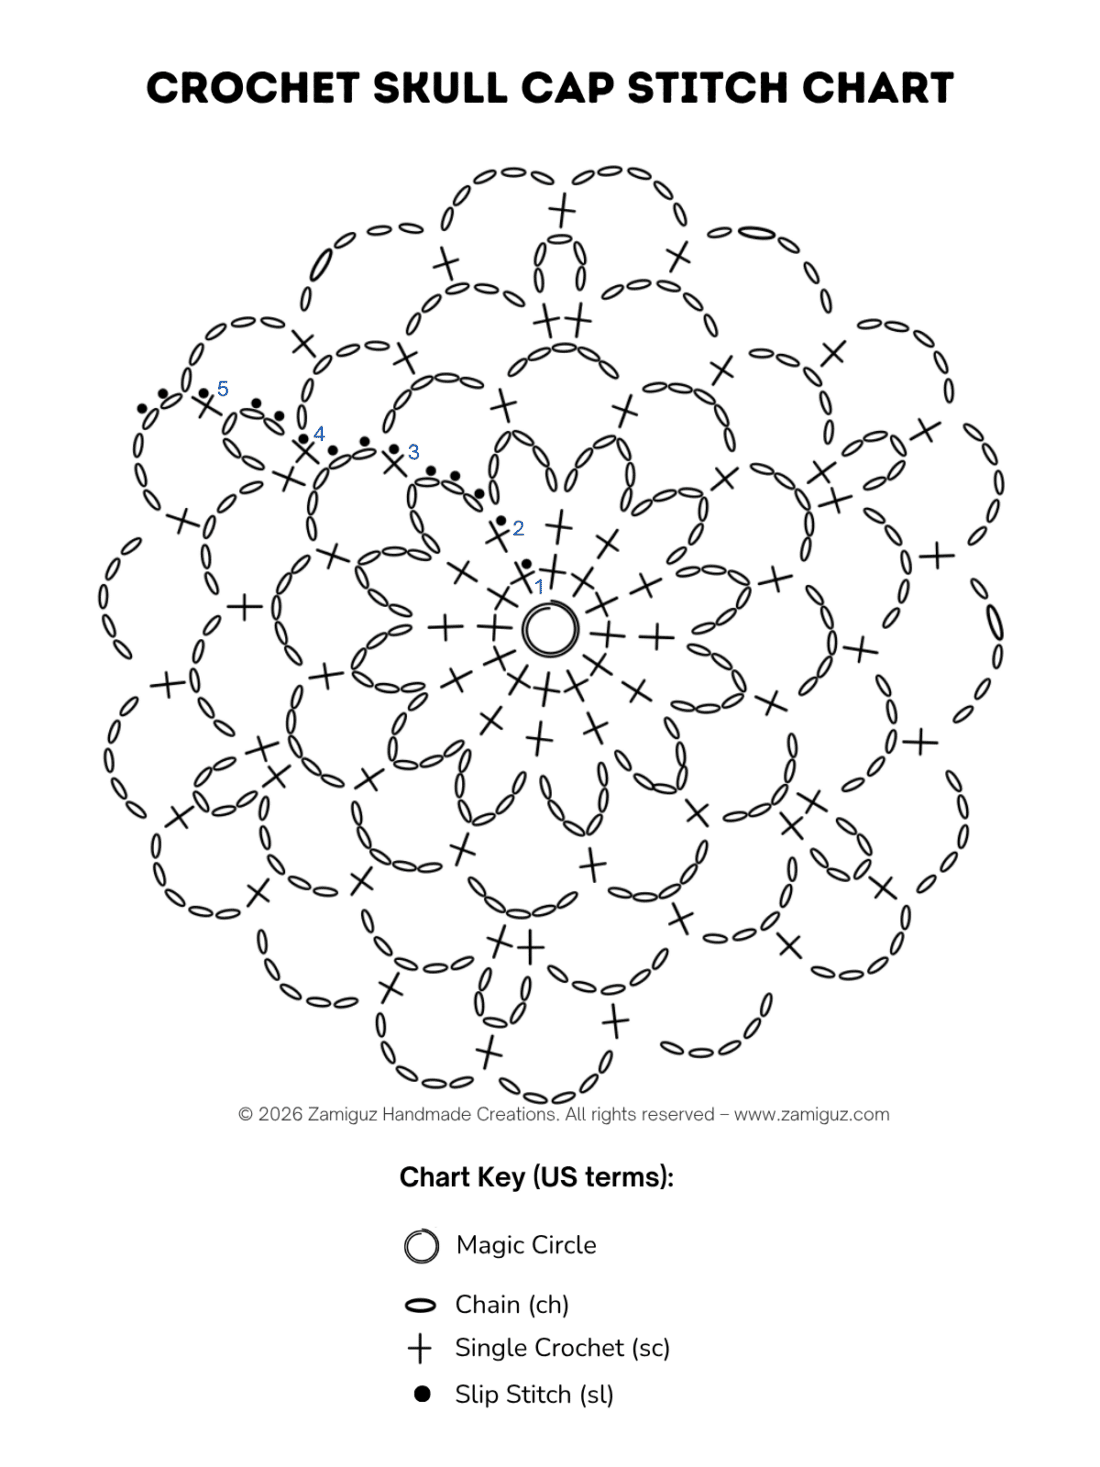
Crochet your mesh beanie using this stitch diagram along with the written instructions below.
Note: The chart in the image below illustrates the stitches for the smaller size of this crochet skull cap. Both sizes begin in a very similar way, but the larger size includes one additional stitch to create an extra chain-5 space (refer to the written instructions below if you’re making the larger size).
Row #1:
12 (13) sc in a magic circle, sl st to join. Alternatively, instead of the mc, you can ch 2 and place the sts in the 2nd ch from the hook.
Row #2:
(sc, ch 6) x12 (x13), then sl st to join.
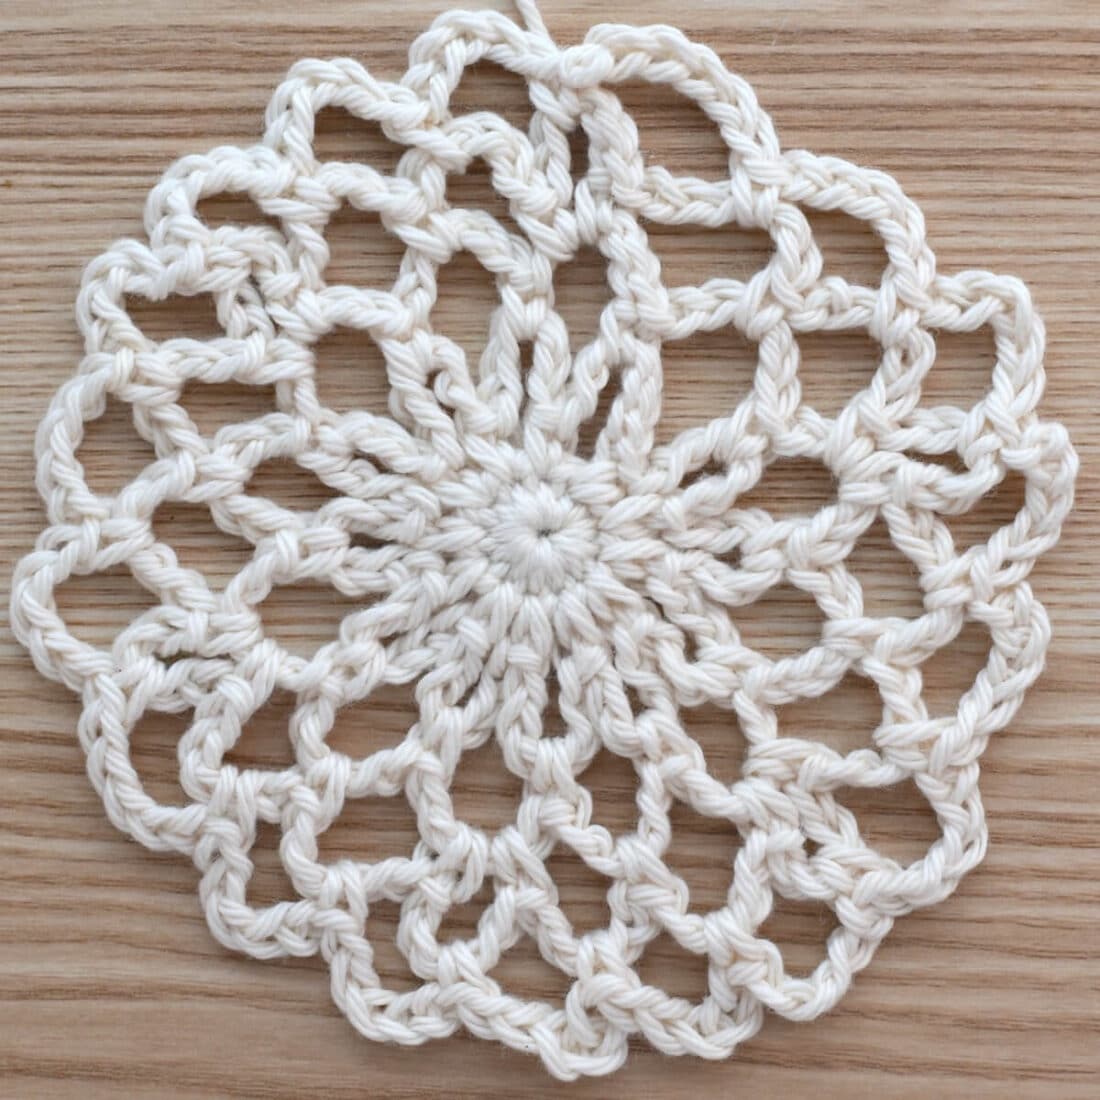
Maggie’s Pro Tip: Due to the mesh stitch used in this cap, the piece will appear uneven and unshaped in the initial rows. This is entirely normal. The shape will gradually take form as the project progresses.
Row #3:
Sl st into the next 3 chs, sc in same ch 6 sp, (ch 5, sc in next ch 6 sp) x12 (x13), sl st to join.
Row #4:
Sl st into the next 3 chs, (sc, *ch 5, sc) in same ch 5 sp, (ch 5, sc in next ch 5 sp) x2, rep from the asterisk five more times. If you’re making the larger size, you’ll have room to crochet one extra ch-5 sp at the end of this row. Sl st to join.
Row #5-15:
Sl st into the next 3 chs, sc in same ch 5 sp, (ch 5, sc in next ch 5 sp) x18 (x19), sl st to join.
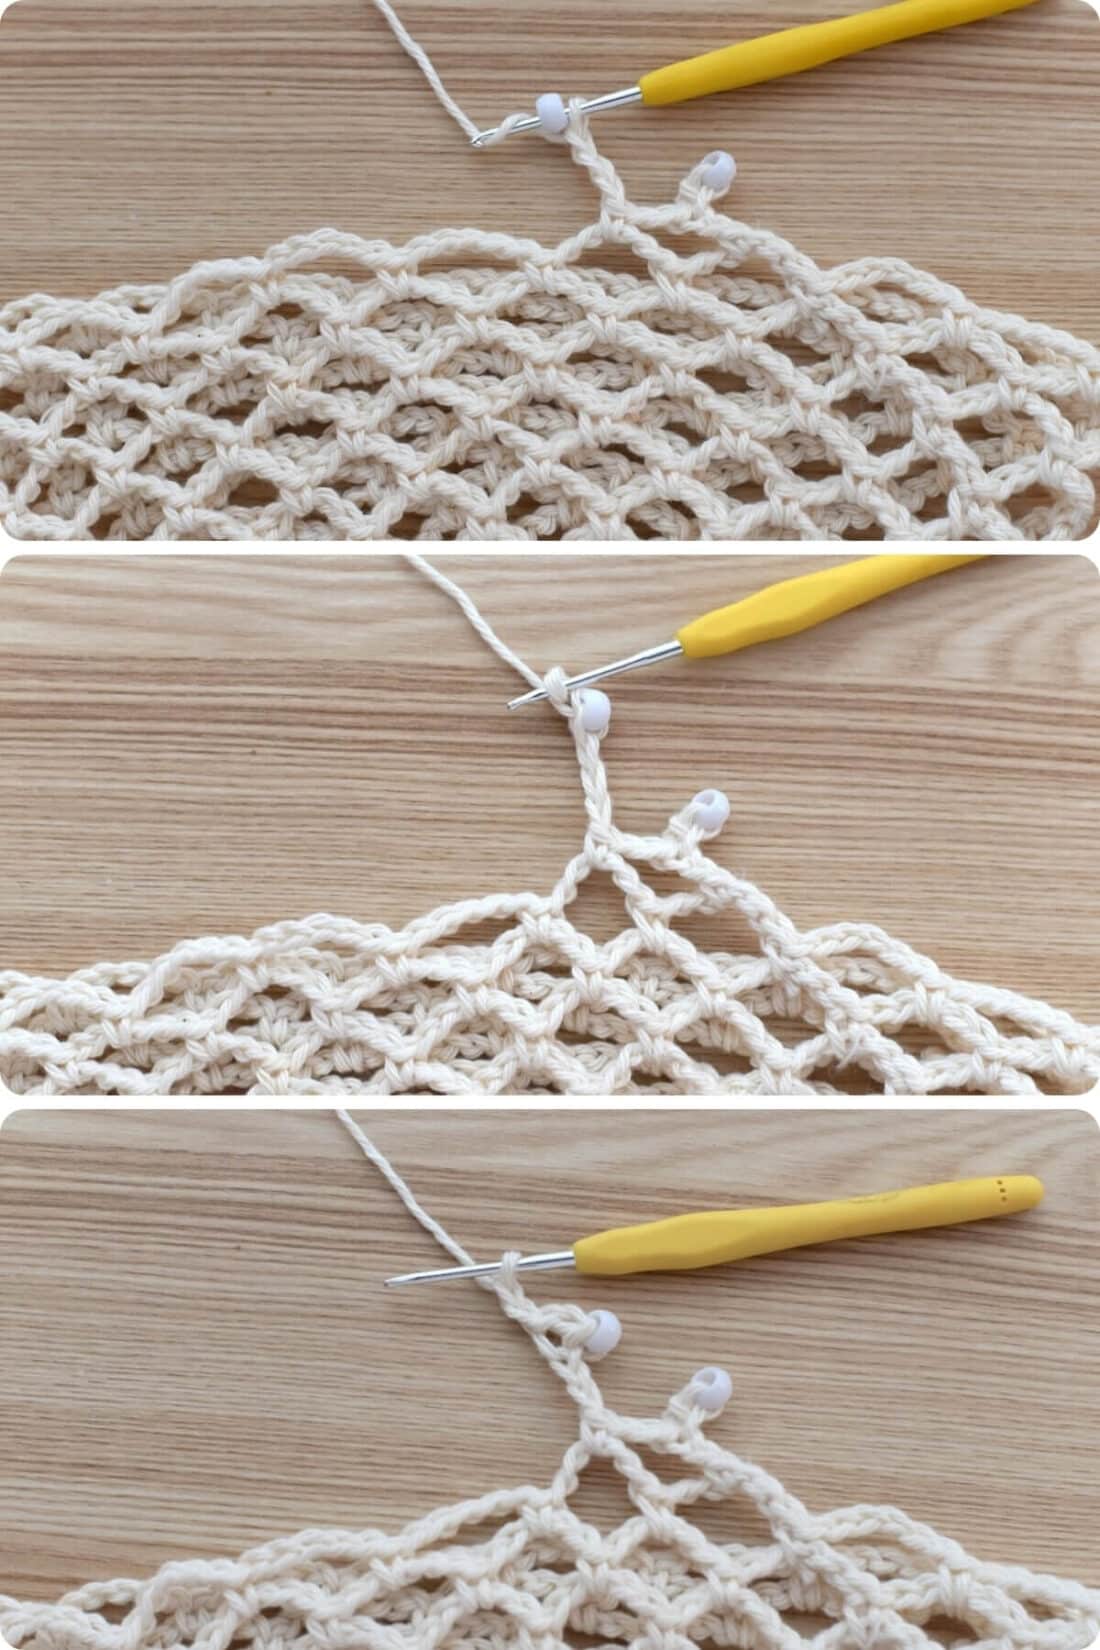
Row #16:
Here is where you add the beads to decorate the edge of your mesh hat.
Sl st into the next 3 chs, sc in same ch-5 sp, *ch 3, ch 1 with a bead (a smaller hook will help here), ch 1again, sl st in 3rdch from hook, ch 2, sc in next ch-5 sp, rep from the asterisk around. Sl st to join. Fasten off using the invisible finish method, then weave in the loose ends.
Crochet Skull Cap Pattern – FAQs
Is this pattern beginner-friendly?
Yes! This pattern is perfect for beginners. It uses only basic stitches – chains and single crochet – making it easy to follow. And it’s small enough to keep you from getting bored.
How much yarn do I need?
You’ll need from 56 to 65 yards of yarn, depending on which of the two sizes you’re making. The amount may vary a little depending on stitch tension and yarn brande as well. This is the perfect stash-busting project for leftover cotton yarn.
What type of yarn works best?
Cotton yarn is ideal for this crochet skull cap pattern, especially for warm-weather wear. You can use mercerized cotton for a slight sheen or non-mercerized cotton for a softer, more casual look. I would avoid stretchy yarns, though, as they can affect the fit of your crochet skull cap.
Can I adjust the size of the skull cap?
It depends! I offer instructions for two sizes, but if you’re an experienced crocheter, you may be able to start with fewer or more stitches in the magic circle. From there, you’d need to determine the chain-5 space increases to make it work.
Can I add embellishments to the cap?
Absolutely! I worked mine with craft beads along the edge for a decorative touch. You can also attach sequins all over the cap or ready-to-use bead or pearl strings on the edges – the possibilities are endless.
Your crochet skull cap is now finished! I hope you had fun working on this pattern, but most importantly, that you will love wearing your new head piece.
Happy Crocheting! 🧶
Pin, Share, and Comment
- Comment on this post: I always read comments and reply to all questions posted on the blog, and I love it when you take the time to stop by and say hello.
- Have you made this? Share your project if you make this or any of my other patterns, tag me on Instagram or Facebook, or use the hashtag #zamiguzmakers. I love seeing what you make.
- Pinit now: Are you not ready to make it yet? You can use the above image to pin it to your crochet boards or follow me on Pinterest for more.
- Join The Makers community: Join my community group on Facebook and be the first to know about pattern releases and other crochet-related content.
Would you rather bookmark this blog post for later? You can create a free Grow.me account and use the “heart” on the left-hand side of your screen to save it. It’s easy to have your internet favorites in one place.