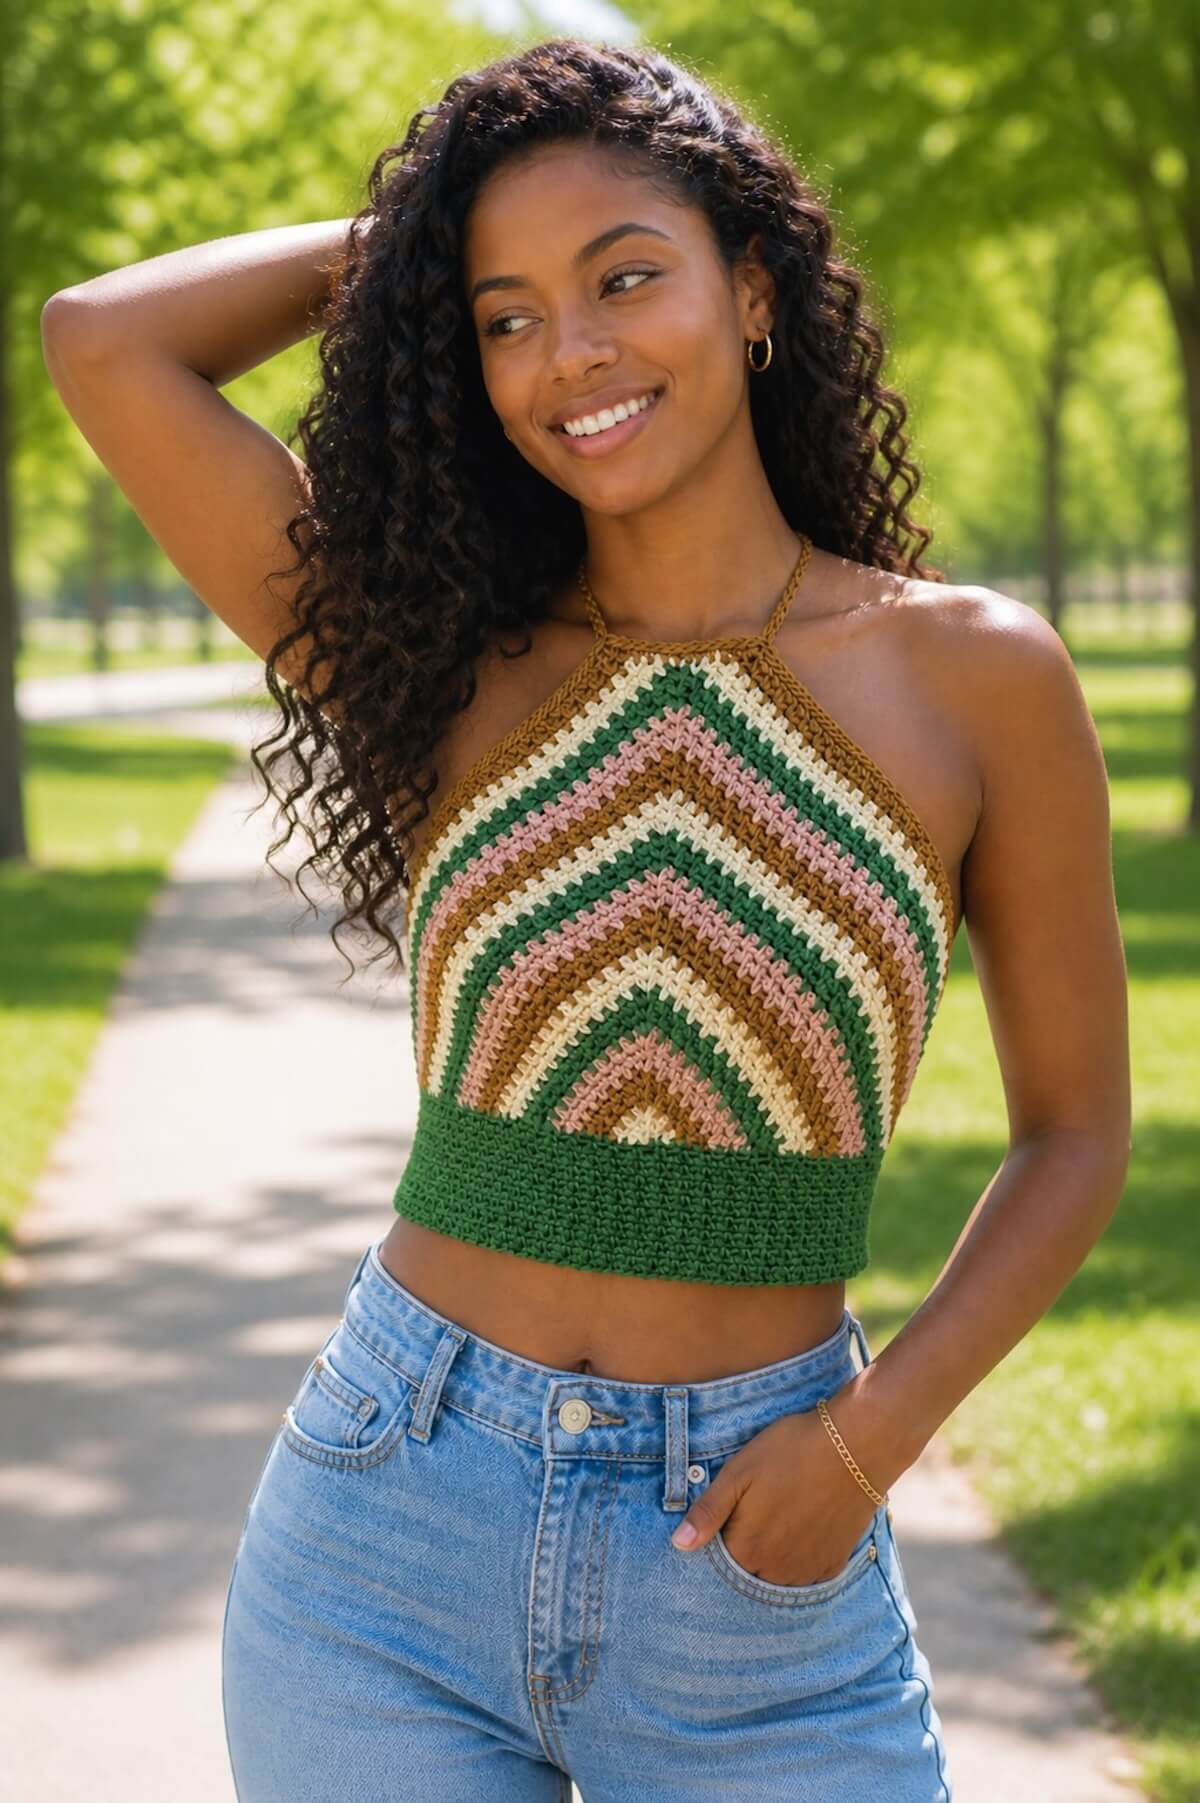
DIY Crochet Halter Top | Made to Measure Pattern
I’m so excited to finally share this crochet halter top pattern here on the blog!

This website is reader-supported and contains affiliate links. As an Amazon Associate, I earn from qualifying purchases. Find my affiliate disclosure here.
After designing my crochet bikini top a few years ago, I knew I eventually wanted to create a halter-style top with a more casual, everyday summer look for more bust coverage.
The inspiration for this design came while I was scrolling through Pinterest and spotted a striped fabric top with a simple, flattering shape. Right away, I could picture how gorgeous it would be if translated into crochet.
After experimenting with a few stitch options and color combinations, the moss stitch quickly became my favorite choice. Its geometric texture paired perfectly with bold stripes and gave the top the exact lightweight, modern feel I was looking for.
I designed and tested this top with comfort, simplicity, and customization in mind. The construction is straightforward, making it a doable project for brave beginners who already feel comfortable with basic crochet stitches.
Quick Pattern Summary
Why You’ll Love This Crochet Halter Top
- Simple, beginner-friendly construction: The main body is made with easy back-and-forth moss stitch rows to create the triangle cups, followed by a customizable bottom band worked in the same stitch pattern. The construction is straightforward, fun to crochet, and best of all – there’s no sewing involved.
- Easy to customize as you crochet: The pattern is worked using a simple measure-as-you-go approach, you can adjust the fit, coverage, and overall length throughout the process instead of relying on strict sizing numbers.
- Lightweight and perfect for warm weather: The moss stitch creates a breathable fabric with beautiful texture, making this halter top ideal for summer outfits, beach days, vacations, festivals, or casual walks at the park.
- Beautiful with stripes and colorwork: The geometric look of the moss stitch pairs very well with bold stripes and multiple yarn colors, giving the finished top a modern, handmade look with plenty of room for creativity.
Crochet Halter Top Photo Gallery


What You’ll Need
- Worsted Weight (4) yarn – I used approximately 280 yards (257 m) of 24/7 Cotton by Lion Brand, a 100% mercerized cotton yarn. I loved how well it worked for this project because it gives the moss stitch beautiful definition while still creating a lightweight fabric that feels comfortable for warm weather.
- 4.00 mm (US G) crochet hook – Since this crochet halter top is designed as a made-to-measure garment, feel free to adjust your hook size depending on your yarn choice and personal tension. If your stitches tend to be tighter or looser, changing hook sizes can help you achieve the fabric and drape you prefer.
- A smaller hook – I used a 2.50 mm crochet hook to tighten the stitches on the side edges for better bust coverage. All the details are in the pattern below.
- Flexible measuring tape – Measuring as you go is an important part of customizing the fit for this top. You’ll use it to check measurements such as chest circumference, waist fit, and armhole depth throughout the project.
- Scissors, a stitch marker, and a tapestry needle – You’ll need these to keep track of stitches and weave in the yarn ends neatly.
Yarn Substitutions:
One of the things I love about this pattern is how versatile it is with different cotton yarns. Here are a few alternatives that would work great with this project:
- I Love This Cotton by Hobby Lobby: This is one of my personal favorite non-mercerized cotton yarns. It creates a softer, slightly more relaxed fabric with a cozy feel.
- Cotton Sprout Worsted by Premier Yarns: A great option if you enjoy working with colorful yarns. The self-striping versions can create beautiful color transitions while minimizing the number of yarn ends to weave in.
- Caron All Day Cotton by Yarnspirations: This is another mercerized cotton option that’s affordable and high quality.
Maggie’s Pro Tip: If you substitute the yarn, I recommend checking the drape and stretch of your fabric after a few rows. Cotton yarns can behave very differently depending on whether they are mercerized, blended, or non-mercerized.
Sizing & Fit
As I mentioned earlier in this article, this crochet halter top is designed as a made-to-measure pattern, giving you plenty of flexibility when customizing the fit. Instead of following rigid size numbers, you’ll use your own measurements throughout the project to create a top that feels comfortable and flattering on your body.
I included detailed instructions and measuring guidance to help you adjust important areas like:
- Bust coverage
- Band length
- Overall top length
- Strap placement options
One of my favorite things about this design is the measure-as-you-go approach. As you crochet, you can easily add more rows to increase coverage or adjust the fit to your comfort level and preferred style.
Maggie’s Pro Tip on Sizing: I recommend trying the top against your body periodically as you work. Stitch tension and yarn choice are fairly flexible, but checking measurements as you go is the best way to achieve the look and fit you want.
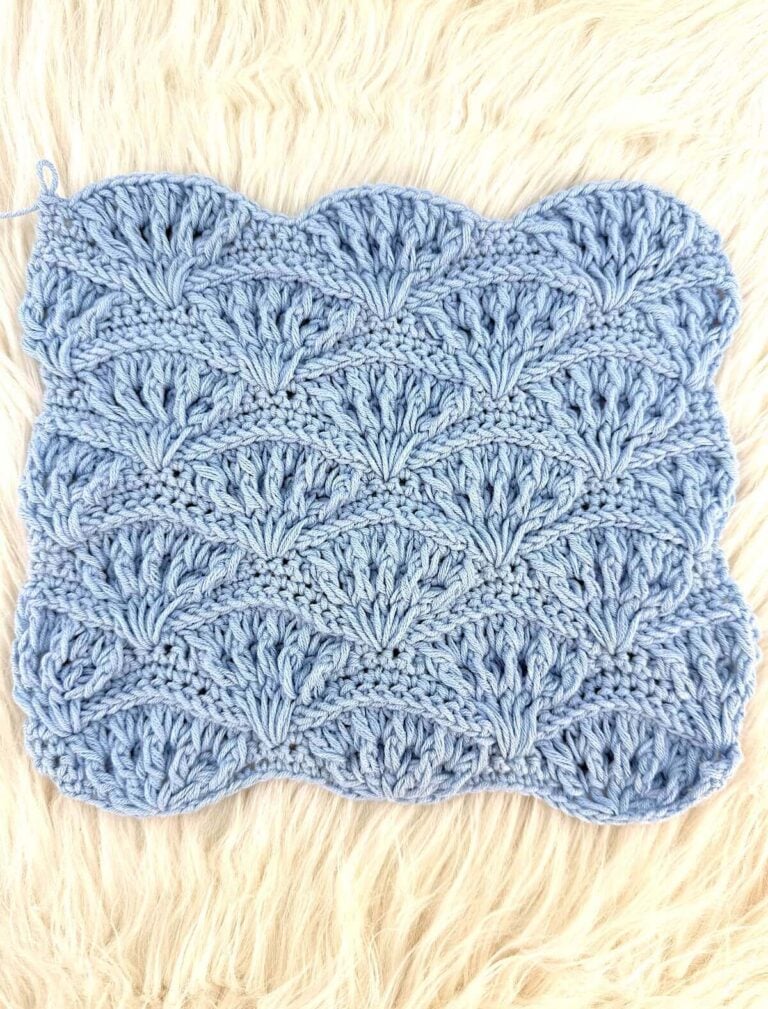
The Stitch Used
The crochet moss stitch is perfect for summer garments because it’s breathable yet creates a dense fabric for modest coverage. It’s just a single crochet and a chain-1 space in the repeat, and it won’t be boring to work on, especially if you’re using multiple yarn colors.
I’ve included plenty of step-by-step photos in the pattern instructions below, but here’s the stitch diagram as an extra visual reference to help you follow along.

Pattern Abbreviations (US Terminology)
Do you like free PDFs? You can get a Free Guide to Abbreviations & Terms (PDF download right here on the blog.
- ch(s): chain(s)
- FO: Fasten off
- rep: repeat
- sc: single crochet
- sc2tog: single crochet two together (decrease)
- sp: space (created with a chain)
- sl st: slip stitch
- sk: skip
- st(s): stitch(es)
- ( ): Repeat the instructions in parentheses as many times as directed.
Gauge
Since this crochet halter top is designed as a made-to-measure garment, gauge isn’t critical for achieving a good fit. However, for reference, the first 8 rows of the triangle measure approximately 4″ (10 cm) wide by 2.75″ (7 cm) tall.

About Exclusive Content: When you create a Grow.me account, you can bookmark your favorite content in one place. With one free account, you can save not only mine, but also the content of many other creators, allin one place.
When you visit my blog and see the “Unlock Exclusive Content” button, please create an account or click the login button and sign in with an existing Grow account. It’s a secure, free feature, and you can unsubscribe at any time. Everything you bookmark with the “heart” ona page that uses Grow.me will show up under “Grow Bookmarks” in your account.
Disclosure: Please note that Grow.me is a third-party app for Exclusive Content, and I have no control over their user policies. Neither will I be able to assist with account creation and/or password resetting. For information on how to troubleshoot login and password resetting, go to “Resources” on the Grow.me website’s top menu.
Purchase a PDF Download
- Inexpensive
- Ad-free
- Formatted and Print-friendly
Crochet Halter Top Instructions

Have your yarn in all the colors you’ll use, your hook, and a few stitch markers. Also, you may find the stitch diagram I included in this blog post helpful for following along with these written instructions (see the “stitch chart” section above).
Total Time: 5 hours
Section 1: Crochet the Main Triangle Panel

Row 1: in a magic circle, ch 2, (sc, ch 1) x2, sc, ch 2, and turn.
Row 2: sc into the 1st ch 1 sp, ch 1, (sc, ch1, sc) into the next ch 1 sp, ch 1, (sc, ch 1, sc) in the last ch-1 sp, ch 2, and turn.
From here, I’ll refer to the (sc, ch1, sc) in the same ch-1 sp as the “top corner”.
Row 3: sc into the 1st ch 1 sp, (ch 1, sc into the next ch-1 sp) to the top corner, ch 1, (sc, ch1, sc) in the middle corner, (ch 1, sc in the next ch-1 sp) to last, (ch 1, sc) again same last ch-1 sp, ch 2, and turn.
From row 4 onward: Repeat the instructions from row 3 until the triangle reaches the desired size minus 2-4 inches. For my crochet halter top sample, which fits a C-D cup, I used 36 rows. There’s no need to cut the yarn and fasten off when this section is complete, unless you’re changing colors.
Section 2: Add the Sides of the Triangle

In this section, the rows stop at the top corner, where we’re creating decreases and turning. Continue from where you stopped in the previous section, with 2 chs and a turn as usual.
Row 1: sc into the 1st ch 1 sp, (ch 1, sc into the next ch-1 sp) to the top corner. In the last ch-1 sp right before the top corner: insert hook in the ch-1, pull up a loop (2 loops on hook), do not complete the sc st yet, insert hook again into the top corner, pull another loop (3 loops on hook), complete a 2sctog, ch 2, and turn.
Row 2: sc into the 1st ch 1 sp, (ch 1, sc into the next ch-1 sp) to last, (ch 1, sc) in same last ch-1 sp as last sc, ch 2 and turn.
From row 3 onward: repeat rows 1-2 until you’re happy with the coverage on the sides of the triangle. For the C cup sample I made, I added 6 rows.
When the first side is done, cut the yarn, FO. Then, attach the yarn to the opposite end of the triangle, ch 2, and repeat the instructions above. Cut the yarn, and FO.
Maggie’s Pro Tip: Did you get a gap on the side edges of your crochet halter top? It can be fixed with a row of slip stitches if you like. See the “Fixing & Troubleshooting” section below for more details.
Section 3: Crochet the Bottom Band

The band is crocheted in a rectangle shape, also in turning rows, because you’ll be leaving an opening at the back.
Note: The band designed for this crochet halter top will be on the tighter side, so please keep that in mind when creating the foundation chains.
Here is how to get ready to crochet the band:
1. First, measure your under-bust circumference, then subtract the width of the main body panel along the under-bust edge.
2. The difference will be the length of chains needed in inches (or cm) to crochet the band’s foundation, divided by two. Also, important to mention that to work the moss stitch, you’ll need an even number of chains on each end of the triangle.
3. Attach the yarn to one end and crochet as many chs as needed (an even number), then cut the yarn and FO.
4. Next, attach the yarn again on the other end and create the same number chs as the other side.
How to crochet the band after finding creating the foundation chains:
Band row 1: sc in 2nd ch from hook and in each ch across, then sc in each post stitch on the triangle’s edge, sc in the magic circle, then sc in each of the remaining chs on the other end. Ch 2 and turn. At the end of row 1, there should be an odd number of sc sts.
Band row 2: (sc in next sc st, ch 1, sk 1 sc) until two sts remain, sk 1 sc, sc into last sc st, ch 2, and turn.
Band row 3 and beyond: rep row 2 to the desired band length. Cut the yarn, and FO. For my sample’s band, I crocheted 17 rows.
Section 4: Shoulder Straps

1. Pick a side to be the right side of your crochet halter top (it doesn’t matter which) and attach the yarn to one of the corners along the top neckline.
2. Then, crochet as many chains as needed to make it twice the height of the top’s front – for the medium size shown in the photos, it was 100 chains.
Next, sl st into the back bump of the 2nd chain from the hook and into the back bump of each chain across.
3. The straps should be long enough to form a crisscross pattern on the back closure.
4. At the bottom of this first set of chains, continue with 1 sc in each moss st post along the neckline.
5. Now, we’re creating the 2nd strap at the other corner: crochet the same number of chains as the 1ststrap, then repeat the sl st to the last ch. Fasten off and cut the yarn.
6. Finally, use the stitches along the back edge of the band to weave in the tips of both straps, top to bottom, in a crisscross pattern.
Maggie’s Pro Tip: If you don’t like the crisscross strap style for your crochet halter top, you can also use them as regular straps by attaching them to the top edge of the band or tying them around your neck. See how to do it in the “Fixing & Troubleshooting” section below.
Finishing touches
If you’re working with multiple colors of yarn, you’ll have quite a few loose ends to weave in. Make sure you weave them in on the side you picked to be the wrong side of the top for a clean and invistible finish.
Maggie’s Pro Tip: Never crochet over your ends. Instead, leave at least 4 inches for each tail and weave them in one at a time for a more secure finish. See more tips in this blog post.
Estimated Cost: 20.00 USD
Supply:
- Medium Weight Yarn 100% Cotton (more on the yarn in the list of materials above)
Tools:
- 4.00 mm (US G) hook, 2.50 mm hook
Materials: Measuring tape, scissors, tapestry needle, and stitch markers
Fixing & Troubleshooting
I love how my crochet halter top turned out, but I did notice a couple of small things while making it that you may want to adjust depending on your preference and fit.
The issue: A gap above the bust
Because of the nature of the moss stitch, the edges above the bust may not lie perfectly flat once the top is finished.
An optional fix
For a neater edge, you can attach the yarn to the last row of the triangle on the right side and crochet a row of tight slip stitches along the outer edges using only the back loops of the stitches. Using a smaller hook can help with this—I used a 2.50 mm hook (see photo below).
The issue: The crisscross closure may feel snug to pull on
Depending on the fit and how tightly the straps are adjusted, the crisscross back can make this crochet halter top a little less convenient to put on as a pullover.
Optional strap adjustment
Instead of sewing the straps permanently, you can thread the strap ends through stitches on the back band and tie them into adjustable knots. This allows for a more customizable fit. Another option is to tie it around your neck.
Optional closure alternative
If you prefer adjustable straps, you may also like adding buttons to the back closure to make the top easier to put on and remove. Simply sew buttons along one edge and use the stitches on the opposite edge as buttonholes.

Crochet Halter Top Customization Ideas
One of my favorite things about this crochet halter top is how easy it is to customize. Here are a few ideas you can try to make it uniquely yours:
Make it Longer
If you’d like more coverage or prefer a crop-top-to-tank-top look, you can simply continue adding moss stitch rows to the bottom band until you reach your desired length.
Maggie’s Pro Tip: The bottom band naturally fits a little more snugly than the bust section, so keep that in mind when determining the starting chain count below the bust.
Add a Decorative Edge
I personally kept my crochet halter top simple because I love a clean, minimal look. However, this design would also pair with decorative finishes like:
- A scalloped edging
- A soft ruffle
- A picot trim
These details can give the crochet halter top a more romantic or boho-inspired style.
Play with Colorwork
The moss stitch creates a beautiful texture for stripes and color transitions. For a more defined striped effect, you can try changing colors every two rows instead of every three rows, which is what I used for my sample.
Maggie’s Pro Tip: Thinner stripes tend to highlight the texture of the moss stitch even more, especially when using high-contrast colors.
Crochet Halter Top Pattern FAQ
What crochet stitch is used for this halter top?
This top is primarily made using the moss stitch in a triangular pattern, creating a lightweight fabric with a beautiful geometric texture. I chose this stitch because it works especially well for striped colorwork while still keeping the fabric breathable and comfortable for summer wear.
Can I make this crochet halter top longer?
Absolutely. One of the things I love most about this design is how customizable it is. You can easily add more rows to the bottom band to create additional length and coverage.
Maggie’s Pro Tip: Keep in mind that the bottom band naturally fits a little more snugly than the bust area, so it’s a good idea to account for that while measuring your starting chains.
What type of yarn works best for this pattern?
I recommend worsted-weight cotton yarn for the best stitch definition, breathability, and structure. I used Lion Brand 24/7 Cotton for my sample because the mercerized cotton gives the moss stitch a crisp, polished look.
Non-mercerized cotton yarns can also work beautifully if you prefer a softer, more drapey finish.
Can I use acrylic yarn instead of cotton?
You can, but the finished top may feel warmer and have a different drape than the original sample. Cotton yarn is usually my preferred choice for summer garments because it’s lightweight, breathable, and holds its shape well.
Is the pattern adjustable for different body sizes?
Yes. This crochet halter top is designed as a made-to-measure garment, which means you customize the fit as you crochet by taking your own measurements and adding rows where needed.
Can I add an edging?
Definitely. I kept my crochet halter top sample simple and minimal, but this design also looks beautiful with scalloped edging, ruffles, picot trims, or even playful color combinations.
How do I make the straps adjustable?
Instead of sewing the straps permanently, you can thread them through stitches along the back band and tie them into adjustable knots. This makes the fit easier to customize and can also make the top easier to put on and remove. Or you can simply tie them around your neck.
Can I make this top with multiple colors?
Yes — and I highly recommend it! The moss stitch creates gorgeous stripes and color transitions. For more defined stripes, you can try changing colors every two rows instead of every three rows.
Ready to Wear!
And that’s it — your crochet halter top is ready to wear! I absolutely loved designing this piece and experimenting with the bold stripes and textured moss stitch, and I hope you enjoyed making it just as much.
One of my favorite things about this pattern is how easy it is to customize, allowing you to create a fit and style that feels uniquely yours. Whether you pair it with jeans for a casual summer outfit or wear it at the beach on sunny days, I hope this crochet top becomes a fun addition to your warm-weather wardrobe.
More Summer Clothing Patterns
- Crochet Hexagon Dress
- Stunning Crochet Maxi Dress
- Lace Summer Top Pattern
- Beach Conver-Up Pattern Roundup
- Drop-Shoulder Tee
- Daisy Girl Sundress
- Crochet Bralette Pattern Roundup
- More Summer Top Patterns
Pin, Share, and Comment
- Comment on this post: I always read comments and reply to all questions posted on the blog, and I love it when you take the time to stop by and say hello.
- Have you made this? Share your project if you make this or any of my other patterns, tag me on Instagram or Facebook, or use the hashtag #zamiguzmakers. I love seeing what you make.
- Pinit now: Are you not ready to make it yet? You can use the above image to pin it to your crochet boards or follow me on Pinterest for more.
- Join The Makers community: Join my community group on Facebook and be the first to know about pattern releases and other crochet-related content.
Would you rather bookmark this blog post for later? You can create a free Grow.me account and use the “heart” on the left-hand side of your screen to save it. It’s easy to have all your internet favorites in one place.