How to Make a Twisted Fringe for Crochet Projects
After designing several blanket patterns, this is the first time I’ve added a twisted fringe—and I have to say, I’m completely obsessed!
I’ll admit, I expected it to be a bit tedious at first (it does take a little time and patience), but once I got started, I couldn’t stop. The result is so elegant and fun that now I’m planning to use it in all my future projects.
If you want to give your crochet or knit blankets, scarves, or wraps a polished and sophisticated finish, this easy twisted fringe technique is the perfect detail to try.
And here’s a little teaser… my next blanket pattern featuring this gorgeous fringe is coming soon!

What You’ll Need:
- Yarn – in my experience, acrylic and cotton, or cotton blend, work better for a project you want to add a twisted fringe. The picture swatch and blanket were created with bulky (5) yarn.
- A Crochet hook in a size suitable for the yarn and project you’re working on – I used a 6 mm (E) hook in this tutorial.
- Scissors and a yarn needle.
Watch the Video Tutorial
Before you scroll to the written instructions, you may also like these other tutorials: How to Crochet a Non-Strech Strap, How to Create an Invisible Finish in Crochet, and How to Crochet a Perfect Circle. All these tutorials have step-by-step photos and are easy to follow.
Twisted Fringe Written Instructions (US terms)
For the purpose of better view and showing the texture, I used a contrasting color of yarn on this tutorial. Also, if you’re a visual learner, you may find it easier to follow along with the YouTube video above.
Total Time: 30 minutes
-
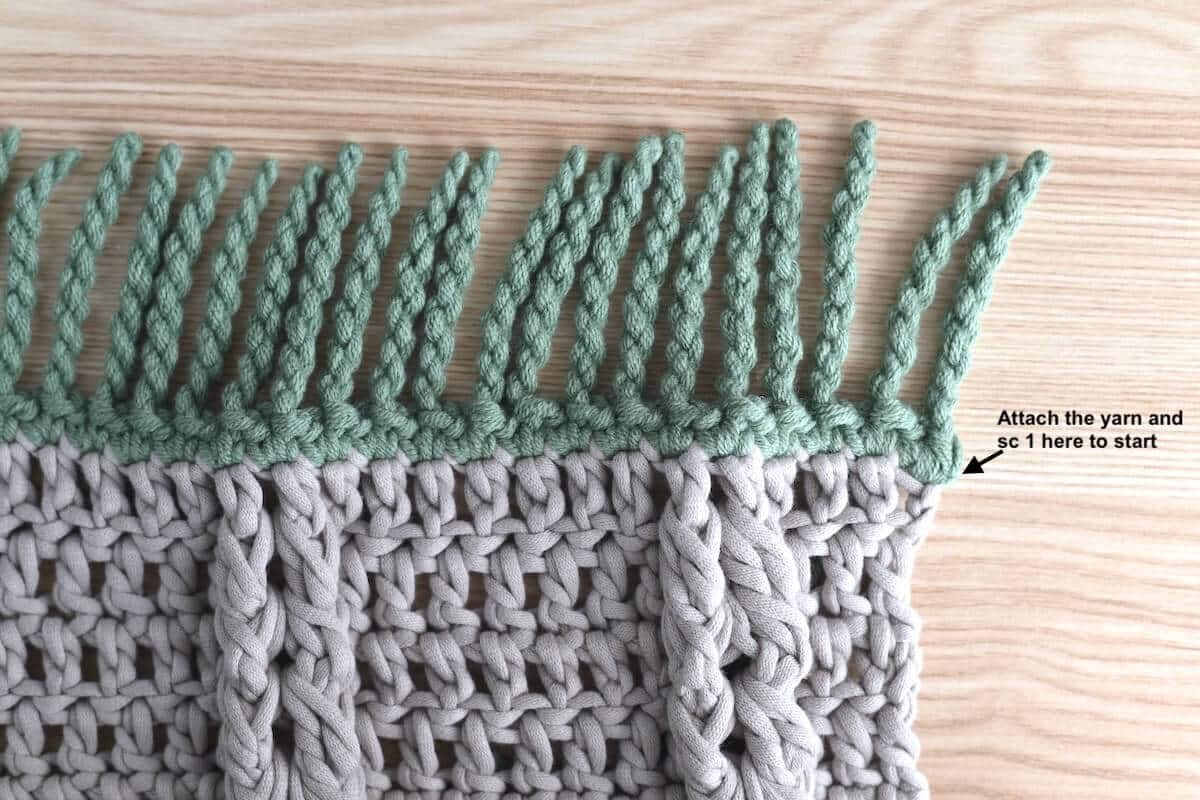
Attach the yarn to start

Attach the yarn to the first stitch along one edge of the blanket, where you want the fringe, and do a single crochet stitch.
Note: I photographed my swatch after I was half done with the fringe, but it works the same way with every stitch across.
-
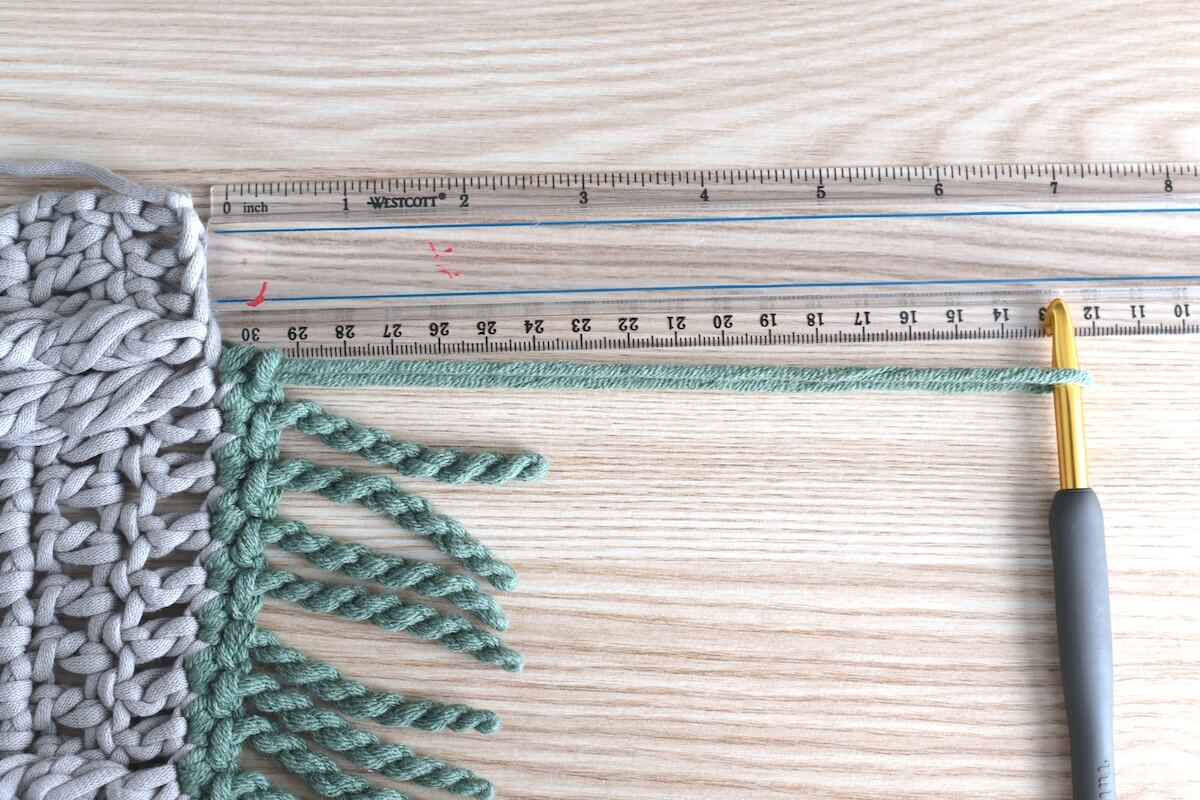
Determine the fringe length
After creating the single crochet stitch, decide how long you want the fringe to be and pull up a loop twice that length – a ruler will be useful here!
-
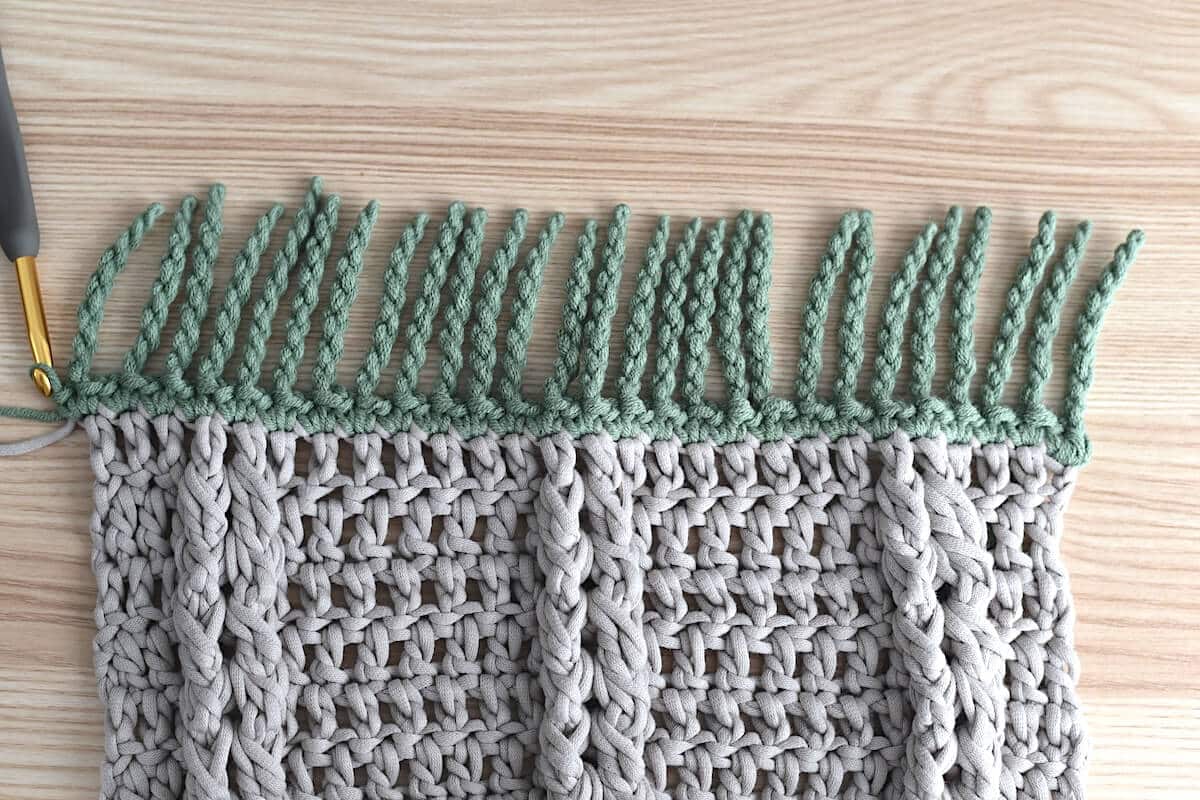
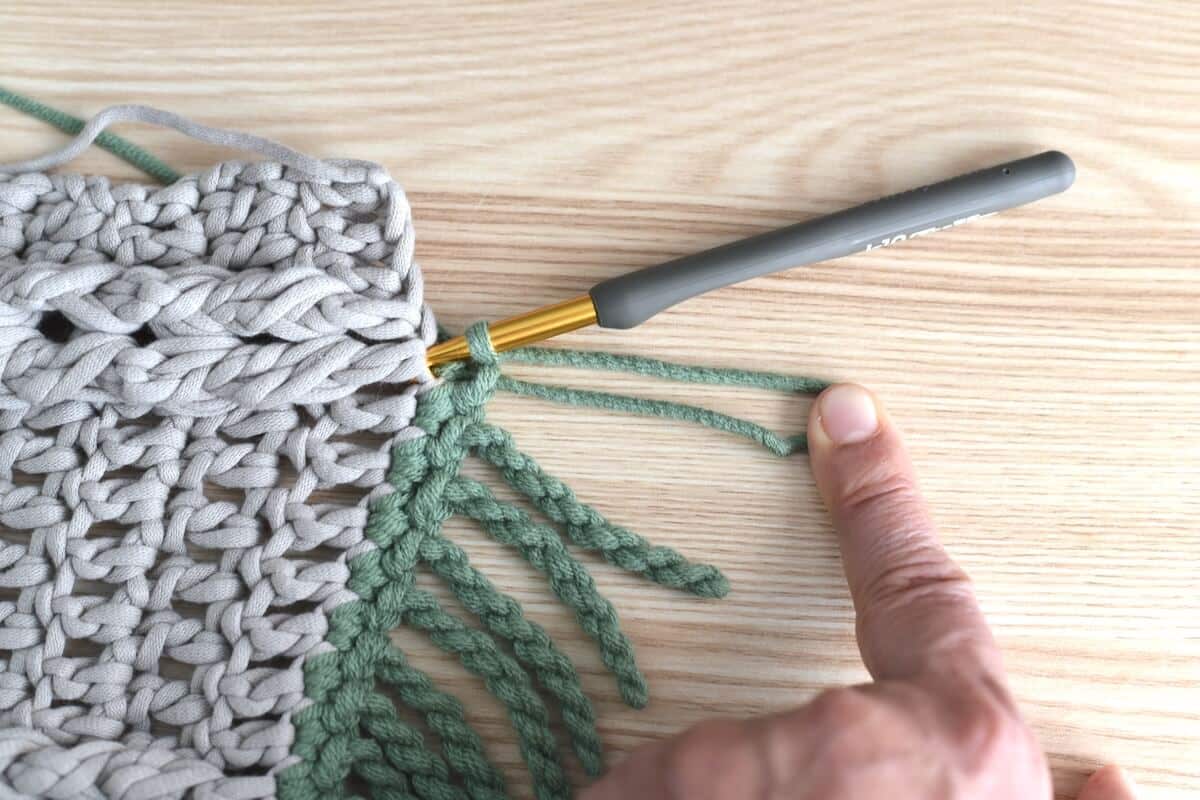
Twist, twist, twist!
Twist the loop as many times as needed to create the first fringe (about 25 to 30 twists). Once released, it will naturally form a cord-like torsion.
Tip: I found it easier to hold the loop with my pinky finger while yarning over to crochet the next single crochet stitch. It takes a little patience to find the best way to create the twist, but it works.
-
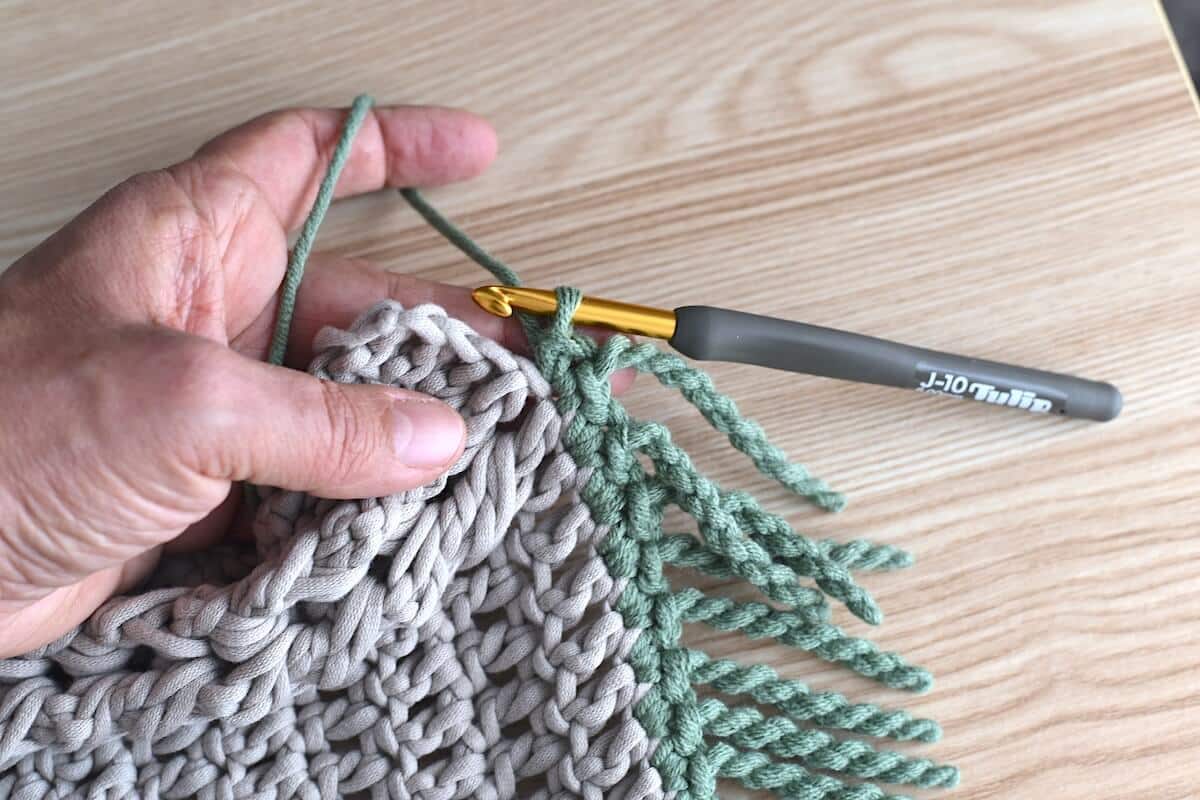
Single crochet again
Insert the hook into the same stitch and single crochet again.
From here, all you need is to repeat the process with the remaining stitches, then cut the yarn, and secure it at the end of the row. Do the same with the other end of your project.
Estimated Cost: 5.00 USD
Supply:
- Yarn
Tools:
- Crochet Hook
Materials: Scissors, yarn needle
That’s it! Easy-peasy, isn’t it? I hope you enjoyed learning how to make this twisted fringe and will make it for your next crochet blanket.
Twisted Fringe FAQ
Can this fringe be made in any length?
Yes! You can create your twisted fringe as short or as long as you like. Just keep in mind that the longer the strands, the more dramatic and elegant your fringe will appear. However, longer strands will also take more time to twist. I recommend pulling the loops to a length that is more than twice the desired finished length, as twisting will shorten them slightly.
What type of yarn works best for a twisted fringe?
This technique works well with most yarn types, but non-chenille yarns provide the cleanest and most defined twists. Cotton, acrylic, or blended yarns hold their shape well, while wool or textured yarns create a softer, more relaxed look.
Can I add a twisted fringe to both crochet and knit projects?
Absolutely! Twisted fringe is a versatile finishing technique that works beautifully for crochet blankets, knitted scarves, shawls, wraps, or throws. You can even use it to refresh older handmade pieces that need a little upgrade.
Is making a twisted fringe time-consuming?
It does require some patience, especially for larger projects, but the results are worth the effort! Once you get the hang of it, it becomes enjoyable to work on, and the polished finish will make your project look professionally done.
How do I ensure all the fringes are even?
I use a ruler to measure them roughly, but after working on it for a while, you’ll be able to estimate the lengths by eye as you go.
Can I mix yarn colors for the fringe?
Definitely! Mixing two or more colors adds visual interest and helps tie together the shades in your project. Consider using a contrasting hue of a thinner yarn for a bold, modern touch.
More Crochet Tutorials


Pin, Share, and Comment
- Comment on this post: I always read comments and reply to all questions posted on the blog, and I love it when you take the time to stop by and say hello.
- Have you made this? Share your project if you make this or any of my other patterns, tag me on Instagram or Facebook, or use the hashtag #zamiguzmakers. I love seeing what you make.
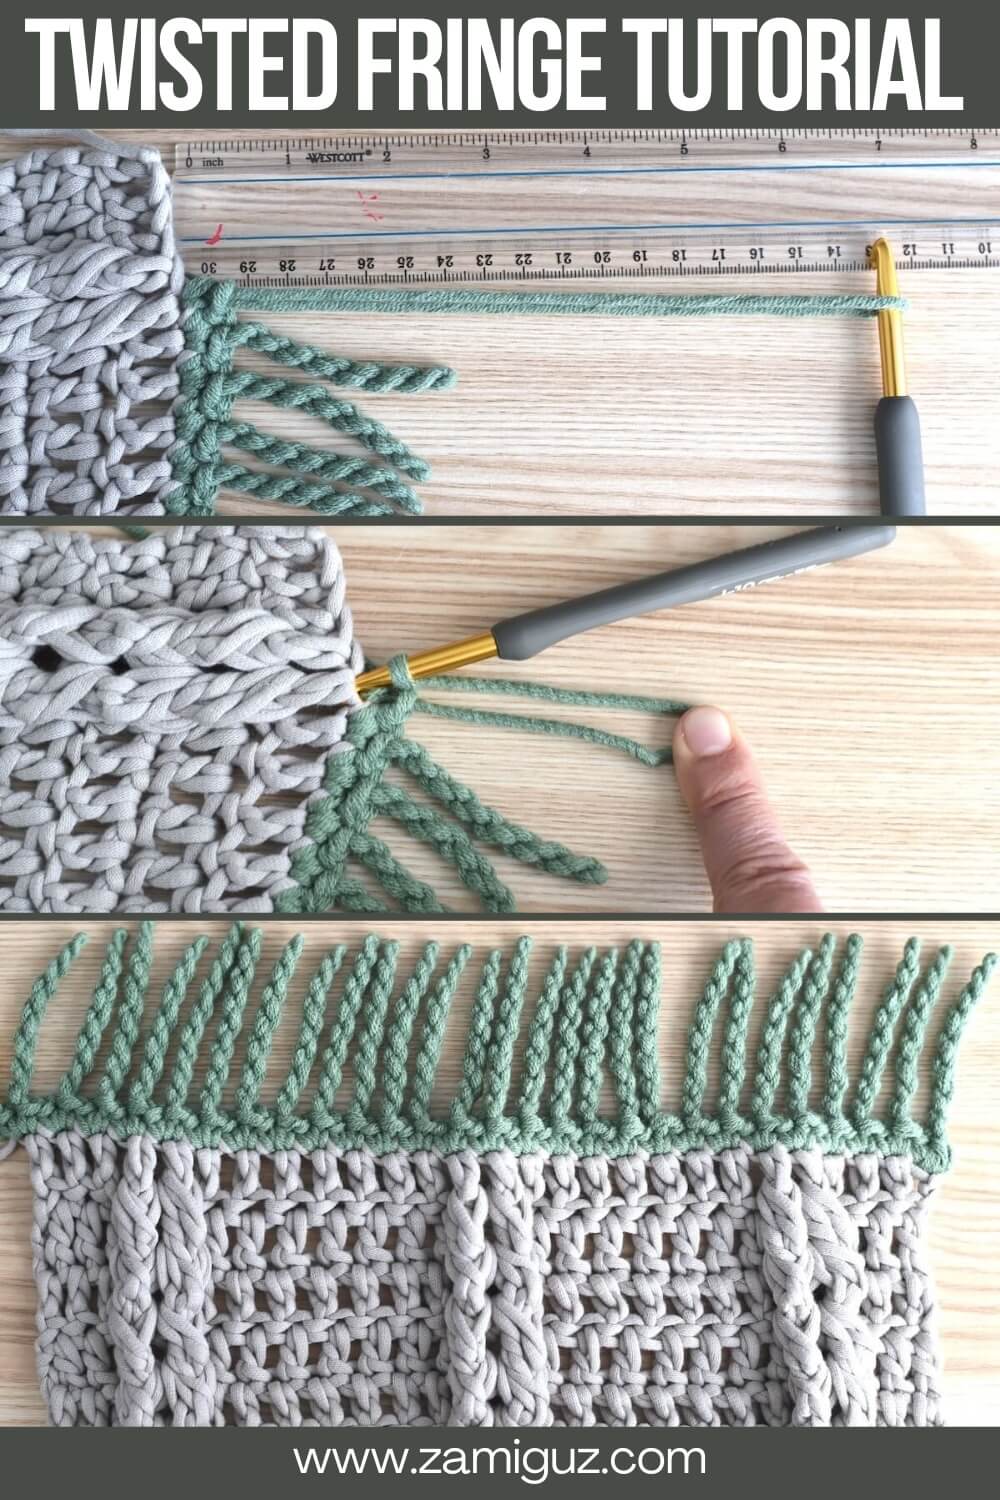
- Pin it now: Are you not ready to make it yet? You can use the above image to pin it to your crochet boards or follow me on Pinterest for more.
- Join The Makers community: Join my community group on Facebook and be the first to know about pattern releases and other crochet-related content.
Would you rather bookmark this blog post for later? You can create a free Grow.me account and use the “heart” on the left-hand side of your screen to save it. It’s easy to have your internet favorites in one place.