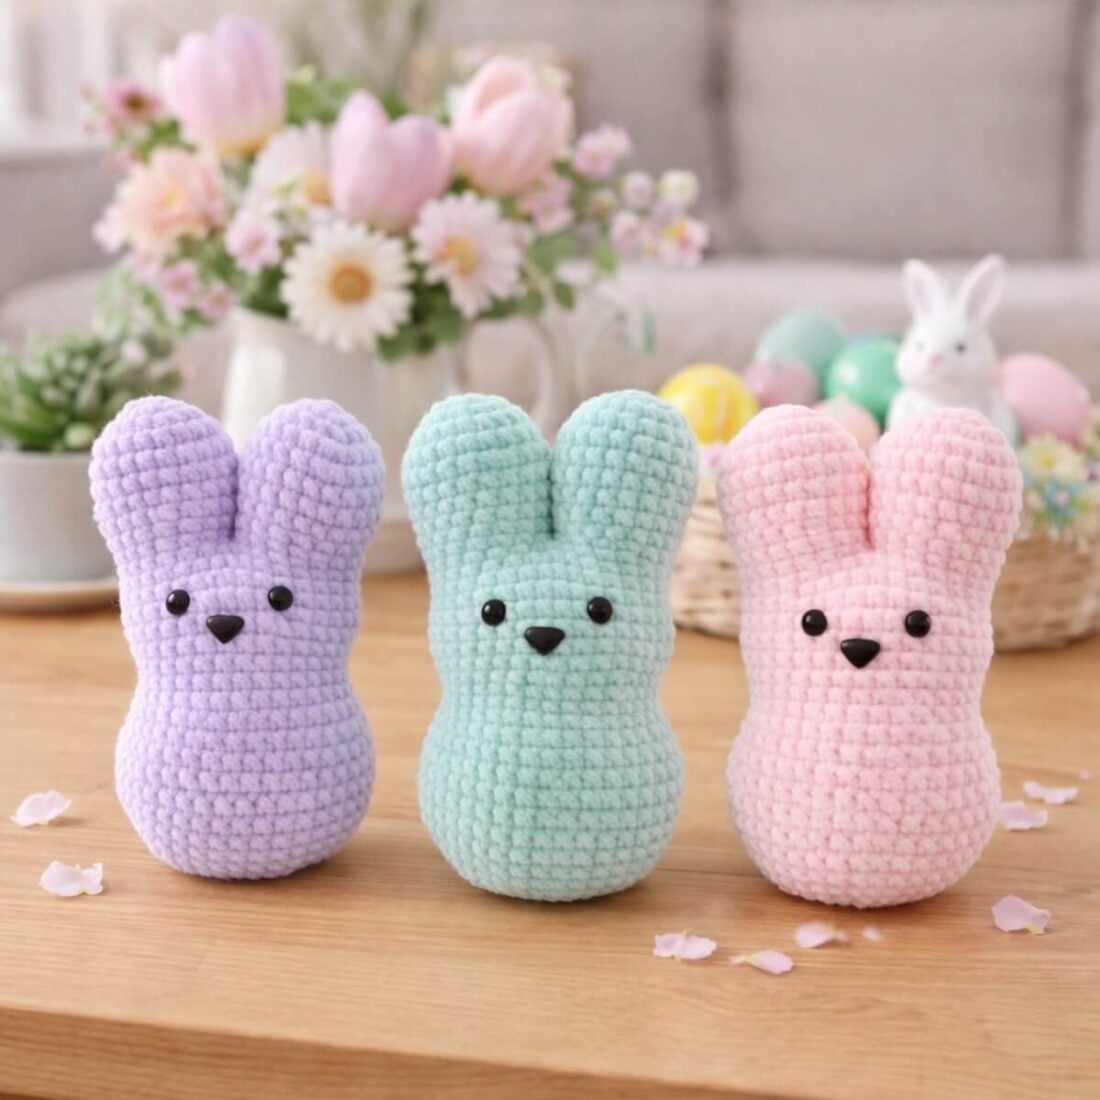
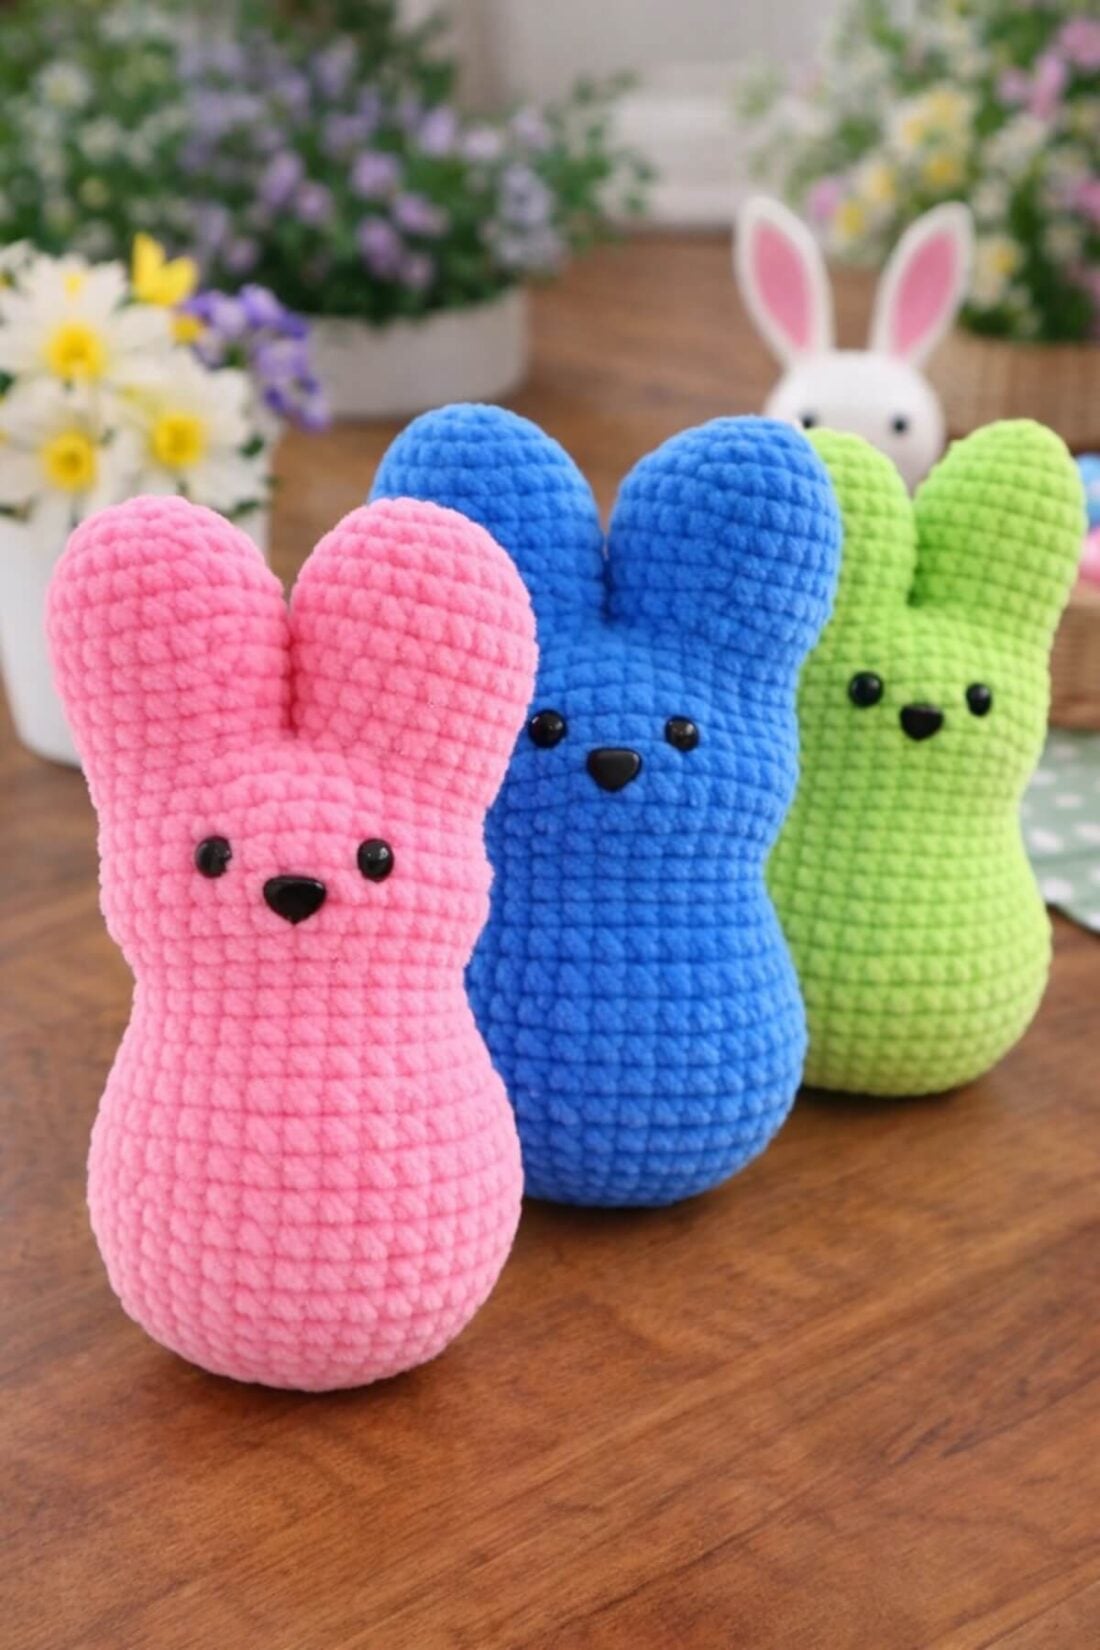
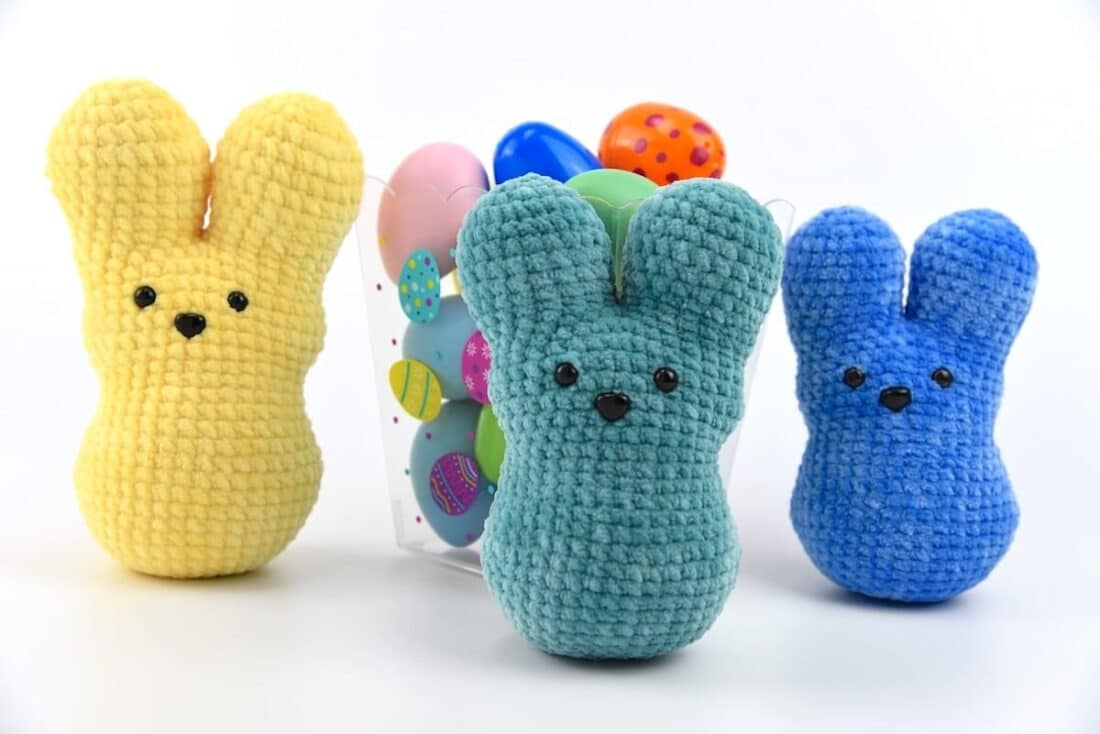
Marshmallow chicks might be the classic Easter treat, but I’ve always had a soft spot for the bunny version — especially when they’re handmade! 🐰✨ That’s why I couldn’t resist turning these sweet springtime favorites into plushy, huggable Amigurumi. With this crochet peep bunny pattern, you’ll create an irresistibly soft, big-eared bunny that looks just like the marshmallow version — only cuter (and calorie-free!).
This website is reader-supported and contains affiliate links. As an Amazon Associate, I earn from qualifying purchases. Find my affiliate disclosure here.
These bunnies are perfect as Easter basket stuffers, springtime décor, or cuddly toys for the little ones in your life. And the best part? This is a no-sew pattern — everything is worked in one piece, making it fast, fuss-free, and totally beginner-friendly.
You can whip them up in any yarn weight or color, so go ahead and make a whole collection of these fluffy friends — bright pastels, bold primaries, or even sparkly yarns if you’re feeling festive. However you make them, they’re bound to bring a smile!
Purchase a PDF Download
- Inexpensive
- Ad-free
- Formated and Print-friendly
If you like, you can pair these peeps with an Easter basket, or my Easter eggs? You can get the pattern for the classic Easter basket pattern here and the adorable crochet Easter eggs here. Both are also free here on the blog.


Crochet Peep Pattern
This pattern used standard US terminology.
Skill level: Intermediate.
These peep bunnies are crocheted from the top of the ears down to the body in one piece. And the best part? There’s zero sewing required!
You’ll need basic knowledge of the Amigurumi technique, which is crocheted in a continuous spiral with single crochet (sc) stitches. Meaning, you won’t join the end of each round with a slip stitch, unless if/where otherwise instructed.
What You’ll Need:
- 3.5mm (US E) hook
- Scissors
- Tapestry needle
- 2 stitch markers
- Stuffing tool, like a craft dowel
- A pair of 8mm safety eyes
- One 9 mm safety triangle nose
- Stuffing fiber like fiberfill
Yarn Specifics:
Yarn option 1: Bulky Yarn (#5) Premier Parfait Chenille, 100% Polyester. The amount for 1 peep bunny was approximately 1.01 oz (29 g), 56 yds (51 m). And the color was blue.
Yarn option 2: Super Bulky (#6) Baby Snuggle by Hobbii, 100% Polyester. The amount for 1 peep bunny was approximately 1.91 oz (54 g), 72 yds (66 m). And the colors were yellow (07) and green (06).

Pattern notes:
- If this peep bunny is for a young child, please refrain from using safety eyes, as they could come off if pulled.
- The hook size recommended in this pattern is small enough to keep the tension tight without hurting your hands. But if you have a loose tension, you may need to use a smaller hook.
- Add stuffing fiber as you go (I started stuffing at round 33). Make sure you stuff it firmly, but do not overstuff.
- Add the fiber separately in each section. This will help to fill it well, especially the spots with increases. First, stuff the ears, one at a time. Then the head and cheeks. And lastly, the body.
While you’re scrolling, you may like to take a look at my latest content:


Finished Project Size:
You can achieve different sizes with this crochet peep pattern by using different yarn weights. The peep will be 6” (16 cm) tall if made with Bulky Yarn (#5) Premier Parfait Chenille, and 7.25” (18 cm) tall if made with Super Bulky (#6) Baby Snuggle by Hobbii.

Stitch tension:
A gauge swatch is not crucial for this project, but if you want a size reference, it will help you to compare your stitch tension with mine. If you are using the same yarn I did, you can get an idea of whether your crochet peep bunny will be the same size as mine.
A swatch of 6 rounds in sc, the diameter is 2.75” (7 cm) with Super Bulky (#6) Baby Snuggle, and 2.25” (5.7 cm) with Bulky Yarn (#5) Premier Parfait.
Gauge swatch pattern:
- Ch 2
- Rnd1: sc 6 in second chain from hook
- Rnd2: (inc) 6 times [12]
- Rnd3: (inc, sc in next st) 6 times [18]
- Rnd4: (inc, sc in next 2 sts) 6 times [24]
- Rnd5: (inc, sc in next 3 sts) 6 times [30]
- Rnd6: (inc, sc in next 4 sts) 6 times [36]


Stitch Abbreviations (US terms)
Get a FREE Abbreviations & Terms Guide (PDF download).
- approx. approximately
- ch(s) chain(s)
- inc increase
- FO Fasten Off
- Rnd Round
- sc single crochet
- sl st slip stitch
- sk skip
- st(s) stitch(es)
- ( ) repeat instructions within parenthesis as many times as directed
- * repeat instructions after asterisks as directed
- [ ] stitch count in a round
Crochet Peep Pattern Instructions

Here is the crochet peep pattern. I’ve added some step by step pictures to make it even easier for you to follow along. Before you begin, take a look thse helpful resources: How to Do the Invisible Finish in Crochet, How to Create the Crochet Invisible Decrease, How to Create a Magic Circle, and How to Crochet a Perfect Circle.
Total Time: 1 hour
-
Crochet the ears (make 2)

Ch 2
Rnd1: sc 6 in 2nd ch from hook
Rnd2: (inc) 6 times [12]
Rnd3: (inc, sc in next st) 6 times [18]
Rnd4: (inc, sc in next 2 sts) 6 times [24]
Rnd5: (inc, sc in next 11 sts) 2 times [26]
Rnd6: sc around [26]
Rnd7: (dec, sc in next 11 sts) 2 times [24]
Rnd8: (dec, sc in next 10 sts) 2 times [22]
Rnd9: (dec, sc in next 9 sts) 2 times [20]
Rnd10: (dec, sc in next 8 sts) 2 times [18]
Rnd11: sc around [18]
FO. Cut the yarn (for the first ear only).When you are done with rnd 11 in the second ear, do not cut the yarn. Continue to rnd 12 (see below), where you will be joining it to the first ear.
Note: Mark the last st in round 11 in the first ear with a second st marker. The reason is because you will have to count the sts in next round to join the ears. -
Join the ears in round 12
Rnd12: sc in next 9 sts in the 2nd ear, keep the hook inserted in that 9th st normally. Go ahead, and insert the hook in the 9th st of round 11 in the 1st ear and do a sc to join them, sc in next 17 sts of the 1st ear, remove the second st marker as you go, sc in next 9 sts of the 2nd ear [36]
Now, that you have joined the ears, you are going to continue crocheting around both in big rounds to start the head. And then, go down to the body.
-
Crochet around both ears in big rounds
Rnd13: (dec, sc in next 16 sts) 2 times [34]
Rnd14: sc around [34]Here, you may notice a small hole between the two ears, where you joined them. To fix it, get a strand of the same yarn, and thread the tapestry needle. Then, sew it from the inside and close that gap (two or three stitches may be enough).
Rnd15: (inc, sc in next 16 sts) 2 times [36]
Rnd16: (inc, sc in next 17 sts) 2 times [38]
Rnd17: sc around [38]
Rnd18: (dec, sc in next 17 sts) 2 times [36]
Rnd19: (dec, sc in next 16 sts) 2 times [34]
Rnd20: (dec, sc in next 15 sts) 2 times [32] -
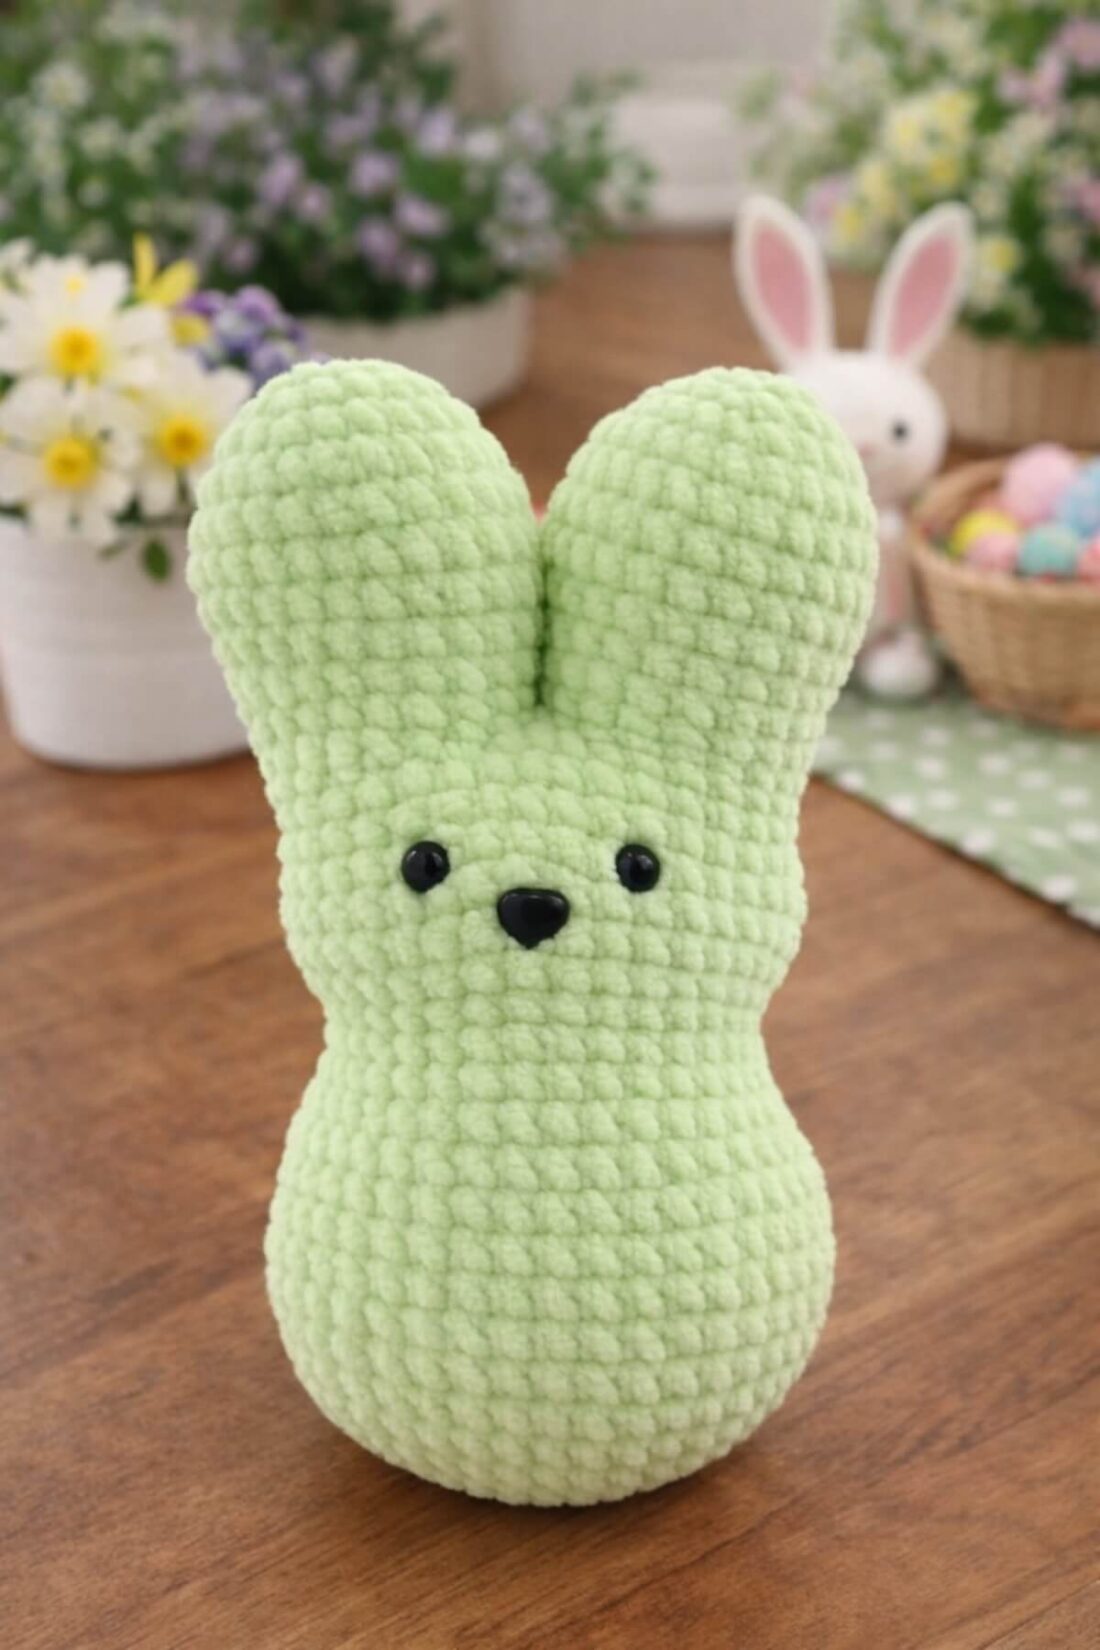
Place the safety eyes and nose
Now, it’s a good time to place the eyes and nose in the crochet peep pattern. First, pick one side to be the face, it doesn’t matter which because they are identical. Next, place the eyes between rounds 16 and 17, 6 sts apart.
Use the gap between the two ears in the crochet peep pattern as a guide to center them correctly. And lastly, place the nose, two rounds below the eyes, centering it between them. Before you attach the washers, recheck the placement to see if it is correct.
-
Crochet the waist and then torso
Rnd21: sc around [32]
Rnd22: (inc, sc in next 15 sts) 2 times [34]
Rnd23: (inc, sc in next 16 sts) 2 times [36]
Rnd24: sc around [36]
Note: From here, we are pushing the increases a little further in each round. The reason for that is because we want the increases to be on the sides of the crochet peep pattern. By doing that, we are giving it a little bump on each side and shaping it evenly.
Rnd25 sc, inc, sc in next 17 sts, inc, sc in next 16 sts [38]
Rnd26: sc, inc, sc in next 18 sts, inc, sc in next 17 sts [40]
Rnd27: sc in next 2 sts, inc, sc in next 19 sts, inc, sc in next 17 sts [42]
Rnd28: sc around [42]
Rnd29: sc in next 2 sts, dec, sc in next 19 sts, dec, sc in next 17 sts [40]
Rnd30: sc, dec, sc in next 18 sts, dec, sc in next 17 sts [38]
Rnd31: sc, dec, sc in next 17 sts, dec, sc in next 16 sts [36]
Rnd32: sc, dec, sc in next 16 sts, dec, sc in next 15 sts [34] -
Add stuffing fiber
This is a good place where you can start stuffing and add a little more fibber as you finish it, if needed. Get two identical generous chunks of fiber and add to the ears, one at a time. Then, get another one and add to the head.
This crochet peep pattern was designed to have curves and shapes. Make sure you shape the sides of the cheeks and of the belly well, using your fingers or a stuffing tool. Please check that all spots are filled in.
Quick tip: when you need to add more fiber to a stuffed animal, like this crochet peep pattern, “carve” a hole with your fingers in the center of the already filled in fiber and add more into that spot. That way, you don’t create bumps that will cause your toy to be uneven on the outside.
Rnd33: (dec, sc in next 15 sts) 2 times [32]
Rnd34: (dec, sc in next 14 sts) 2 times [30]
Rnd35: (dec, sc in next 3 sts) 6 times [24] -
Crochet rounds 36-38 and finish off
Rnd36: (dec, sc in next 2 sts) 6 times [18]
Rnd37: (dec, sc in next st) 6 times [12]
Rnd38: dec 6 times [6]
Cut the yarn and leave a tail about 6” long, pull it through the last stitch so it doesn’t unravel. Thread the tapestry needle with the leftover tail and close it off.


Estimated Cost: 10.00 USD
Supply:
- Bulky (#5) yarn
- Super Bulky (#6) yarn
Tools:
- 3.5mm (US E) hook
- Scissors
- Yarn needle
- 2 stitch markers
- Stuffing tool like a craft dowel
Materials: 1 pair of 8mm safety eyes 1 9mm safety triangle nose Stuffing fiber like fiberfill
Your peep bunny is done. Faten off to segure it, then weave in the leftover tails.
Keep scrolling if you need more details, tips and tricks to crochet these peep bunnies.
Tips for crocheting Amigurumi with chenille yarn
If you have never used chenille yarn before, it can be tricky at first. But once you get a hang of it, you won’t want any other yarn for your small Amigurumi projects. By the way, this crochet peep pattern is the perfect small project to get you started with chenille yarn.
Here are a few tips on how to get started with chenille yarn.
1. Feel the stitches instead of trying to see them
Crocheting with chenille yarn goes better when you learn how to “feel” the stiches more than when you try to “see” them.
So, practice on a small swatch, that way you can get familiar with the “feel” of it. You will know where your hook slides in better, and that’s where you next stich should go.
2. Use lighter colored yarns
If you are just starting out with fuzzy yarn, the light-colored ones will work better, as dark yarns make it harder to see. Also, make sure you have plenty of light so you can see it well.
3. Avoid frogging too much
Chenille yarn will peel easily if you unravel your project multiple times. Maybe, frogging once will be fine, but I would say do not frog at all, if possible. Again, practice will be your best friend. By the way, I had to put in the trash a generous amount of my Hobbii yarn when I was creating this crochet peep pattern.
4. Count as you go and use stitch markers
Counting your stitches as you go works better than when you try to count them after finishing a round. So, if someone talks to you while you are counting, count louder so they will leave you alone (jokes aside, but this works wonders!)
Stitch markers will be your second-best friends. Usually, I place one stitch marker in the first stitch of a round, moving it up as I go. But when I first started, I even used multiple stitch markers, in different colors, to mark the increase and decrease sections in a round.
5. Practice a little more and have fun
With Amigurumi, you do multiple stitch increases and decreases in a round. Those increases are usually two stitches in the next stitch (or 2sctog for a decrease), which could be even trickier to see with chenille yarn.
Therefore, they are easy to accidentally skip. Again, practice and count as you go. Practice, practice, practice… did I say that again? Yes, practice will make perfect!
And here is the most important advice: have fun! Even if you have to frog it while you learn, that’s okay. You can always start over.
More Patterns You’ll Love
- Crochet Strawberry Pattern
- No-sew Amigurumi Ghost Pattern
- Easy & Cute Amigurumi Dolls
- Amigurumi Axolotl Patterns
- Cute Crochet Ducks
- Adorable Crochet Gnomes
Comment, Pin, and Share
Join The Makers community: Join my community group on Facebook and be the first to know about pattern releases and other crochet-related content.
Comment on this post: I always read comments and reply to all questions posted on the blog, and I love it when you stop by to say hello.
Share your project: if you make this or any of my other patterns, tag me on Instagram or Facebook, or use the hashtag #zamiguzmakers. I love seeing what you make.
Pin it now: Are you not ready to make it yet? You can use the above image to Pin it to your crochet boards or follow me on Pinterest for more.
Would you rather bookmark this blog post for later? You can create a free Grow.me account and use the “heart” on the left-hand side of your screen to save it. It’s easy to have your internet favorites in one place.


This is an awesome pattern. The instructing are clear and easy to follow. I have been making amigurumi for a couple years and never learned your to for stuffing. Thank you!!
Hi Michele. I’m so glad the pattern met your expectations, and that you learned something new. Thank you very much for taking the time to leave a comment.
Maggie
I’ve tried other Peep patterns but I really love how our pattern came out. The Peep shape really looks like a Marshmallow Peep.❤️
Hi Sandra! I’m so glad that you enjoyed this peep pattern. Thank you very much for using my pattern and for taking the time to leave a comment. <3
This would be cute if it the peep Easter bunny had a tail too!
Hi Virginia. I agree, a small pompom will look cute as a tail.
Thank you for checking out this pattern and for the tip.
Maggie
These are awesome wish there was someway to donate to your site. I love your work
Thank you very much, if you want to support my small business, you can purchase an ad free PDF download with the pattern in my Etsy and Ravelry shops!