Velvet pumpkins add a cozy and elegant touch to fall decor. With this free crochet pumpkin pattern, you can make soft, dimensional pumpkins in three sizes using bulky velvet yarn.

This website is reader-supported and contains affiliate links. As an Amazon Associate, I earn from qualifying purchases. Find my affiliate disclosure here.
I experimented with this pattern using regular yarn, but it did not give me the fancy look I was looking for. So I decided to try Bernat Velvet for my samples, and I love how they turned out. Velvet yarn’s plush texture creates a beautiful, store-quality finish.
The pumpkin body is worked as a circle in continuous single crochet rounds with many increases to intentionally create a wavy piece. The outside edge is then gathered, stuffed, and shaped into 12 rounded sections.
Display your finished pumpkins on a mantel, shelf, entryway table, or fall centerpiece. Make one statement pumpkin or combine several sizes and colors to create your own handmade pumpkin patch.
More Crochet for Fall


Materials
Yarn Specifics
I used Yarnspirations Bernat Velvet yarn for the pictured pumpkins. Its soft, plush texture gives the finished pumpkins a smooth and luxurious appearance.
Approximate yarn amounts:
- Small: 1.78 oz (50 g) or 54 yds (50 m); Mulled Rose
- Medium: 2.55 oz (72 g) or 77 yds (70 m); Ivory
- Large: 3.56 oz (101 g) or 107 yds (98 m); Smoke Blue
Your yarn usage may vary depending on your tension and how firmly you stuff the pumpkin.
Pattern Abbreviations
Need help with abbreviations for this crochet pumpkin pattern? My Free Guide to Crochet Abbreviations and Terms is a convenient reference to keep nearby while following this or any other crochet pattern.
Stitch Tension
Gauge is not essential for this decorative project, but checking your tension can help you achieve pumpkin sizes similar to mine.
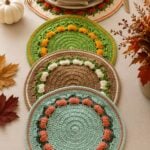
Using a 3.75 mm hook and the recommended yarn, the six-round gauge circle measures approximately 2 ¾ inches (7 cm) in diameter.
Gauge Swatch:
If your swatch is smaller than mine, try a larger hook. If it is larger, try a smaller hook.
Finished Pumpkin Sizes
The finished circumference will vary slightly depending on your tension and stuffing.
- Small: Approximately 13 inches (33 cm)
- Medium: Approximately 15 inches (38 cm)
- Large: Approximately 18 inches (46 cm)

Pattern Notes
- This easy-level crochet pumpkin pattern uses standard US crochet terminology.
- The circle will ruffle as it grows. This is intentional and creates the pumpkin’s indentations.
- Use strong sewing or upholstery thread for shaping. For the large pumpkin, cut approximately 90 in (228 cm). The thread color does not matter because it will be hidden.
- Use a small hook to create tight stitches and prevent the fiberfill from showing. Although the yarn label recommends a 6.5 mm hook, I used a 3.75 mm (US F) hook. A 4 mm (US G) hook or smaller is recommended.
- To simplify counting, divide each round into 12 increase sections. For example, Rnd 5 has 12 sections of five stitches each: one increase and three single crochets. Count to five 12 times instead of counting all 60 stitches.

Purchase a PDF Download
- Inexpensive
- Ad-free
- Formatted and Print-friendly
Crochet Pumpkin Instructions
Before beginning, review the materials, abbreviations, gauge, and pattern notes above.

Use this free crochet pumpkin pattern to make velvet pumpkins that add a modern, cozy touch touch to your fall décor.
Total Time: 3 hours
-
Crochet the Pumpkin Body

The pumpkin body is worked as a flat circle in continuous rounds. Do not join with a slip stitch or turn at the end of each round.
Place a stitch marker in the first stitch and move it up as you complete each round.
Rnd 1: Ch 2, work 12 sc in the second ch from the hook. [12]
Rnd 2: Inc in each st around. [24]
Rnd 3: (Inc, sc in the next st) 12 times. [36]
Rnd 4: (Inc, sc in each of the next 2 sts) 12 times. [48]
Rnd 5: (Inc, sc in each of the next 3 sts) 12 times. [60]
Rnd 6: (Inc, sc in each of the next 4 sts) 12 times. [72]
Rnd 7: (Inc, sc in each of the next 5 sts) 12 times. [84]
Rnd 8: (Inc, sc in each of the next 6 sts) 12 times. [96]
Rnd 9: (Inc, sc in each of the next 7 sts) 12 times. [108]
Rnd 10: (Inc, sc in each of the next 8 sts) 12 times. [120]
Rnd 11: (Inc, sc in each of the next 9 sts) 12 times. [132]
Rnd 12: (Inc, sc in each of the next 10 sts) 12 times. [144]
Rnd 13: (Inc, sc in each of the next 11 sts) 12 times. [156]
Rnd 14: (Inc, sc in each of the next 12 sts) 12 times. [168]For the small pumpkin: Stop after Rnd 14. FO and cut the yarn.
Rnd 15: (Inc, sc in each of the next 13 sts) 12 times. [180]
Rnd 16: (Inc, sc in each of the next 14 sts) 12 times. [192]
Rnd 17: (Inc, sc in each of the next 15 sts) 12 times. [204]For the medium pumpkin: Stop after Rnd 17. FO and cut the yarn.
Rnd 18: (Inc, sc in each of the next 16 sts) 12 times. [216]
Rnd 19: (Inc, sc in each of the next 17 sts) 12 times. [228]
Rnd 20: (Inc, sc in each of the next 18 sts) 12 times. [240]
For the large pumpkin: FO after Rnd 20 and cut the yarn. -
Gather the Outside Edge
Cut a long piece of strong crochet or upholstery thread. Fold it in half and place a stitch marker through the folded end to keep the strands together.
Lay the crocheted circle on a flat surface with the wrong side facing up.
The final round has 12 evenly spaced increases. These increase points may look slightly raised or pointed along the edge.Thread both cut ends through a bent-tip yarn needle. Beginning at one increase point, insert the needle through both loops of one stitch, working from the wrong side to the right side.
Repeat around the edge, picking up one stitch at each of the 12 increase points. Gathering only these points keeps the edge from becoming too bulky and helps form the pumpkin’s rounded sections.
-
Cinch and Stuff the Pumpkin
After picking up all 12 points, insert the needle through the folded end of the thread.
Remove the stitch marker and pull the thread gently. The edge will begin to gather into 12 rounded sections.
Leave an opening in the center and fill the pumpkin with fiberfill. Use your fingers to distribute the stuffing evenly as you continue tightening the thread.
Do not overstuff the center. You will have another opportunity to add more fiberfill before closing the pumpkin completely.
-
Secure the Center
Pull the thread until the center opening is nearly closed. Fasten off securely, but do not cut the thread yet.
At this stage, the pumpkin will resemble a flower with 12 rounded “petals.”
-
Add More Stuffing and Shape the Sections
Add more fiberfill inside each rounded section as needed. Push the stuffing toward the outside edges, but keep it loose enough that you can finish closing the center.
Using the uncut thread:
1. Insert the needle through a stitch near the top edge of one rounded section.
2. Bring the needle back through the center.
3. Pull the thread firmly to draw the section inward.
4. Repeat for each remaining section.Continue shaping and tightening until the pumpkin looks evenly rounded.
-
Close the Center

For the small pumpkin, the opening may already be almost closed. The medium and large pumpkins may require another pass around the remaining opening.
Insert the needle through the edge of each remaining bump, then bring it back through the center. Pull the thread firmly after each stitch.
Repeat until the opening is completely closed. Fasten off securely, cut the thread, and weave in the end.
-
Attach the Stem
I used real pumpkin stems that I saved and dried after decorating for fall. You can also use a cinnamon stick, wooden dowel, piece of craft rope, small tree branch, or purchased artificial stem.
To attach the stem:
1. Apply a small amount of glue over the gathered center.
2. Place a small felt or fabric scrap over the glue.
3. Add another generous drop of glue on top of the fabric.
4. Press the stem firmly into place.
Allow the glue to dry completely before moving or displaying the pumpkin.FO. Cut the thread. Weave in the ends.


Estimated Cost: 10.00 USD
Supply:
- Bulky (#5) Yarnspirations Bernat velvet yarn,
- Strong Crochet tread or upholstery thread,
- Fiber fill like polyfil,
- Fabric glue (or hot glue)
Tools:
- 3.75 mm (US F) crochet hook,
- Stitch marker,
- Bent tip yarn needle,
- Scissors
Materials: Dried pumpkin stems (wood craft sticks, cinnamon sticks or leather strips are also good options for the stem), Scraps of felt or fabric, about 0.5” square or small enough to be covered by the base of the stem, if you are using dry stems.
Your velvet crochet pumpkin is ready to become part of your fall decor! Try making all three sizes in coordinating colors to create a soft and elegant centerpiece, or use leftover velvet yarn to build a colorful pumpkin patch. These handmade pumpkins can be displayed year after year, making them a beautiful and reusable addition to your seasonal decorations.
Happy crocheting! 🧶💕
Pin, Share, and Comment
- Comment on this post: I always read comments and reply to all questions posted on the blog, and I love it when you take the time to stop by and say hello.
- Have you made this? Share your project if you make this or any of my other patterns, tag me on Instagram or Facebook, or use the hashtag #zamiguzmakers. I love seeing what you make.
- Pin it now: Are you not ready to make it yet? You can use the above image to pin it to your crochet boards or follow me on Pinterest for more.
- Join The Makers community: Join my community group on Facebook and be the first to know about pattern releases and other crochet-related content.
Would you rather bookmark this blog post for later? You can create a free Grow.me account and use the “heart” on the left-hand side of your screen to save it. It’s easy to have your internet favorites in one place.
More Halloween and Fall decor patterns