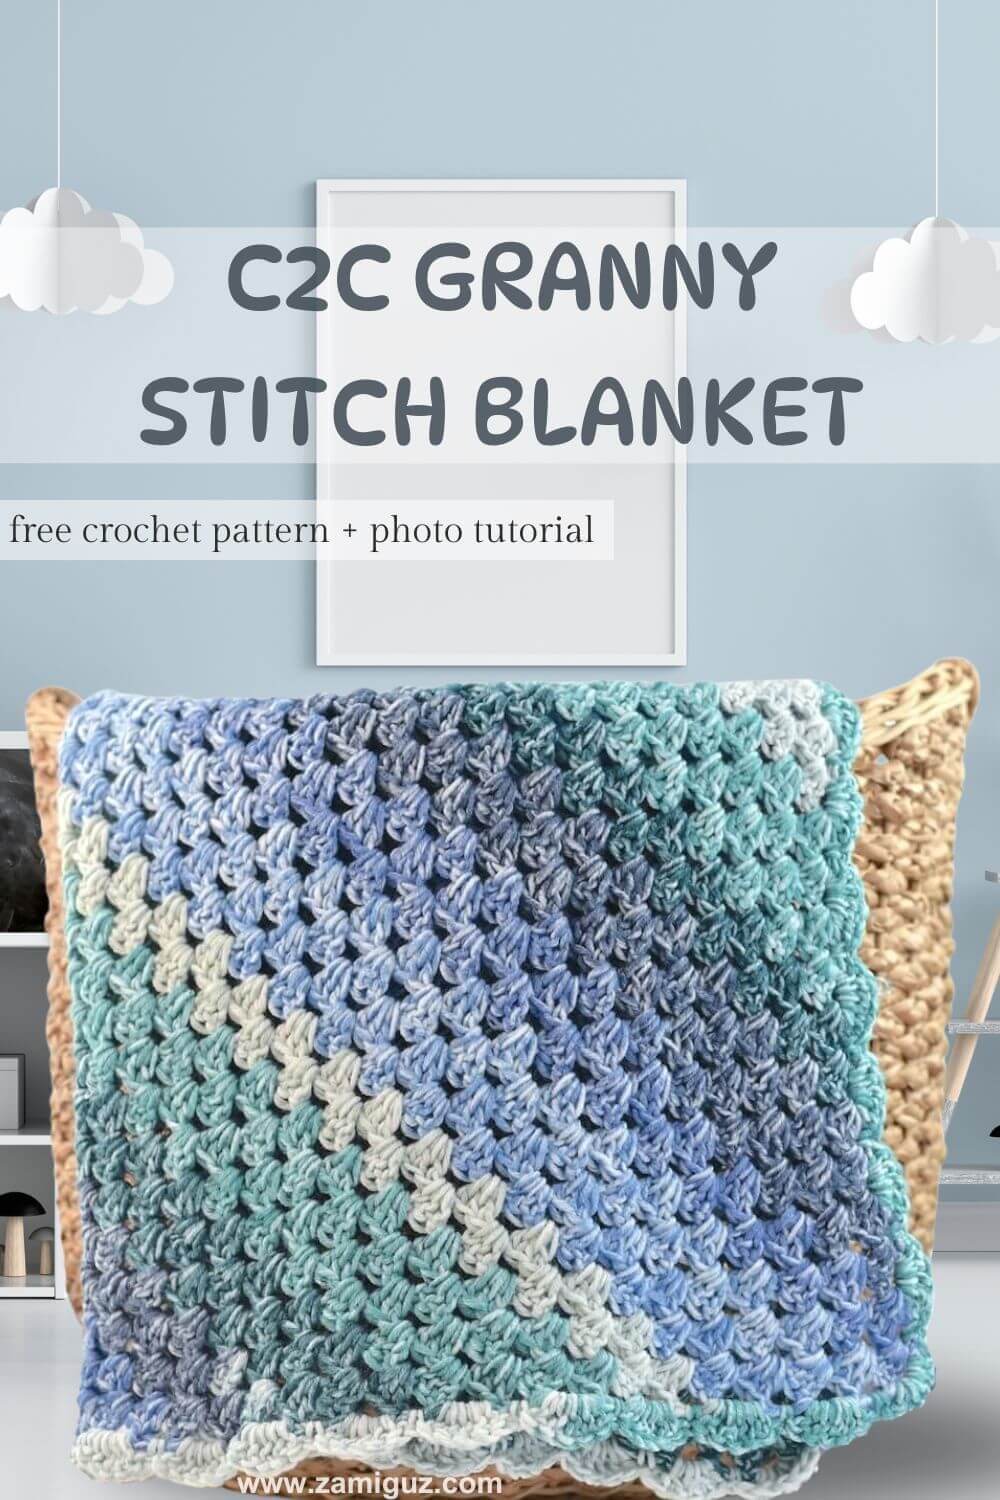
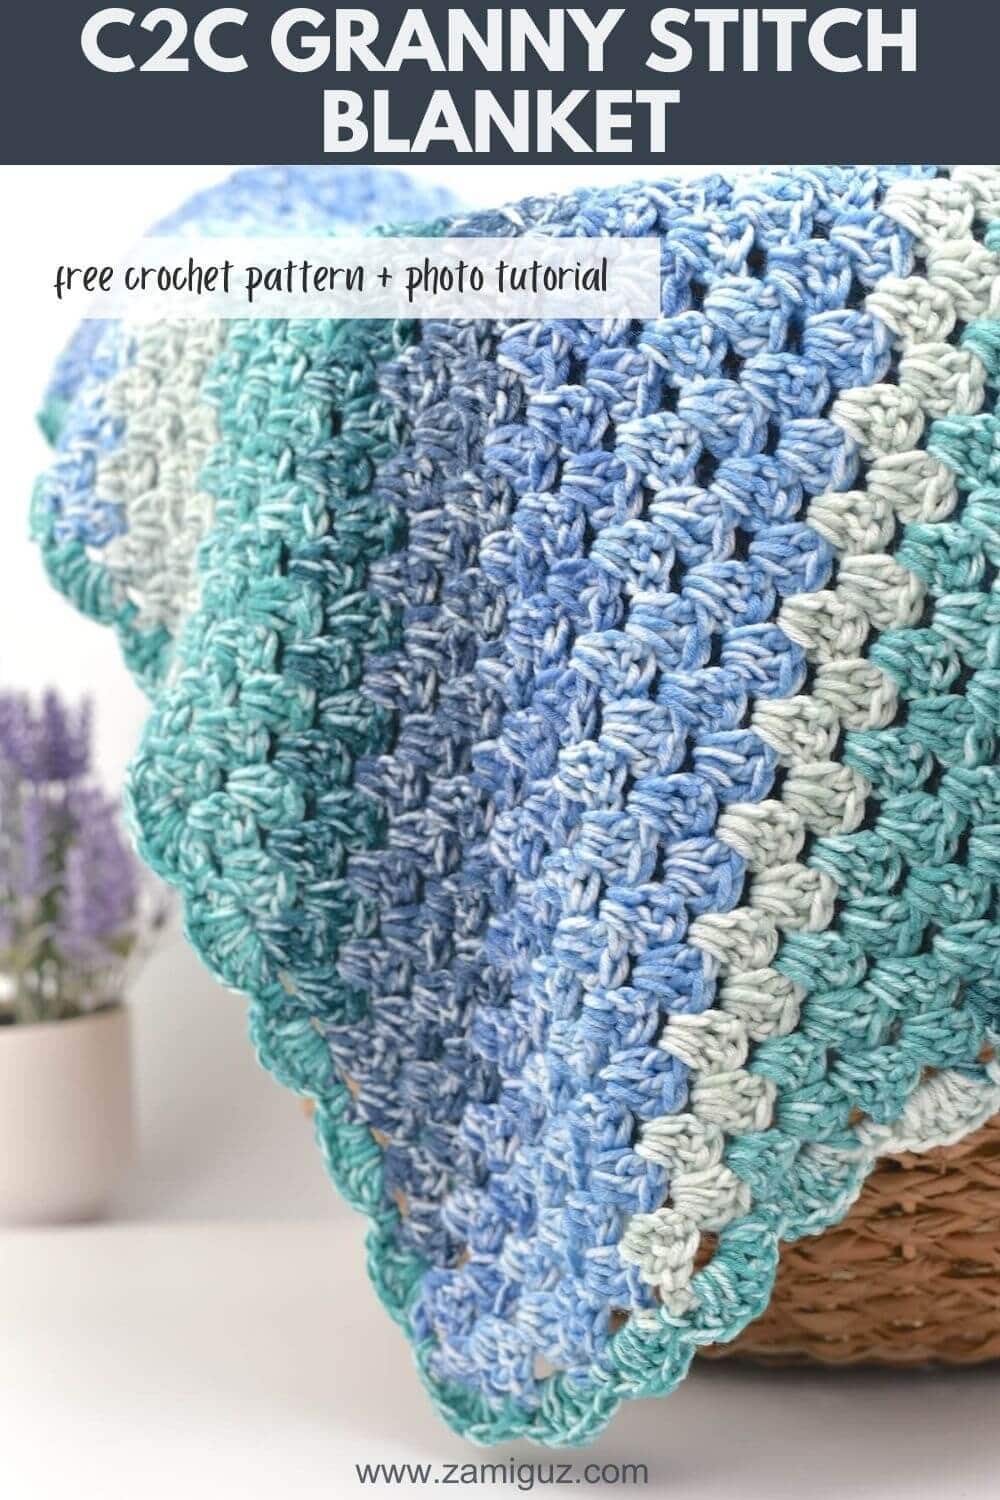
C2C Crochet Blanket Free Pattern
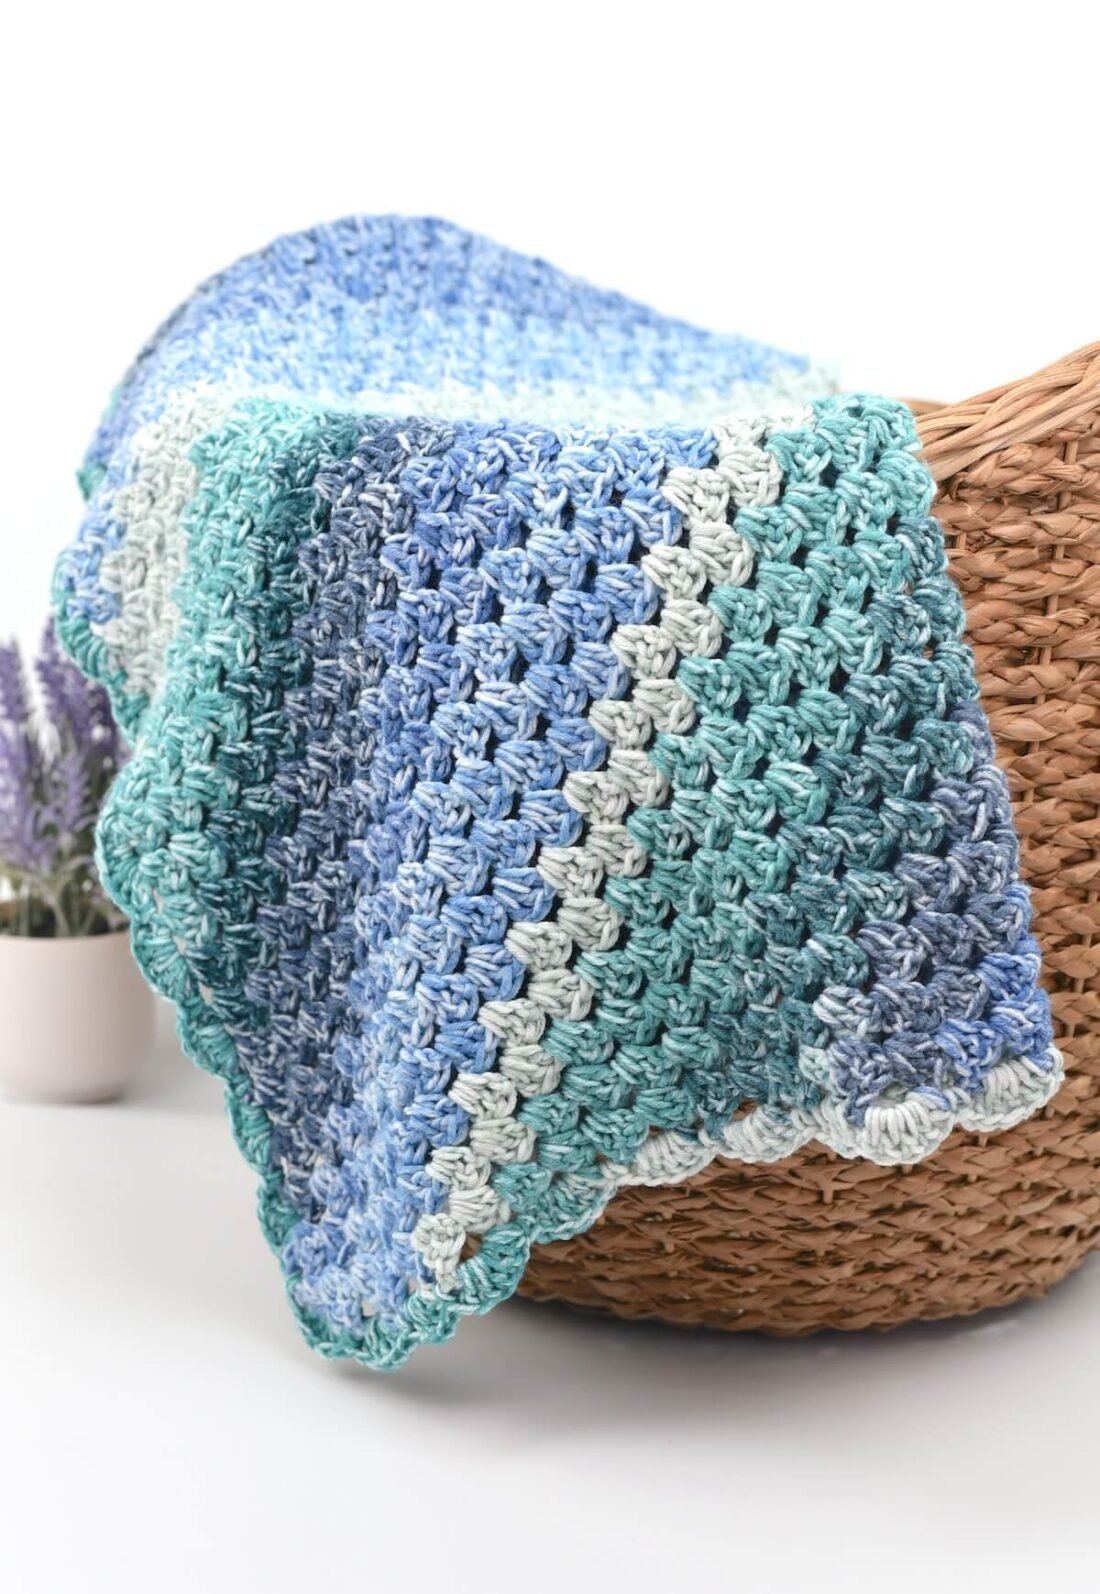
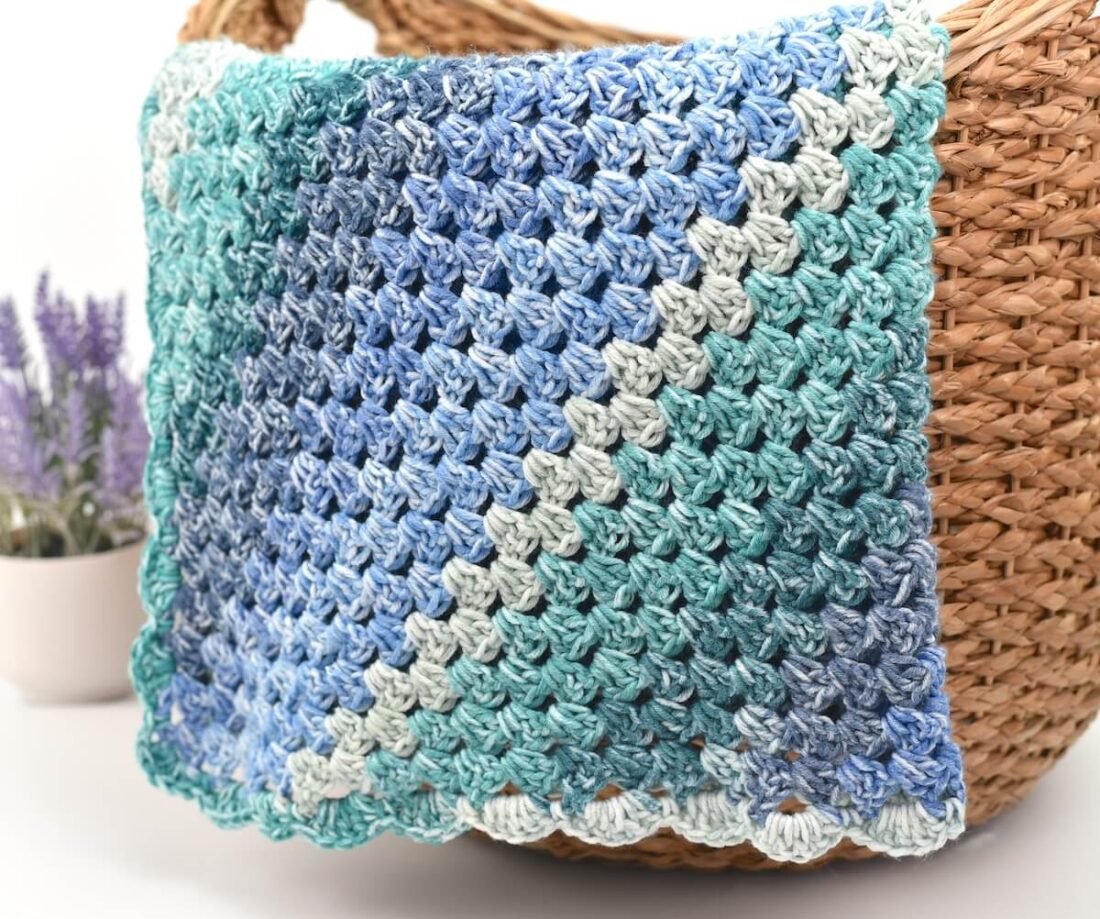
Hi crochet, Friend! I can’t get enough of this stunning C2C crochet blanket! The diagonal texture is absolutely gorgeous, don’t you think? It’s just so eye-catching!

This website is reader-supported and contains affiliate links. As an Amazon Associate, I earn from qualifying purchases. Find my affiliate disclosure here.
This pattern is super easy and quick, making it perfect for both advanced beginners and experienced crocheters. We all know a new mom friend who would love a handmade blanket, right?
You can whip this up in just a few hours, making it a perfect project to create a truly special gift.
I used self-striping yarn, but it’s also a perfect pattern for using up scrap yarn. Let’s grab our favorite yarns and tools, check out the pattern notes, and start our fun C2C crochet adventure.
Explore More Patterns


Purchase a PDF Download
- Inexpensive (costs less than a coffee)
- Ad Free
- Print-friendly
C2C Crochet Blanket Pattern
Materials
- Worsted Weight yarn (#4). I used approximately 10.43 oz (296 g) or 677 yards (619 m) of the super-soft Mandala Ombré yarn in color Mantra.
- 4.5 mm (US 7) Clover Amour crochet hook
- Tapestry needle to weave in the yarn ends.
- Scissors
Yarn Substitutions:
This C2C crochet blanket pattern is perfect for stash busting. Even if you don’t have enough of one color, you can use different colors and create a scrap blanket. Here are other self-striping yarns that will make great substitutes:
Pattern Notes
This C2C crochet blanket pattern uses US crochet terms.
Difficulty level: Advanced Beginners / Intermediate.
Finished Project Size: The pictured blanket is a baby size measuring approximately 30” x 30” (76 cm x 76 cm).
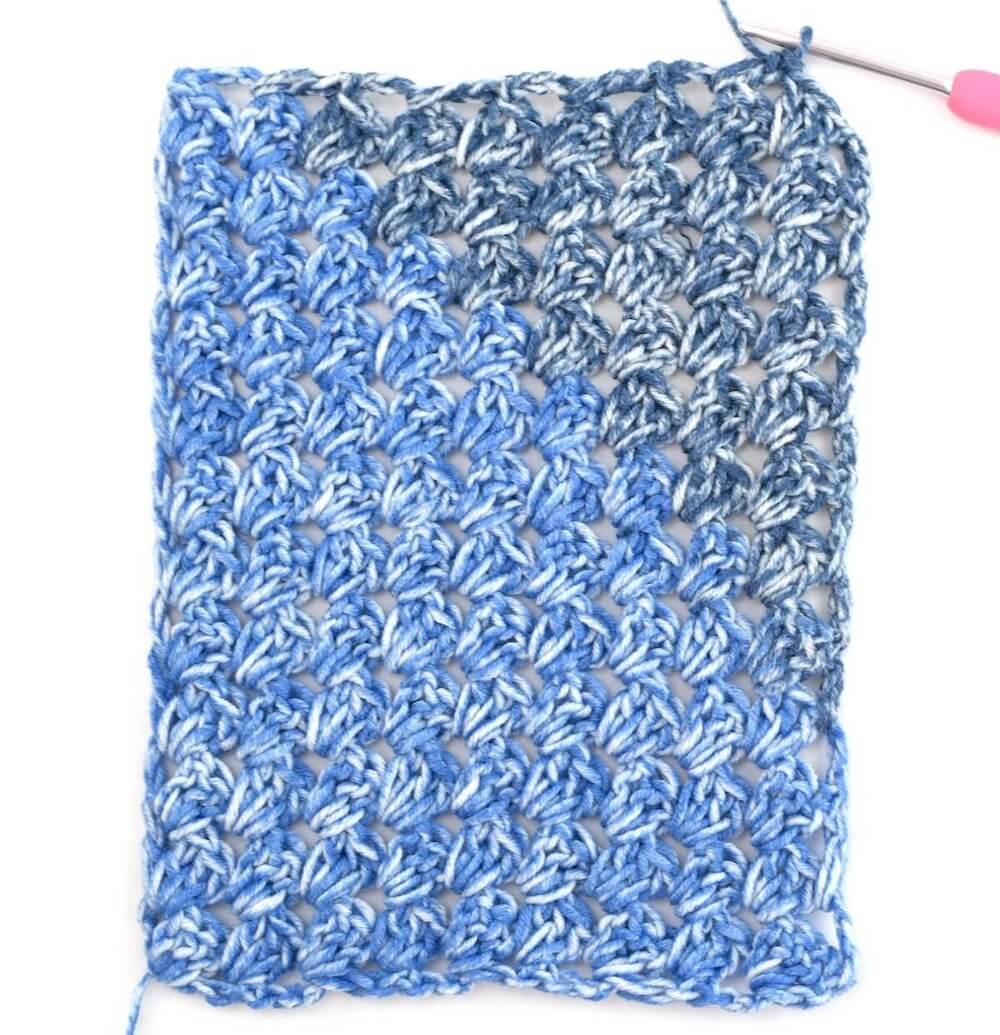
- This granny stitch C2C crochet blanket is created in a diagonal, using the C2C technique.
- The pattern construction has two sections: One is to increase and make the blanket’s size, and the other is to decrease.
- 1 cluster means 3 double crochet stitches in the same stitch or space.
- The turning chain 4 counts as a double crochet stitch and a chain 1 space at the beginning of each row.
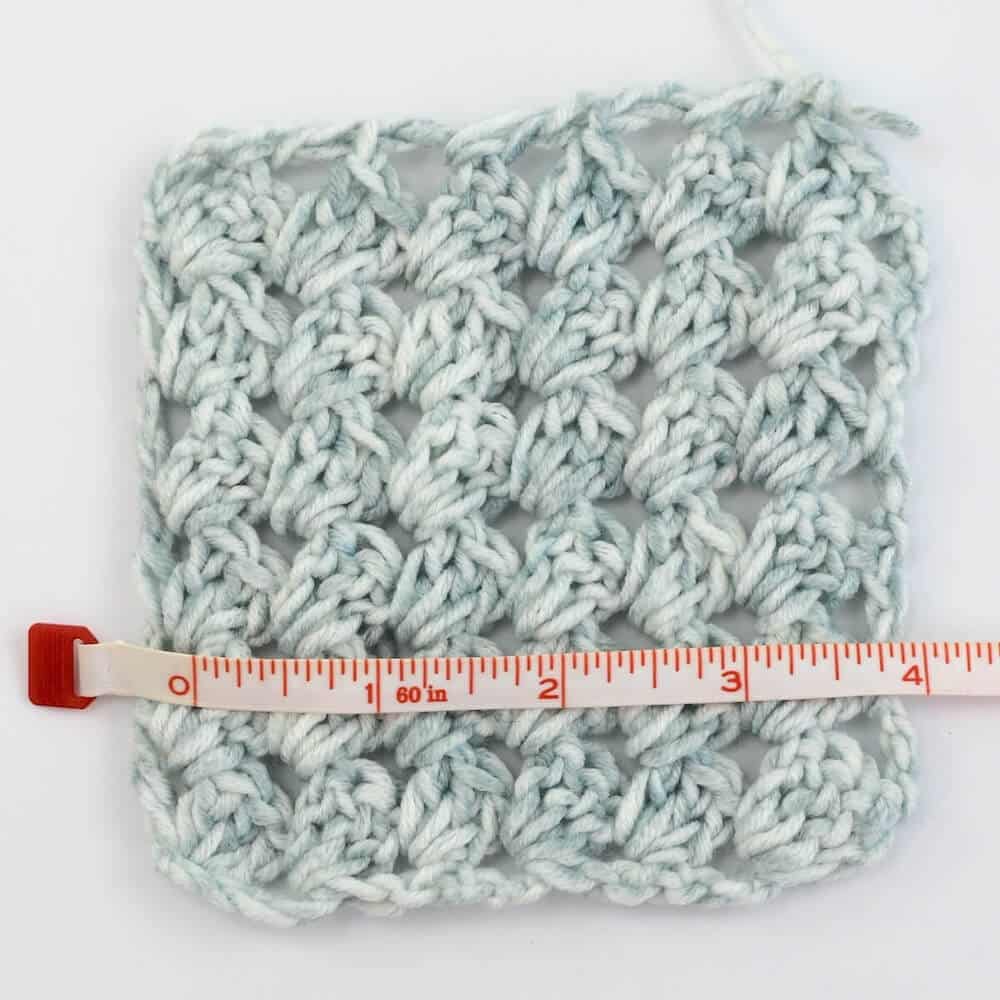
Stitch Tension
A pattern sample with 11 rows measures approximately 4” x 4” (10 cm x 10 cm) with the recommended yarn and hook size.
Abbreviations (US Terms)
- ch: chain
- dc: double crochet
- dc cluster: three double crochet stitches in the same space
- FO: fasten off
- sl st: slip stitch
- sp(s): space(s)
- st(s): stitch(es)
Necessary Skills
This pattern uses very basic skills. This is what you need to know:
- Corner to Corner (C2C): The pattern rows in this C2C crochet blanket are made diagonally, starting in one corner and ending in the opposite corner, hence the name “corner-to-corner.”
- Chain (ch or chs): Yarn over and pull up a loop. You will be using chains for turning.
- Double Crochet Stitch (dc): to create a dc stitch, yarn over, insert the hook in the next stitch, yarn over, and pull up a loop (yarn over, pull through two) twice to complete the stitch.
- Double Crochet Cluster (cluster): 3 double crochet stitches in the same chain space.

Helpful Resources:
Instructions
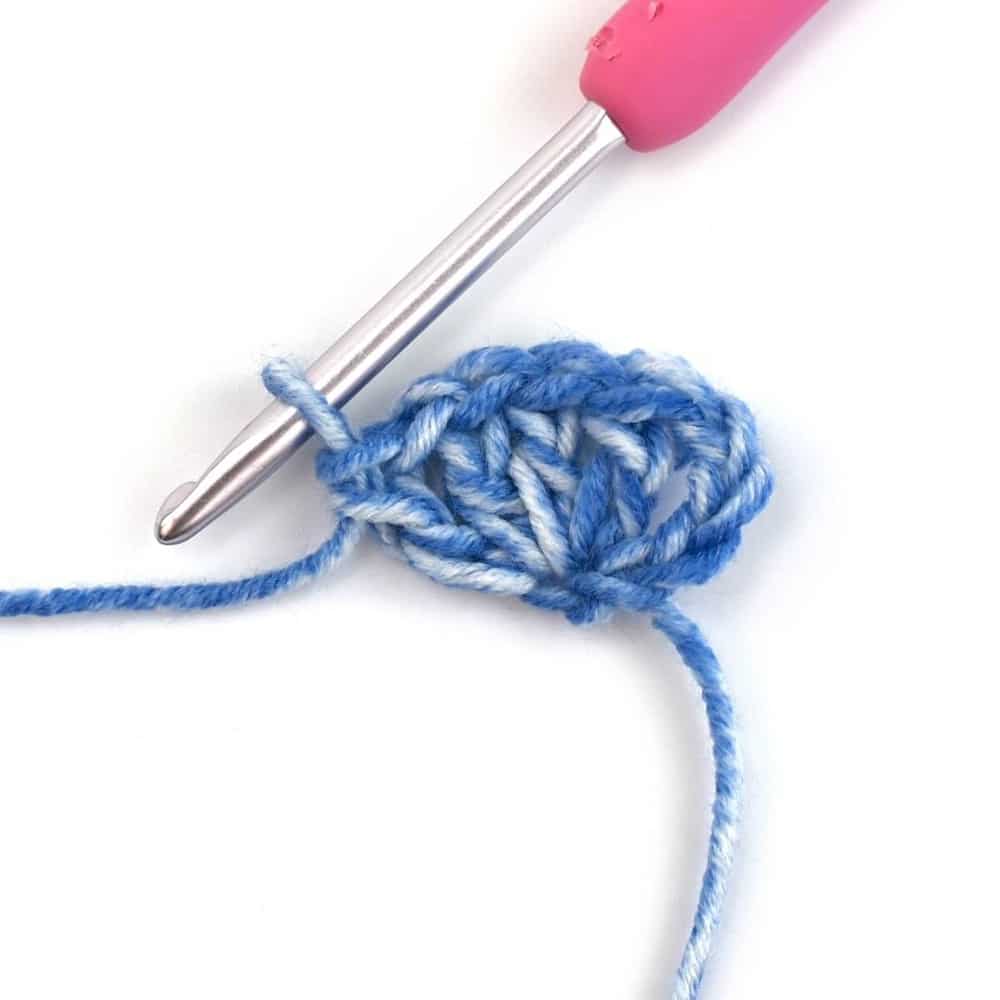
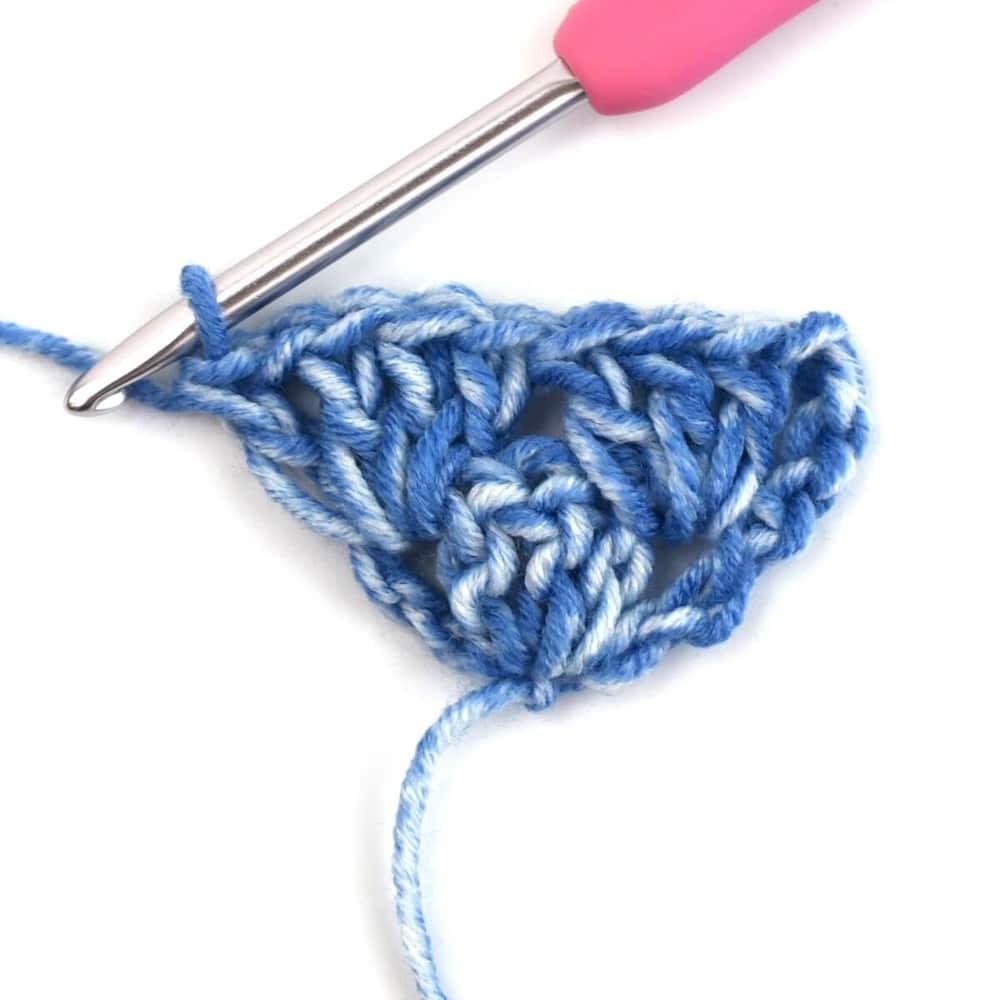
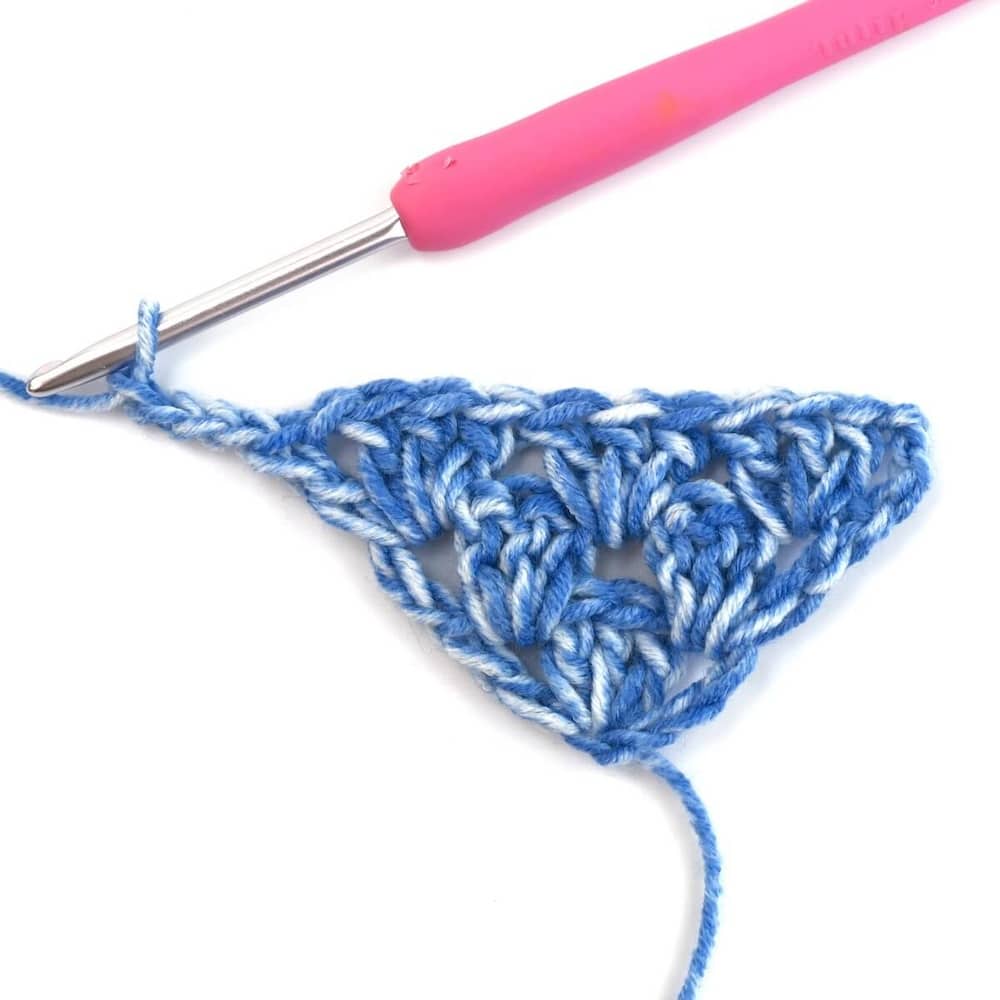
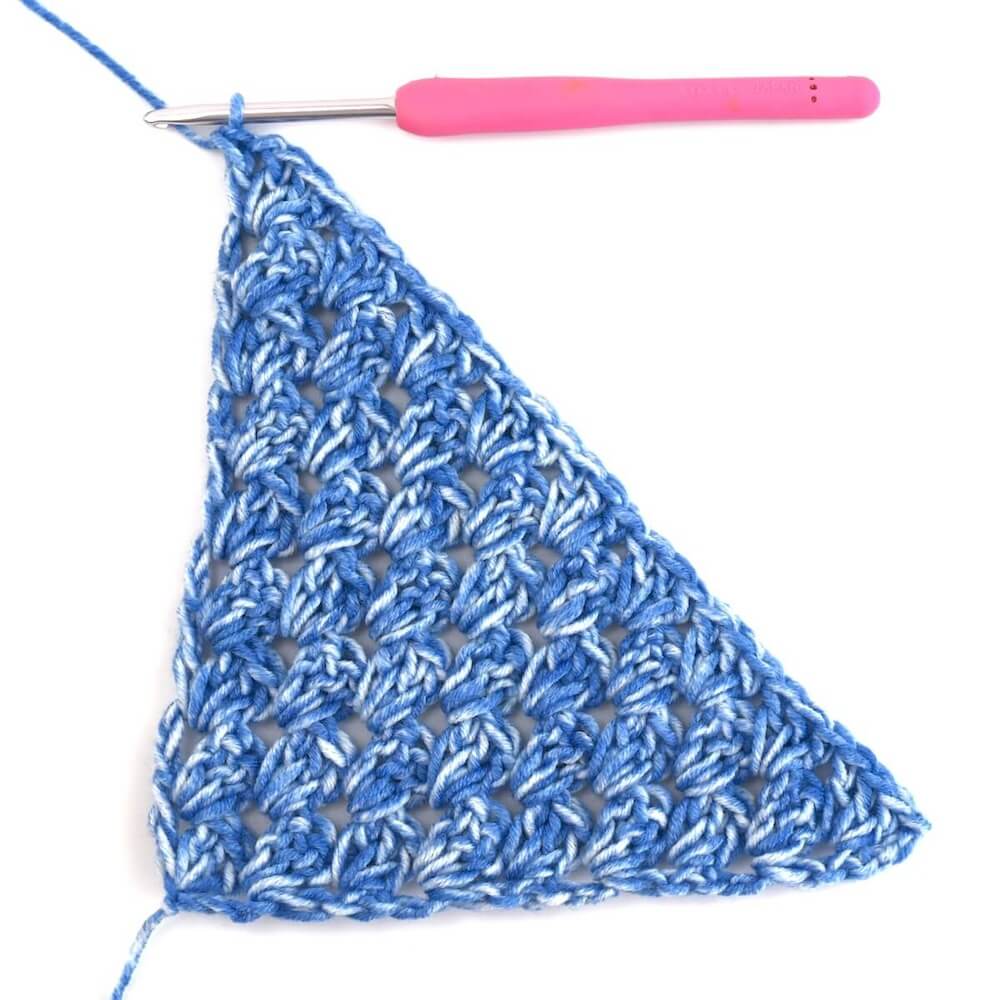
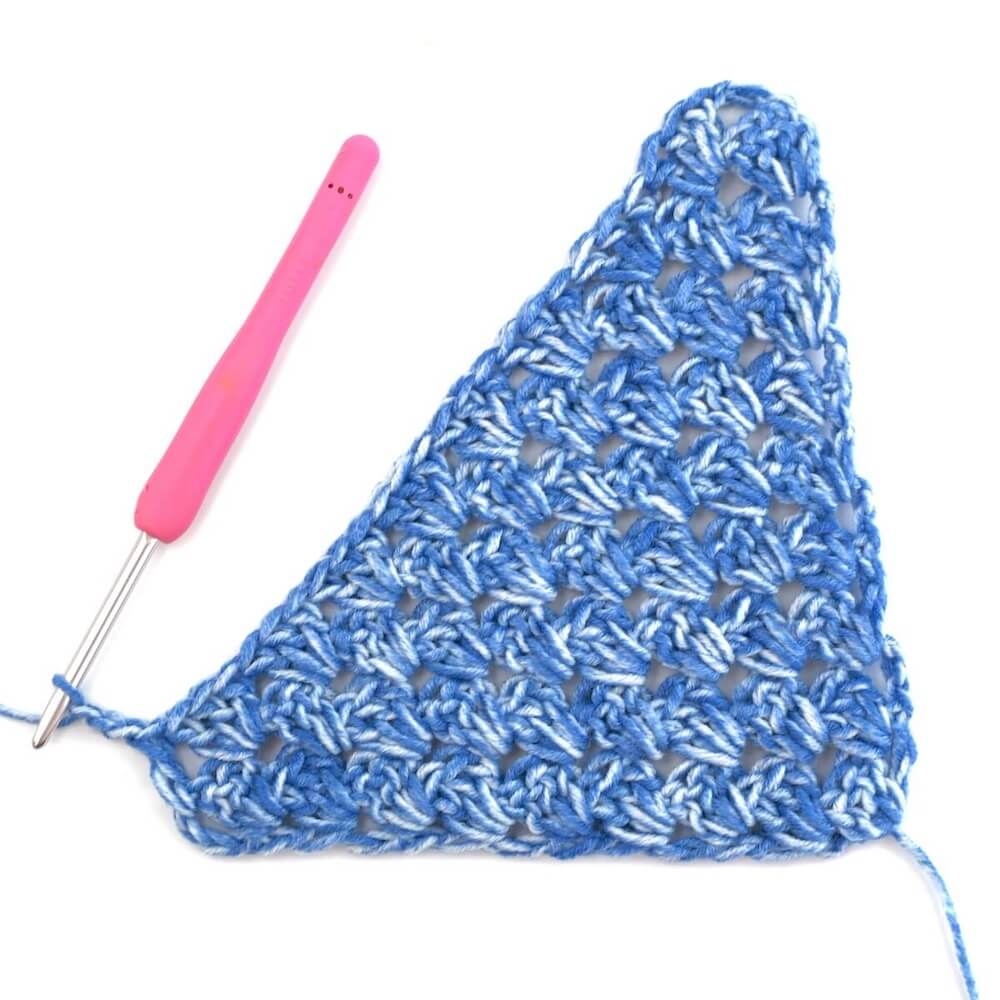
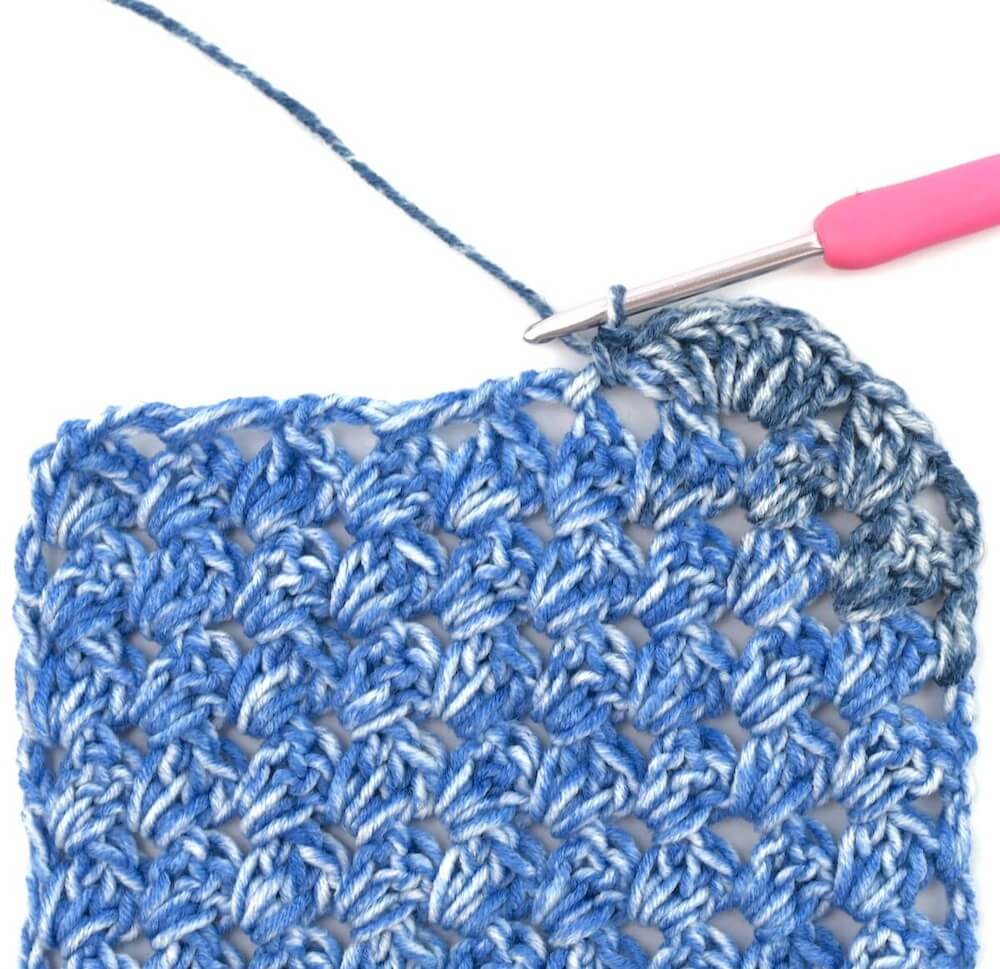
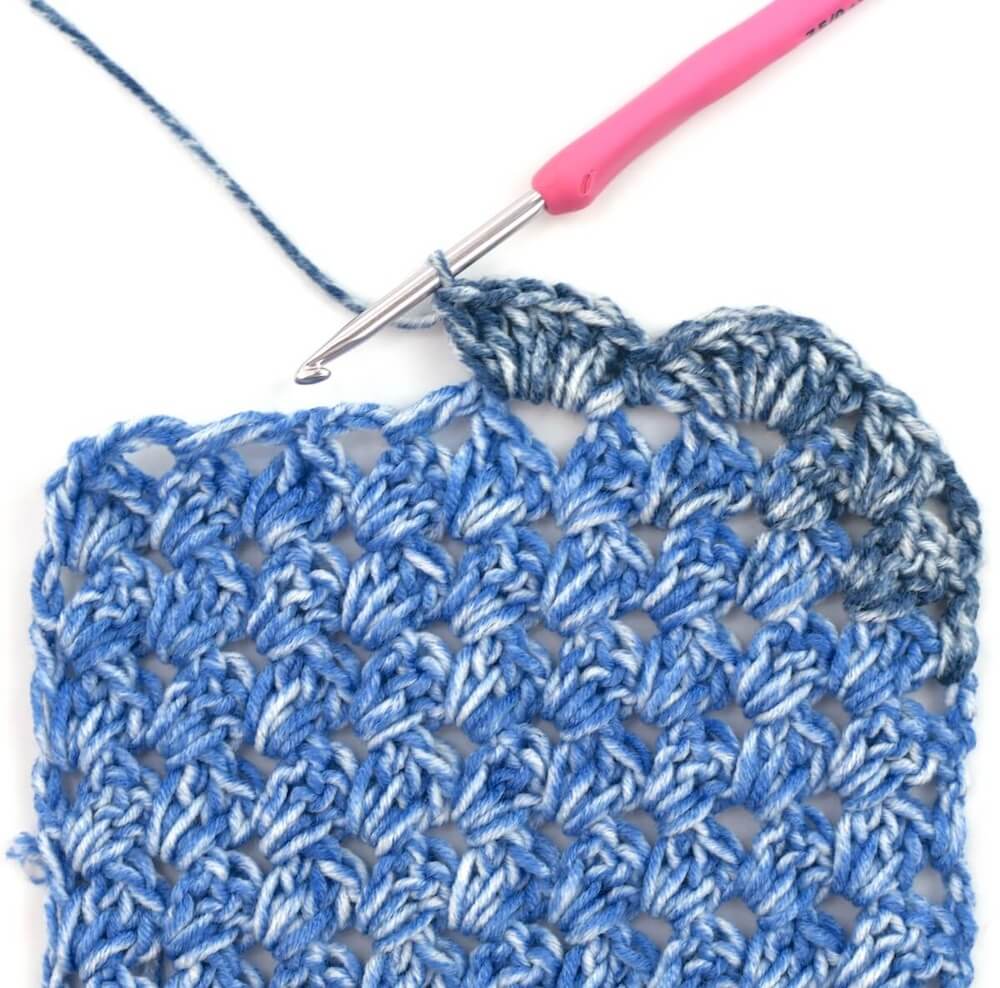
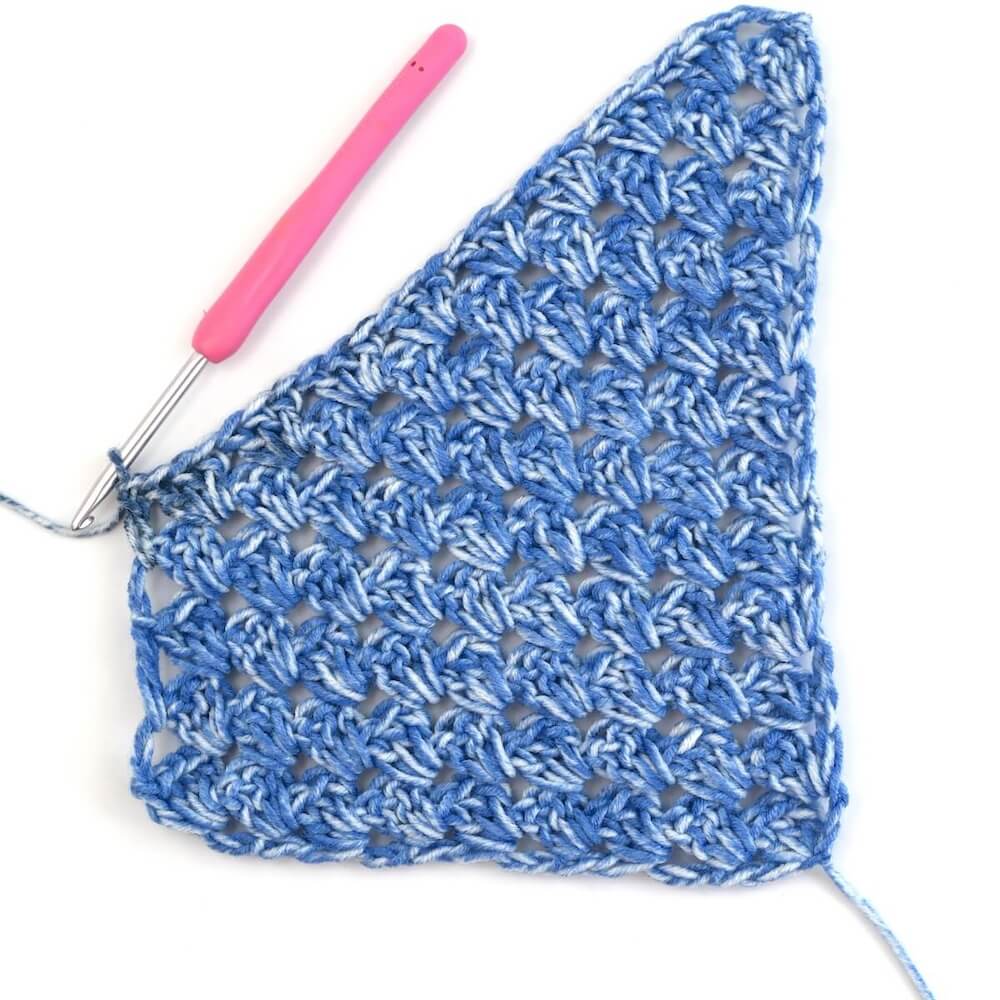
Make the square
This C2C crochet blanket is square and consists of two sections. The first section is where you increase to the desired blanket size. And the second section is where you decrease to finish the blanket. Follow the steps below.
Note: I created a simple sample for these instructions to make it better to photograph and view. Not the entire blanket.
Section 1 (increasing):
Chain 5 to start.
Row 1 of section 1 (increase): (dc 3, ch 1, dc) into 5th ch from the hook, ch 4, turn.
Row 2 of section 1 (increase): dc 3 into the first ch 1 space, (dc 3, ch 1, dc) into the last ch 1 space, ch 4, turn.
Row 3 of section 1 (increase): dc 3 into the first ch 1 space, dc 3 into the next space between the two next clusters, (dc 3, ch 1, dc) into the last ch 1 space, ch 4, turn.
Row 4 of section 1 (increase): dc 3 into the first ch 1 space, (dc 3 into the next space between the two next clusters) to last, (dc 3, ch 1, dc) into the last ch 1 space, ch 4, turn.

Row 5-38: Repeat row 4.
When you reach the last row of the increasing section, ch 3 instead of 4 to turn at the end of that row. The above instructions were for the first section of the square. Next, you’re going to decrease.
Tip: Before you proceed to decrease your blanket, you can subtract or add rows to make it smaller or larger if you like (increase to any even number of rows).
Section 2 (decreasing):
Row 1 of section 2 (decrease): sk the first 3-dc cluster (dc 3 in the next space between the two next clusters) to last, dc in the last ch space, ch 3, turn.
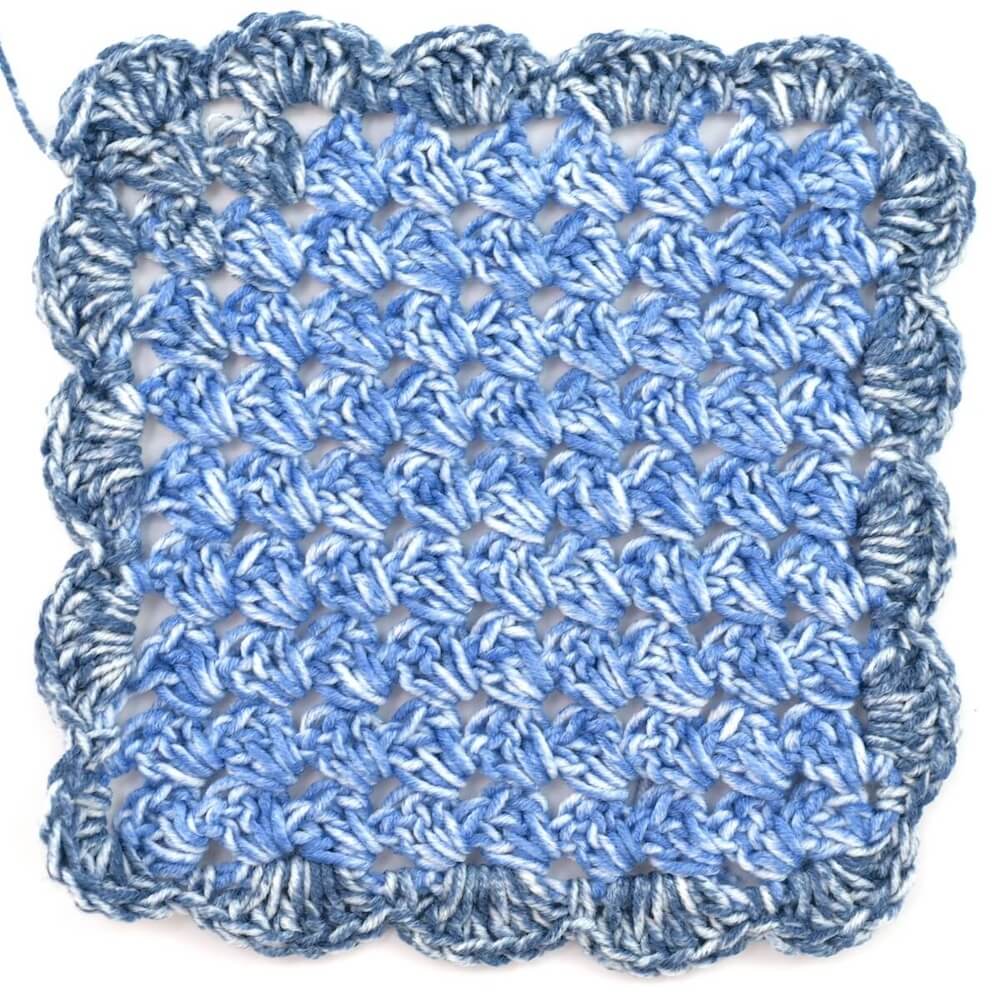
Repeat Row 1 of Section 2 (decrease) until only one 3-dc cluster remains. Your granny stitch blanket is done. If you’re adding a border with the same yarn, do not cut it yet.
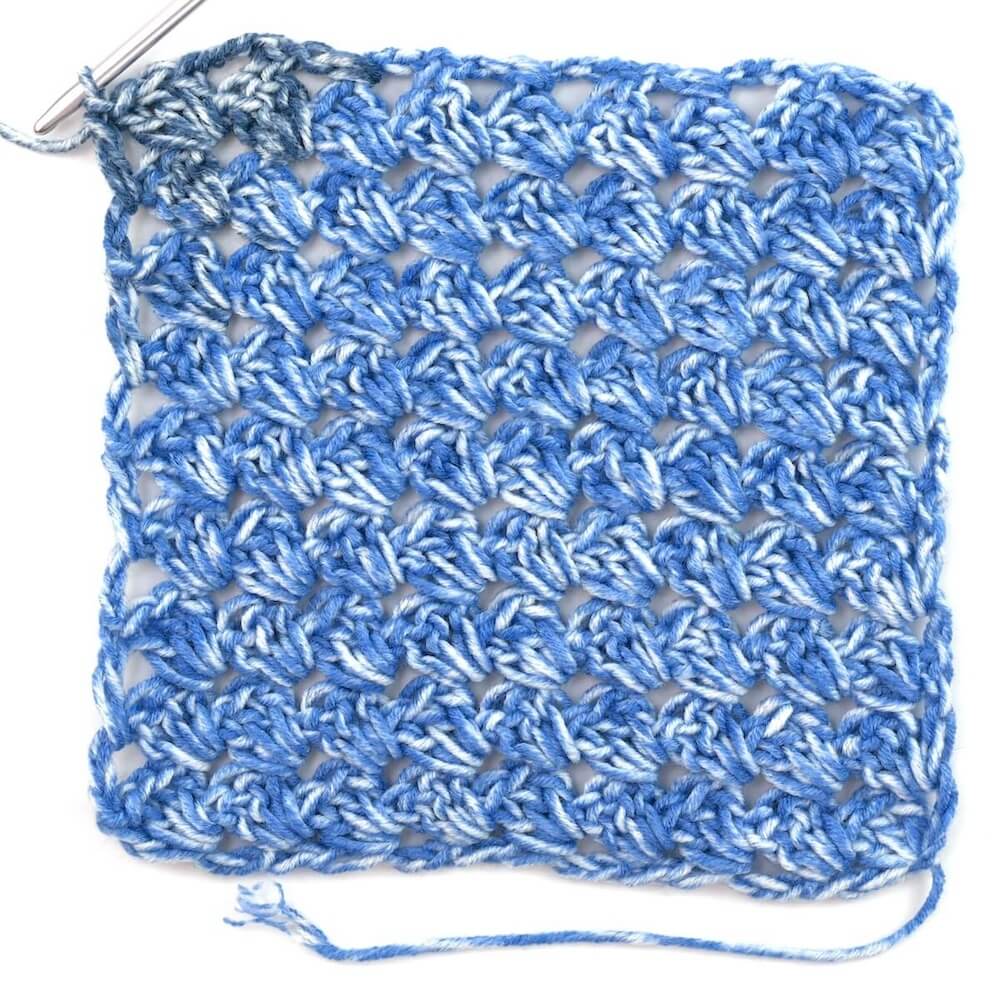
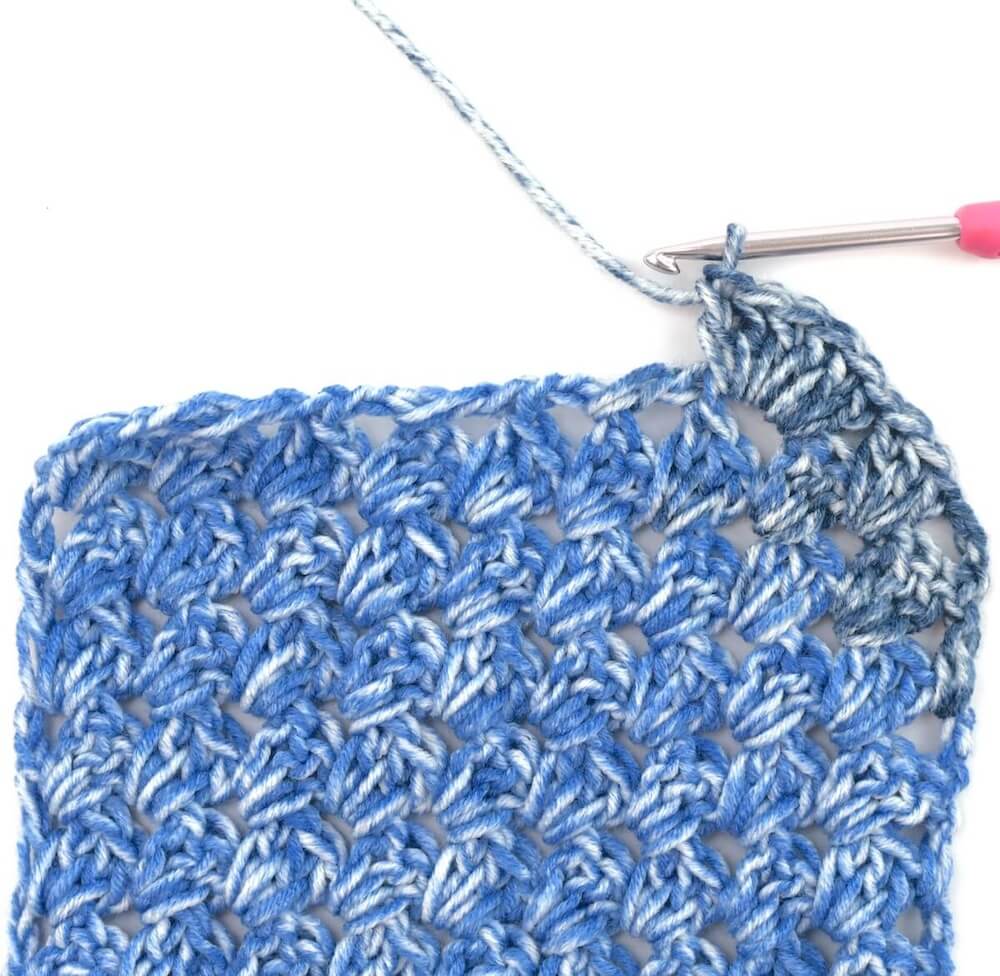
Edging
If you add a border, this c2c crochet blanket will have a better-looking finish. However, you don’t necessarily need to use this one. Alternatively, you can crochet your own edging if you like.
This is a simple one-row border with shells alternated with single crochet stitches in the spaces around the blanket. You don’t need to do anything special in the corners. When you get to the corners, keep going with the pattern below.
The last dc st in last row will count as the first st for the first shell. Here is how you do it:
- First, add 5 more dc sts in the same space as the last dc st on the blanket.
- Next, sc st in next side space.
- Then, dc 6 in next side space.
- Repeat steps 2 and 3 around. Sl st to joing. Cut the yarn. Fasten off and weave in all the ends.
Make it Into a Rectangle
Crochet the first section of the blanket using the increasing pattern above to the desired width. Then, create the middle section of the rectangle using these instructions:
Row 1 of the middle section (decrease one end, increase the other): sk the first 3-dc cluster (dc 3 in the next space between the two next clusters) to last, (dc 3, ch 1, dc) in the last ch space, ch 4, turn.
Row 2 of the middle section (increase one end, decrease the other): dc 3 into the first ch 1 space, (dc 3 into the next space between the two next clusters) to last, dc in the last ch space, ch 3, turn.
Repeat the previous two steps to the desired blanket length. Then, return to the square instructions “Row 1 of section 2 (decrease)” above and decrease to finish your c2c crochet blanket.
Tip: Find out the length of your rectangle by measuring the longer side right before you start decreasing.
Prefer an Ad Free PDF?
My Ravelry and Etsy pattern shops sell inexpensive, ad-free PDF downloads. If you’d rather have the formatted/print-friendly file downloaded for this C2C crochet blanket, click the buttons below.
Adjusting The Size
Simply add rows to the first section to increase and adjust the size of this C2C crochet blanket. Once you have the blanket’s width you like, then you start decreasing.
For example:
If you choose a stroller-size baby blanket, you will use the instructions for the rectangle. First, you increase to 30″ (76 cm), then you add 5″ (13 cm) to the middle section of the rectangle. Lastly, decrease to complete the rectangle.
Tip: If you decide to add a border, remember to account for it. A one-row border may not significantly increase the size of your blanket, but it’s good to keep that in mind.
Wondering what size your C2C crochet blanket should be? I’ve created this chart to help you out with your decision.
Baby Blanket Size Chart

Your blanket is done! I hope you enjoyed crocheting this simple C2C project. If you feel confident with this technique, where you work on the bias, you should check out this granny spike stitch tutorial.

FAQs
Is a C2C crochet blanket easy?
Yes! This is a beginner-friendly blanket pattern if you know some basic stitches and techniques. You can make it if you know how to create a chain and a double crochet stitch.
What yarn is best for C2C crochet blankets?
The best yarns for C2C crochet patterns are self-striping ones in any weight. However, they are more commonly manufactured in worsted (#4) or light worsted (#3) weights. These yarns not only come in beautiful colors but will also create nice stitch textures and transitions.
Can I change the border?
Certainly! This granny stitch C2C blanket is versatile and easy to adapt. So, you can change the border from the shell stitch pictured to something else. Or even leave it borderless if that’s what you prefer.
How do I make my C2C blanket larger?
The easiest way to make this pattern larger is by adding extra increasing rows to any size you like. Once you increase to the desired size, start decreasing to finish the blanket.
How long does it take to make a C2C crochet blanket?
It takes 3 to 4 hours to crochet a baby-size blanket. Of course, the total time will depend on your skill level, the size of the blanket, and how long you work on it in one sitting.
More Patterns
- Granny Spike Stitch C2C Blanket
- Chevron Crochet Blanket Pattern Roundup
- Shell Stitch Rectangle Blanket Pattern
- Classic Granny Square Blanket Pattern
- Cute Crochet Baby Blankets Pattern Roundup
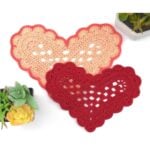
- Heart Crochet Doily Free Pattern
What to do next
- Comment on this post: I always read comments and reply to all questions posted on the blog and I love it when you stop by to say hello.
- Share your project: if you make this or any of my other patterns, tag me on Instagram or Facebook, or use the hashtag #zamiguzmakers. I love seeing what you make.
- Pin it now: Are you not ready to make it yet? You can use the above image to Pin it to your crochet boards, or follow me on Pinterest for more.
- Join The Makers community: Join my community group on Facebook and be the first to know about pattern releases and other crochet-related content.
Would you rather bookmark this blog post for later? You can create a free Grow.me account and use the “heart” on the left-hand side of your screen to save it. It’s easy to have your internet favorites bookmarked in one place.
If you need more time to make your C2C crochet blanket, pin it to your Pinterest Boards for later. Use this image to Pin it:


Hi Maggie! Love this pattern but I’m a little confused about the decrease. Am I continuing the 3dc ch 1 1dc as I decrease? Hope this makes sense
Thank you!
Hi Candy! I am glad to hear you love this pattern <3 Thank you. Your question makes complete sense. You won't (3dc ch 1 1dc) at the end like you were doig to increase. Instead, you ch 3 when you're done with the last row of increasing, then skip the first 3-dc cluster and (dc 3 in the next space between the two next clusters) to last. When you reach the last space of that row, you do only one dc in it, ch 3, turn. Repeat with the remaining rows to the end. I hope this helps.
Maggie