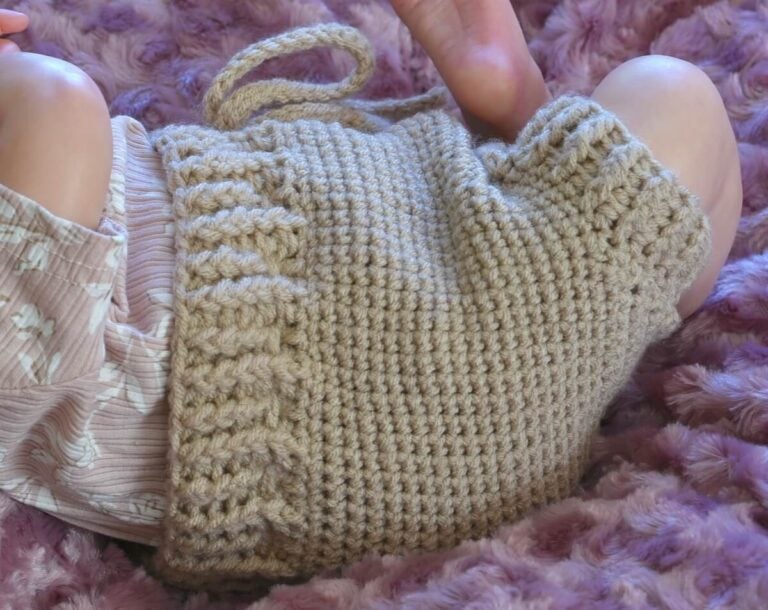
If you’re looking for a size-inclusive crochet kids’ socks pattern, I’m so happy to finally share this one with you! The pattern includes six sizes, ranging from newborn through 8 years, so you can make a cozy pair for babies, toddlers, and older children.

This website is reader-supported and contains affiliate links. As an Amazon Associate, I earn from qualifying purchases. Find my affiliate disclosure here.
If you’ve explored my other baby and children’s crochet patterns, you may have noticed that I often use DK or light worsted weight yarn. I love how the lighter yarn creates comfortable, delicate-looking wearables without feeling too bulky.
Designing these socks required several rounds of testing and adjustments. I crocheted multiple samples to refine the stitch counts, heel shaping, proportions, and sizing before sharing the finished pattern. I hope you enjoy making them for the little ones in your life!

Purchase a PDF Download
- Inexpensive
- Ad-free
- Formatted and Print-friendly
Pattern Summary
Toe-Up Crochet Kids’ Socks Pattern
I designed these children’s socks from the toe up. I start with a foundation chain and work around both sides of it in an oval to shape the toe. Then, I crochet the foot in continuous rounds of single crochet, creating a clean finish without a visible joining seam.
I work the heel separately in turned rows. Simple decreases shape the first half of the heel flap, while increases form the second half, creating an hourglass shape. Once I seam the sides, the heel fits naturally around the back of the foot.
Finally, I crochet the ankle in single crochet and finish it with a stretchy, textured cuff made from front and back post half double crochet stitches.

Before you scroll to the pattern…
…. you might also like to check out these other patterns for babies and kids here on the blog: This cute Granny Stitch Baby Cardigan, an adorable Crochet Baby Booties, a Lacy Diamond Stitch Baby Blanket perfect for heirloom gifts, a C2C Granny Stitch Baby Blanket, and a Baby Bow Headband Pattern for the little girls.
Materials
Choosing a Yarn for Crochet Socks
Choose a soft, washable DK-weight yarn that will feel comfortable against children’s skin. A smooth yarn with good stitch definition will make it easier to see the single crochet stitches and work the post-stitch ribbing.
Another reason I love lightweight yarn is that it gives small projects, like these socks, a delicate finish. Even the textured ribbed cuff feels comfortable without looking bulky.
Always check the yarn label for washing and drying instructions, especially when making socks for babies and young children.
Pattern Abbreviations and Terms
Would you like to keep a crochet reference nearby while you work on these crochet kids’ socks? Download my Free Guide to Crochet Abbreviations and Terms (PDF). You can save or print it to use whenever you follow a crochet pattern.
Crochet Kids’ Socks Sizes
This pattern includes six children’s sizes: (0–3 months, 3–5 months, 6–12 months, 12–18 months, 2–4 years, 5–8 years).

Instructions for all six sizes are shown in parentheses. For example, if the pattern says: Ch (6, 7, 8, 9, 10, 11)
Use the first number for size 0–3 months, the second number for size 3–5 months, and continue in that order for the remaining sizes.
Age ranges for this crochet kids’ socks pattern are intended as a general guide because children’s feet can vary considerably. For the best fit, measure the child’s foot and compare it with the finished measurements in the size chart before beginning.
Maggie’s Pro Tip: Print the pattern and highlight every number corresponding to your chosen size before you begin. This makes multi-size instructions much easier to follow.
Gauge
Since this crochet kids’ socks pattern is a small project, it may be possible to check your stitch tension as you go. Please don’t skip this step.
Using DK/light worsted weight (3) yarn and a 3.50 mm (E) crochet hook: 22 sc × 22 rows = 4 inches (10 cm).
Pattern Notes
About Exclusive Content: When you create a Grow.me account, you can bookmark your favorite content in one place. With one free account, you can save not only mine, but also the content of many other creators, all in one place.
When you visit my blog and see the “Unlock Exclusive Content” button, please create an account or click the login button and sign in with an existing Grow account. It’s a secure, free feature, and you can unsubscribe at any time. Everything you bookmark with the “heart” on a page that uses Grow.me will show up under “Grow Bookmarks” in your account.
Disclosure: Please note that Grow.me is a third-party app for Exclusive Content, and I have no control over their user policies. Neither will I be able to assist with account creation and/or password resetting. For information on how to troubleshoot login and password resetting, go to “Resources” on the Grow.me website’s top menu.
Purchase a PDF Download
- Inexpensive
- Ad-free
- Formatted and Print-friendly
Crochet Kids’ Socks Instructions

Before you begin working on these socks, you may find these free resources helpful: How to Do the Invisible Finishing in Crochet, Surface Slip Stitch, and How to Do Invisible Decrease in Crochet.
Total Time: 1 hour and 30 minutes
-
Sock Toe and Body

Work in continuous rounds, without joining.
R1: With C1, ch (6, 7, 8, 9, 10, 11), then sc 3 in the back bump of the 2nd ch from hook, sc in the back bump of each of the next (3, 4, 5, 6, 7, 8) chs, sc 3 in the last ch. Then, in the same chs, sc in each of the opposite two loops of each of the remaining (3, 4, 5, 6, 7, 8) chs. [12, 14, 16, 18, 20, 22]sc sts.
R2: *2 sc in each of the next 3 sts, sc in each of the next (3, 4, 5, 6, 7, 8) sts. Repeat from * one more time. [18, 20, 22, 24, 26, 28]sts.
R3: *(2 sc in next st, sc in next st) 3 times, sc in each of the next (3, 4, 5, 6, 7, 8) sts. Repeat from * one more time. [24, 26, 28, 30, 32, 34]sts.
R4 (all sizes): Sc around. [24, 26, 28, 30, 32, 34] sc sts.
R5–(15, 18, 20, 23, 25, 27): Switch to C2 and sc around. At the end of the last round, drop C2; you will return to it after completing the heel flap. [24, 26, 28, 30, 32, 34] sc sts.
Maggie’s Pro Tip: For longer feet, add more rounds in this section until you reach the desired length. But please keep in mind the heel also adds a little length to these crochet kids’ socks. These extra rounds will not affect the heel, ankle, or cuff instructions. -
Heel flap
Switch back to C1.
The heel has its own row count. You’ll use a “back-and-forth row increase and decrease” method to crochet the flap into an hourglass shape, then sew it on the sides to shape the heel.
To start the flap, flatten the completed sock body in the direction of the toe starting chain, then attach the yarn to the far-right fold st (or far-left if you’re left-handed), on the opposite side of where you dropped the yarn. Leave a long tail (about 12” / 30 cm) for sewing later.
R1: Sc in each of the next (12, 13, 14, 15, 16, 17) sts, ch 1, turn.
R2: Sc2tog, sc across to last 2 sts, sc2tog, ch 1, turn.
R3–(4, 4, 5, 5, 6, 6): Rep R2. At the end of the last row, you should have (6, 7, 6, 7, 6, 7) sts.
Next, increase to create the second half of the hourglass shape.
R(5–7, 5–7, 6–9, 6–9, 7–11, 7–11): 2 sc in first st, sc across to last st, 2 sc in last st, ch 1, turn. Do not ch 1 or turn after completing the final row.At the end of the last row, you should have (12, 13, 14, 15, 16, 17) sts. Fasten off, leaving a 12” (30 cm) tail for sewing.
-
Sew both sides of the flap

1. Fold the flap at its narrowest point to the outside of the fabric so that its beginning and ending edges meet.
2. Thread the tapestry needle with the yarn tail and whipstitch the folded sides of the flap.
3. Finish one side, then thread the needle with another strand of yarn and repeat on the other side of the flap.
4. I recommend whipstitching the seam twice to make sure it holds up well.
Cut the yarn and fasten off. Turn the right side out.
Maggie’s Pro Tip: You can also seam the hourglass heel flap with surface slip stitches. Keeping the working yarn underneath the fabric, surface sl st along one side of the flap. There is no need to cut the yarn: simply sl st in the sts of the center row to reach the opposite side, then seam the second side in the same way. -
Ankle
Pick up the C2 yarn again and continue to the ankle portion. Resume the round count from where you dropped C2.
R(16–19, 19–22, 21–24, 24–28, 26–31, 28–33): Sc around. On the final round, sl st in the first st to join.
Note: To prevent a gap between the foot and heel, use the following technique when working the corners on the first ankle round:1. Insert the hook into the last st of the heel flap, immediately before the first body st. Yo and pull up a loop. [2 loops on hook]
2. Insert the hook into the side of the last heel st. Yo and pull up a loop. [3 loops on hook]
3. Insert the hook into the first body st—the same st where the last st of Heel R1 was worked. Yo and pull up a loop. [4 loops on hook]
4. Yo and pull through all 4 loops to complete the sc. You’re basically creating a sc3tog. -
Cuff
R(20, 23, 25, 29, 32, 34): Ch 2; the beginning ch 2 does not count as a st here or throughout the remainder of the pattern. Hdc around, then sl st in the first hdc to join.
R(21–22, 24–25, 26–28, 30–32, 33–35, 35–37): Ch 2, *(fphdc around next st, bphdc around next st); rep from * around, then sl st in the first fphdc to join.
Maggie’s Pro Tip: I wanted my sample socks to be ankle-length socks. However, for taller socks, simply add more rounds of sc to the ankle and additional rounds of post sts to the cuff.Fasten off and weave in all the ends.


Estimated Cost: 10.00 USD
Supply:
- Light Worsted (3)/DK yarn
Tools:
- 3.50 mm (US E) crochet hook
Materials: Scissors, yarn needle, measuring tape
FAQ – Crochet Kids’ Socks Pattern
-
What skill level is this crochet socks pattern?
This pattern is best for confident beginners or intermediate crocheters familiar with working in continuous rounds, increasing, decreasing, and post stitches.
-
What sizes are included in the pattern?
The pattern includes six sizes, ranging from newborn through 8 years old.
-
What yarn should I use for these crochet kids’ socks?
Use DK/light worsted weight (3) yarn. Choose a soft, washable yarn that feels comfortable and is safe for children.
-
Can I adjust the foot length for a better fit?
Yes. Add or remove plain rounds before beginning the heel. Changing the foot length will not affect the heel, ankle, or cuff instructions.
-
Can I make the socks taller?
Yes. The pattern creates ankle-height socks, but you can add more plain single crochet rounds before working the cuff. You may also add extra rounds of post stitches for a taller ribbed cuff.
I hope you enjoy making these crochet kids’ socks as much as I enjoyed designing them! With six sizes and plenty of opportunities to customize them, you can create a pair for every little one in your life. Choose their favorite colors, grab your hook, and have fun turning a small amount of yarn into something handmade with love.
Happy Crocheting!
Pin, Share, and Comment
- Comment on this post: I always read comments and reply to all questions posted on the blog, and I love it when you take the time to stop by and say hello.
- Have you made this? Share your project if you make this or any of my other patterns, tag me on Instagram or Facebook, or use the hashtag #zamiguzmakers. I love seeing what you make.
- Pin it now: Are you not ready to make it yet? You can use the above image to pin it to your crochet boards or follow me on Pinterest for more.
- Join The Makers community: Join my community group on Facebook and be the first to know about pattern releases and other crochet-related content.
Would you rather bookmark this blog post for later? You can create a free Grow.me account and use the “heart” on the left-hand side of your screen to save it. It’s easy to have your internet favorit