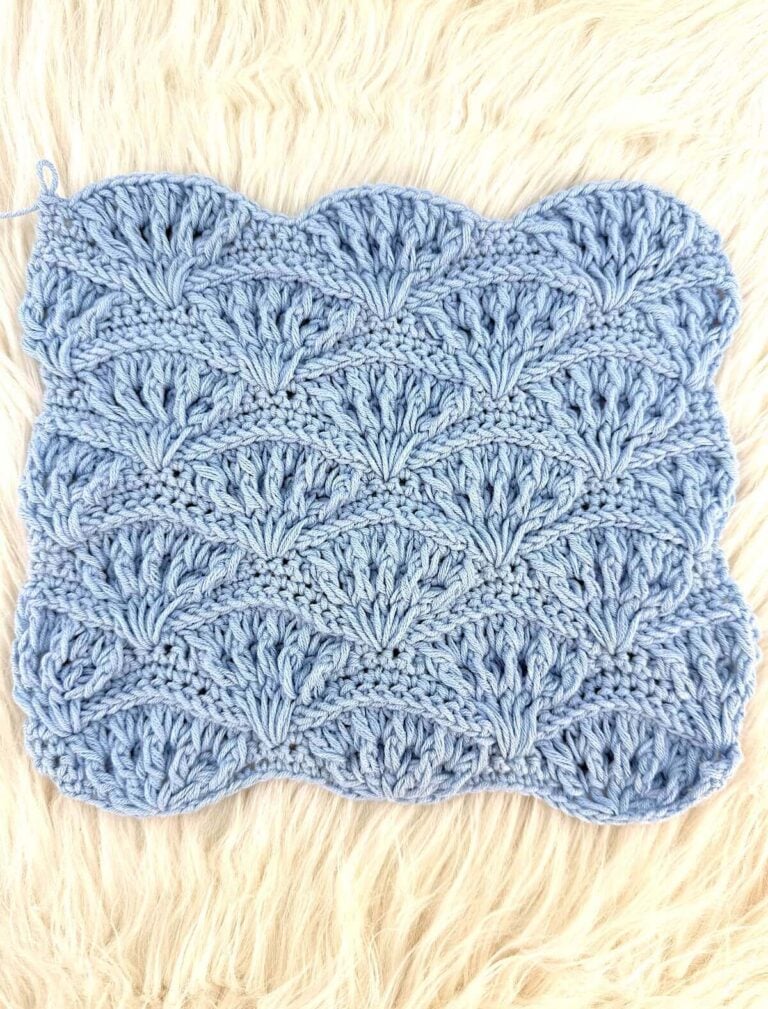
Crochet Alpine Stitch Easy Tutorial with pictures
The crochet alpine stitch is a stitch that alternates single crochet rows with double crochet (dc) and front post double crochet (fpdc) rows. It’s one of my favorite stitches not only because of its beautiful texture and because it’s incredibly easy to crochet.
As a matter of fact, who doesn’t love textures and easy to crochet projects, right? In this tutorial, you will learn how to crochet the alpine stitch in rows and in the round.

Table of Contents
This post may contain affiliate links. Should you choose to make a purchase out of those links I will earn a small commission, from qualifying purchases, at no extra cost to you. Find my affiliate disclosure here.
Common questions about the alpine stitch
What’s the crochet alpine stitch?
The alpine stitch is a four-row-repeat pattern that is worked by alternating single crochet rows with double crochet (dc) and front post double crochet (fpdc) rows.
That alternation creates small twisted bumps that give your projects such a unique and beautiful texture.
What is the crochet alpine stitch used for?
With this beautiful stitch, you can create a variety of crochet projects, like garments, hats, blankets, scarves and more. I’ve even seen sweaters made with the alpine stitch.
In fact, if you go online and search for “crochet alpine stitch patterns”, you will have a lot of ideas and inspirations, it is one of the favorite stitches to most crocheters.
Does the alpine stitch use more yarn?
Yes. The crochet alpine stitch is a dense and texture stitch, for that reason it uses more yarn than the regular double crochet and single do. So, if you are making something with the alpine stitch, you will have to spend a little more with yarn.
The alpine stitch abbreviations in US terms
- ch(s): chain(s)
- dc: double crochet
- fpdc: front post double crochet
- sk: skip
- sl st: slip stitch
- st(s): stitch(s)
Pin this tutorial here to try later
How to crochet the fpdc for the crochet alpine stitch?
Before you dive in to the tutorial for the actual alpine stitch pattern, read the quick guide below on how to crochet the front post double crochet stitch (fpdc). As a matter of fact, the fpdc is the core of this tutorial. But if you are familiar with it already, feel free to go ahead and skip these instructions.
Front post double crochet stitch (fpdc):
- Yarn over
- Insert the hook in the space between the indicated double crochet and the next double crochet, in previous row, from front to back. Draw the hook back to the front, around the indicated double crochet stitch,
- Yarn over
- Pull up a loop
- Yarn Over
- Pull through two
- Pull through two. Complete the double crochet as normal.

Important notes
- For this tutorial, you will need a crochet hook and yarn.
- The instructions are written using US terminology.
- This tutorial was split in two parts: in the first part, there is the tutorial for vertical back-and-forth rows and the second part is for projects made with rounds.
- Chain 1 doesn’t count as a stitch in the single crochet rows/rounds.
- Chain 3 does count as a stitch in every double crochet row/round.
How to crochet alpine stitch in rows?
Chain any even number of stitches plus 1. Instead, if you prefer, you can skip all the initial chains and crochet an even number of stitches in a chainless crochet foundation (by the way, this is my favorite method).
- Row1: single crochet in second chain from hook and in every chain across, chain 3, turn.
- Row2: double crochet in next single crochet stitch and in every stitch across, chain 1, turn.
- Row3: single crochet in first stitch and in every stitch across, chain 3, turn.


Helpful tip for beginners: this is a helpful information on when you are starting a double crochet stitch row on top of a single crochet stitch row. It could be easy for you to make the mistake of not skipping the first stitch, in base of chain 3, after you turn.
That being said, be aware that the first single crochet stitch is not the one you will insert the hook in to do the next double crochet.
If you do a double crochet in that stitch, you will have an extra stitch in your row. Instead, skip it and double crochet in next stitch. This rule doesn’t apply for the single crochet row on top of the double crochet row.
Now is the time to start fpdc
In this step, we start alternating front post double crochets with plain double crochets to create the crochet alpine stitch. Make sure that when you insert the hook and pull up a loop to do the front post double crochet, you pull that loop long enough.
The reason why you want to do that is to make sure that the front post double crochet stitches match the height of the plain double crochets.
Basically, from now on, you will front post double crochet in every plain double crochet in previous double crochet row. Pay especial attention when skipping a single crochet, it could be easy to skip more than one by accident. At the end of next row, the last two stitches will be plain double crochet.
Start the four-row-repeat for the crochet alpine stitch here
- Row 4: front post double crochet in second double crochet in previous double crochet row, *skip the first single crochet stitch, double crochet in next single crochet stitch, skip the next double crochet stitch in previous double crochet row, front post double crochet in next double crochet stitch in previous double crochet row. Repeat from * to the last two single crochet stitches, double crochet in last two stitches. Chain 1, turn.
- Row 5: single crochet in first stitch and in every stitch across, chain 3, turn.
- Row 6: double crochet in next single crochet stitch, front post double crochet in third plain double crochet stitch of previous double crochet row, *skip the next single crochet stitch, double crochet in next single crochet stitch, front post double crochet in next plain double crochet stitch in previous double crochet row. Repeat from * across, chain 1, turn.
- Row 7: single crochet in first stitch and in every stitch across, chain 3, turn.
- Repeat rows 4-7 as many times as needed.

Pin it the crochet alpine stitch tutorial for later
How do I do the crochet alpine stitch in the round?
The concept to crochet this stitch in the round is very similar. You will need two foundation rounds, one of single crochet and one of double crochet, with an even number of stitches. Then you have a four-round-repeat, like when you do it in rows.
However, at this time you will be joining your rounds with a slip stitch and not turning. So, if you are doing a scarf, for example, you only need an even number of initial chains.
You will still need a chain 1 in the beginning of the single crochet rounds and a chain 3 in the beginning of the double crochet rounds. The notes section in the beginning of this tutorial is good for both parts of this tutorial.
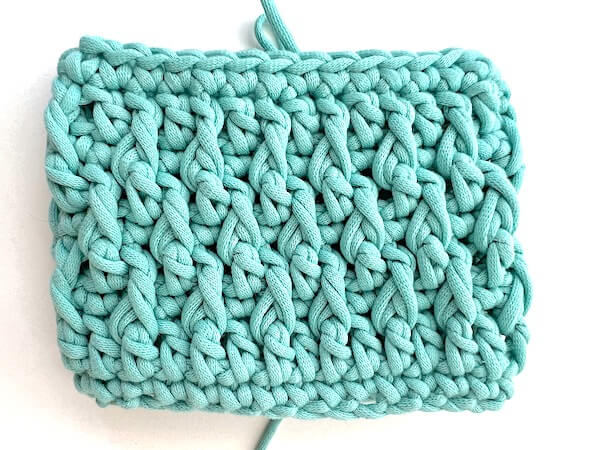
For demonstration purposes, I did this tutorial by chaining 30 and joined with a slip stitch. But remember, it will work with any project in the round that has a plain round of single crochet stitches followed by a plain round of double crochet.
All rounds below have 30 stitches each. Take a look at the images to better visualize what each round looks like. Join every round to first stitch with a slip stitch.
Chan 1 at the beginning of single rounds doesn’t count as a stitch. Chain 3 at the beginning of the double crochet rounds do count as a stitch.
Here is how you do the crochet alpine stitch in the round.
Chain any even number of chains. For the swatch on this tutorial I chained 30. Join both ends with a slip stitch, being careful to not twist it. Keep following the steps below.
Total Time: 30 minutes
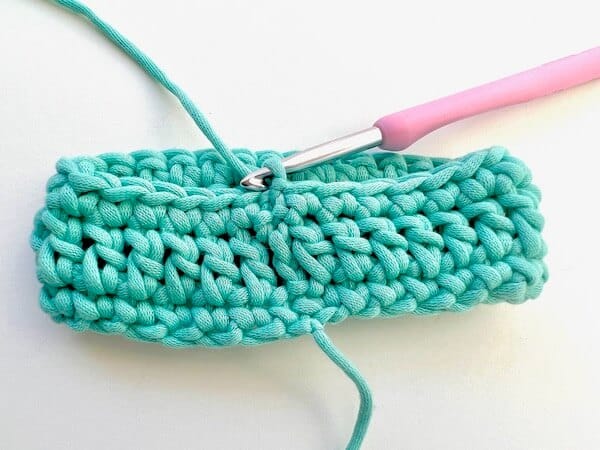
Round 1: crochet the foundation round
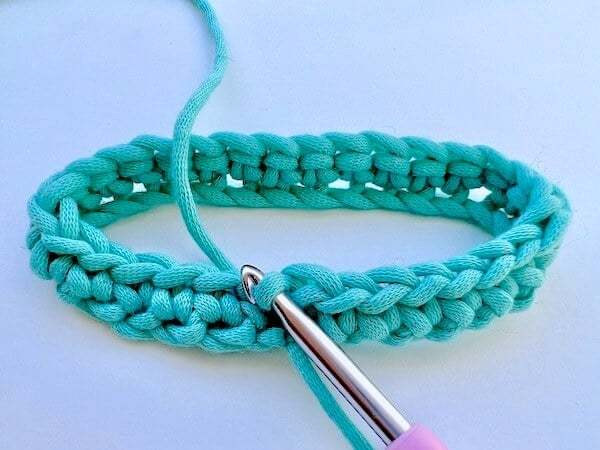
Single crochet in every stitch across, slip stitch to first sc to join.
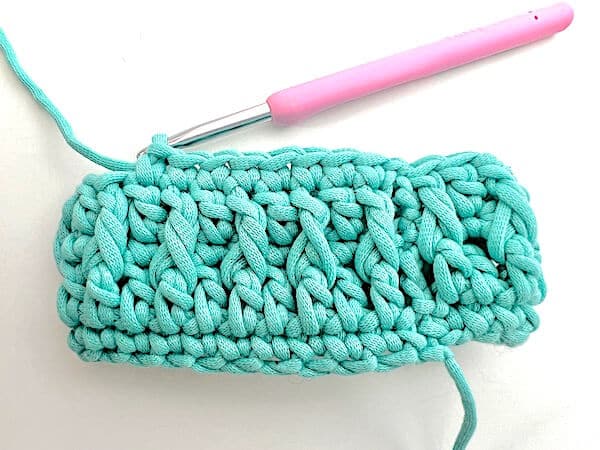
Round 2: crochet the first dc round
Chain 3, double crochet across, slip stitch to initial chain 3 to join.
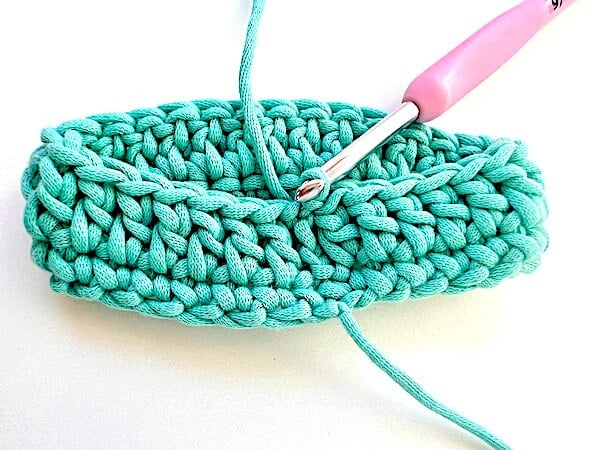
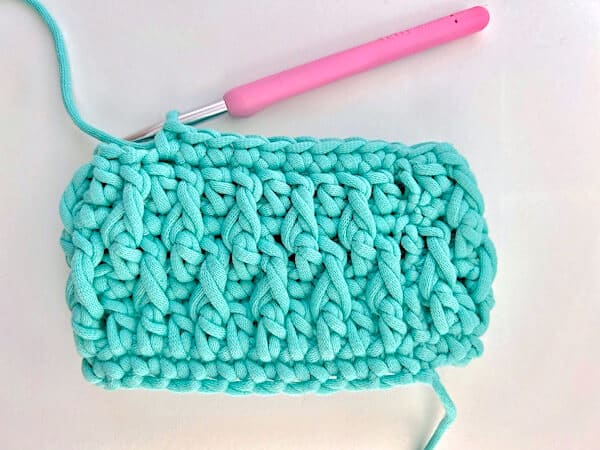
Round 3: crochet the next sc round
Chain 1, single crochet in every stitch across, slip stitch to first sc to join. The next four rounds are the repeats.
Round 4: alternate fpdc, dc, for the first round of the alpine stitch.

Chain 3, skip chain 3 in previous double crochet round, *front post double crochet in next double crochet stitch in previous double crochet round, skip next single crochet stitch, double crochet in next single crochet stitch, skip next double crochet stitch in previous double crochet round.
Repeat from * across. Slip stitch to initial chain 3 to join.
Tip: When doing the fpdc, pull the first fpdc loop up to the hight of the initial chain 3. If the loop is too tight, your work will curl up as you go.
Round 5: Crochet one more sc round.
Chain 1, single crochet in every stitch across, slip stitch to first sc to join.
Round 6: alternate fpdc, dc, for the 2nd round of the alpine stitch.

Chain 3, double crochet in next single crochet stitch, front post double crochet in third double crochet in previous double crochet round, skip the next single crochet stitch, double crochet in next single crochet stitch, *front post double crochet in next plain double crochet stitch in previous double crochet round, skip the next single crochet stitch, double crochet in next single crochet stitch.
Repeat from * across. Slip stitch to initial chain 3 to join.
Round 7: sc across to make the 2nd round of the repeat.
Chain 1, single crochet in every stitch across, Chain 1, slip stitch to first sc to join.
Repeat rows 4-7 as many times as needed.
Estimated Cost: 10.00 USD
Supply:
- Yarn
Tools:
- Crochet hook
Materials: Scissors Yarn needle
I hope you like this tutorial for the crochet alpine stitch and create beautiful stuff with it. Drop a comment below if you have any questions or if you just would like to say “hi”. Another way to reach out to me is by joining my community group on Facebook.
If you use any of my patterns or tutorials for a project, please tag me @zamiguz or use the hashtag #zamiguzmakers. I would love to see what you make.